Globalization and localization in ASP.NET Core With Resource Files
Globalisation and Localisation in .net core 3.1
In ASP.Net webforms you all might have used Resource(.resx) files for implementing multiple language across your websites. What that mean is your webpage will pick text according to the selected culture from the resource file's key value string. However, with the evolution of .net technology and .Net core 3.1 the ways of applying localisation and Resource Files has changed.
So, you will find many solutions asking you to use IStringLocalizer<Resource> for implementing localisation but those seems to be too complicated if you are a beginner or new to .net core. So, for those who are new and want a simpler solution to use Resource files then follow the steps.
Step-1 Add Resource Files on Application Root
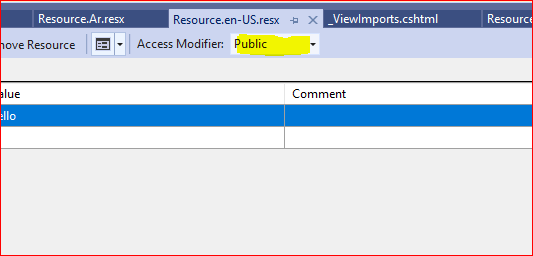
So the first step we need to follow is adding two Resource Files in your .Net core Application at root level. Remember you have to first keep the name Resource.resx and Resource1.resx while adding the files and you can change the filename later according to the culture likes Resource.en-US.resx and Resource.Ar.resx but if you try to use those names from beginning those files won't build properly.
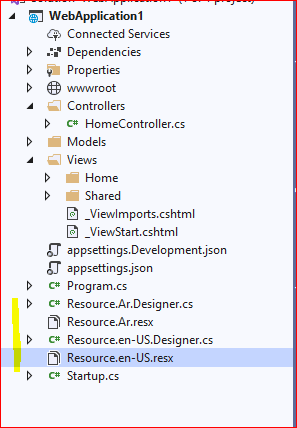
After adding the files click on the files one by one and set Access modifier to Public
Now as our Resource Files are ready to use we will now move to startup.cs file for further steps.
Step 2 - Changes in Startup.cs
So you can see we need few basic things here including Session and AddHttpContextAccessor . We will be using them in later steps.
using Microsoft.AspNetCore.Builder;
using Microsoft.AspNetCore.Hosting;
using Microsoft.AspNetCore.Http;
using Microsoft.Extensions.Configuration;
using Microsoft.Extensions.DependencyInjection;
using Microsoft.Extensions.Hosting;


namespace WebApplication1
{
    public class Startup
    {
        public Startup(IConfiguration configuration)
        {
            Configuration = configuration;
        }

        public IConfiguration Configuration { get; }

        // This method gets called by the runtime. Use this method to add services to the container.
        public void ConfigureServices(IServiceCollection services)
        {
            services.AddSession();
            services.AddHttpContextAccessor();
            services.AddControllersWithViews();
            services.AddSingleton<IHttpContextAccessor, HttpContextAccessor>();
            services.AddMvc().AddViewLocalization().AddSessionStateTempDataProvider();
        }

        // This method gets called by the runtime. Use this method to configure the HTTP request pipeline.
        public void Configure(IApplicationBuilder app, IWebHostEnvironment env)
        {
            if (env.IsDevelopment())
            {
                app.UseDeveloperExceptionPage();
            }
            else
            {
                app.UseExceptionHandler("/Home/Error");
                // The default HSTS value is 30 days. You may want to change this for production scenarios, see https://aka.ms/aspnetcore-hsts.
                app.UseHsts();
            }

            app.UseHttpsRedirection();
            app.UseStaticFiles();

            app.UseRouting();

            app.UseAuthorization();
            app.UseSession();
            app.UseEndpoints(endpoints =>
            {
                endpoints.MapControllerRoute(
                    name: "default",
                    pattern: "{controller=Home}/{action=Index}/{id?}");
            });
        }
    }
}
Resource.ResourceManager.GetString("Hello", new CultureInfo("Ar"))
You can directly use your Resource string by this line . This basically need the culture name for which you have to get your string and the string you want. It will look for the string as per the specified culture and then giving a localised string.
However , we can create a separate class with some common method to get this localised string in order to make it more simpler. We will be using session to store our active culture. You can choose from where you will get culture into session.
We will be creating a new class
 public static class CustomResourceHelper
    {
        public static string GetResourceString(IHttpContextAccessor httpContext, string data)
        {
            if(string.IsNullOrEmpty(httpContext.HttpContext.Session.GetString("culture")))
                httpContext.HttpContext.Session.SetString("culture", "en-US");
            return Resource.ResourceManager.GetString(data, new CultureInfo(httpContext.HttpContext.Session.GetString("culture")));
        }
    }
This class will basically provide us a method to which we have to pass the httpContextAccessor Object and also the Resource string which you would like to have. You can make changes according to your need. And On View you can use it like 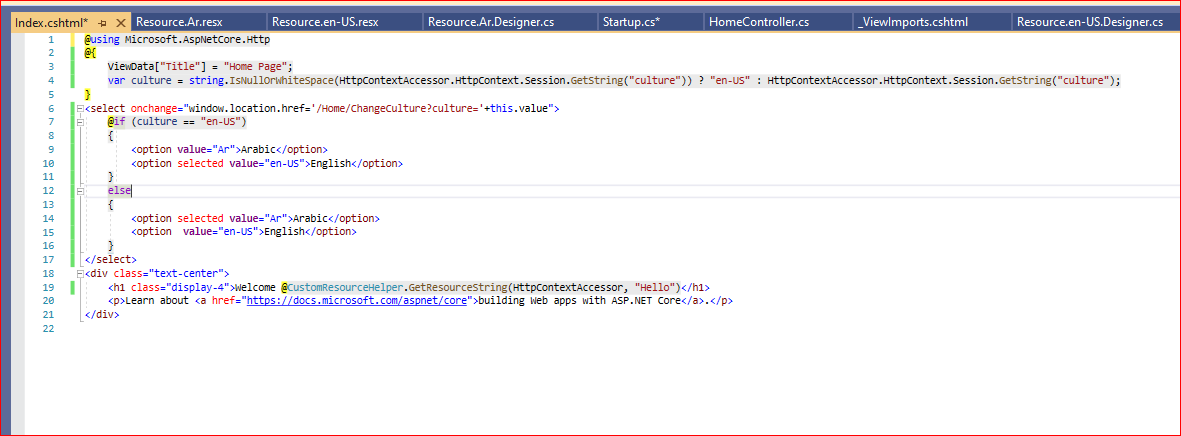
So you can see we have used this to get our localised string for "Hello".The reason why we need HttpContextAccessor is because of the culture value which we have saved in that.
@CustomResourceHelper.GetResourceString(HttpContextAccessor, "Hello")You can see the change culture method which is saving the culture in the httpContextAccessor Session. Which we are using inside the class used on the view.
 public class HomeController : Controller
    {
        private readonly ILogger<HomeController> _logger;
        private readonly IHttpContextAccessor _httpContextAccessor;

        public HomeController(ILogger<HomeController> logger, IHttpContextAccessor httpContextAccessor)
        {
            _logger = logger;
            _httpContextAccessor = httpContextAccessor;
        }

        public IActionResult Index()
        {
            return View();
        }

        public IActionResult Privacy()
        {
            return View();
        }

        [ResponseCache(Duration = 0, Location = ResponseCacheLocation.None, NoStore = true)]
        public IActionResult Error()
        {
            return View(new ErrorViewModel { RequestId = Activity.Current?.Id ?? HttpContext.TraceIdentifier });
        }

        public IActionResult ChangeCulture(string culture)
        {
            _httpContextAccessor.HttpContext.Session.SetString("culture", culture);
            return RedirectToAction("Index");
        }
    }
You can change your view like this
@using Microsoft.AspNetCore.Http
@{
ViewData["Title"] = "Home Page";
var culture = string.IsNullOrWhiteSpace(HttpContextAccessor.HttpContext.Session.GetString("culture")) ? "en-US" : HttpContextAccessor.HttpContext.Session.GetString("culture");
}
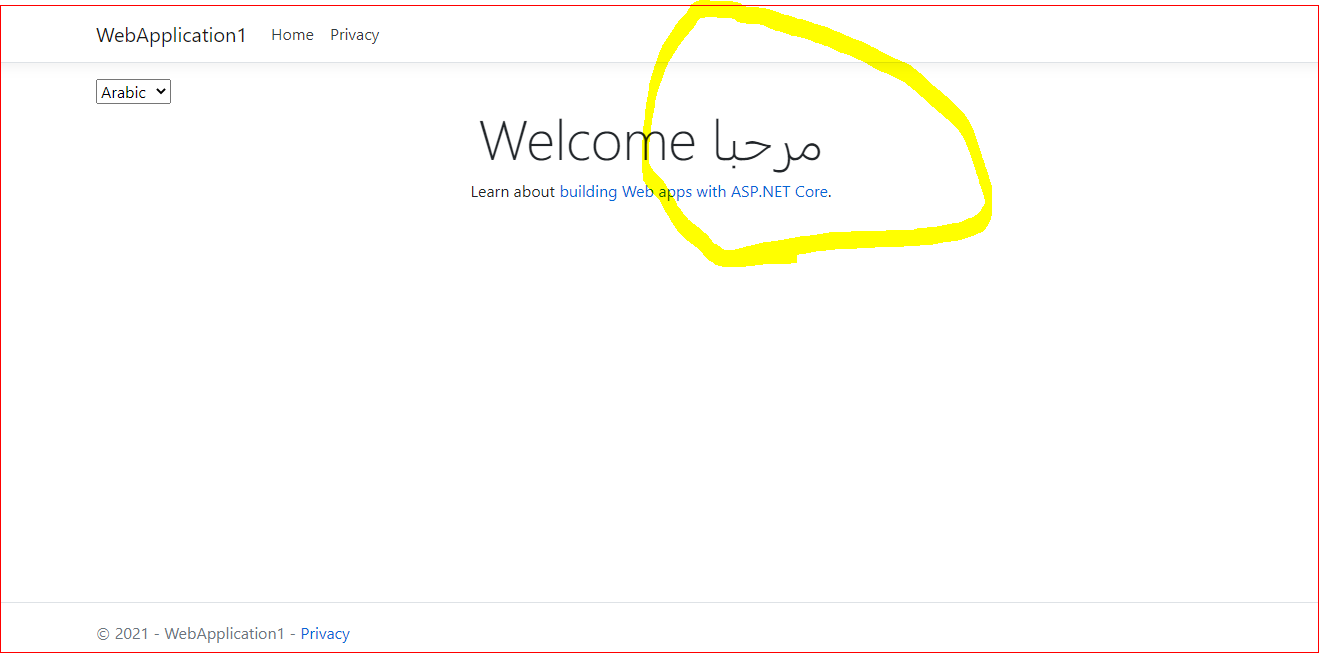
<select onchange="window.location.href='/Home/ChangeCulture?culture='+this.value">
@if (culture == "en-US")
{
<option value="Ar">Arabic</option>
<option selected value="en-US">English</option>
}
else
{
<option selected value="Ar">Arabic</option>
<option value="en-US">English</option>
}
</select>
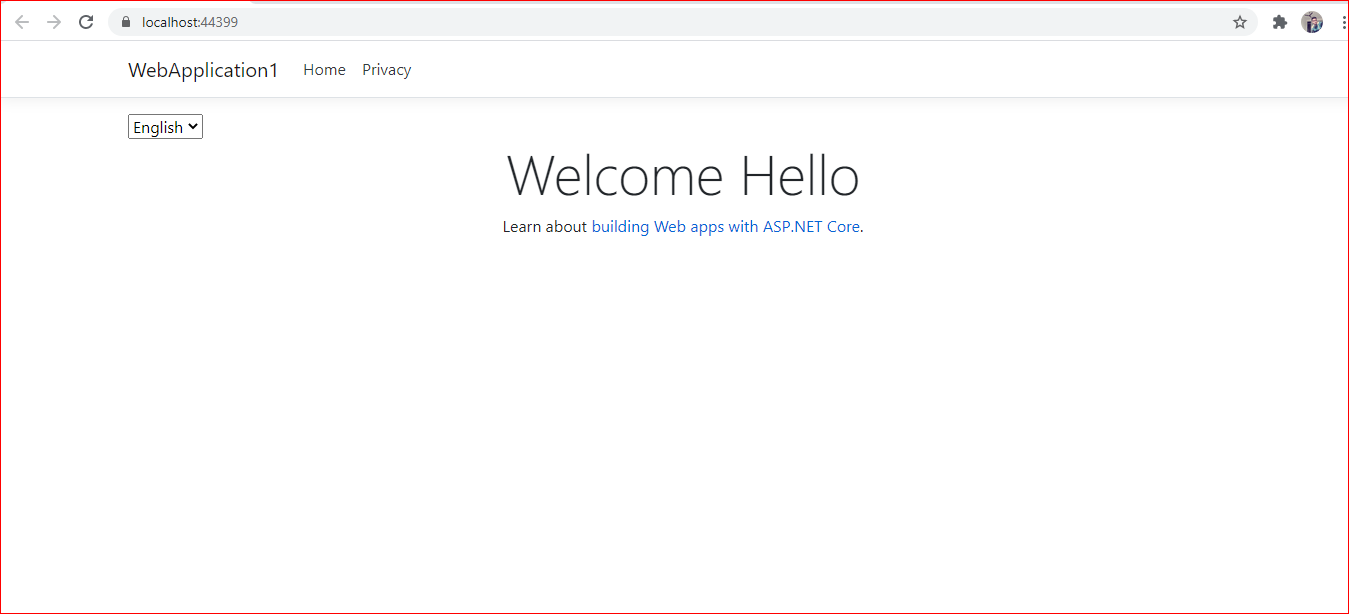
<div class="text-center">
<h1 class="display-4">Welcome @CustomResourceHelper.GetResourceString(HttpContextAccessor, "Hello")</h1>
<p>Learn about <a href="https://docs.microsoft.com/aspnet/core">building Web apps with ASP.NET Core</a>.</p>
</div>