Owin Authentication in Asp.net MVC Api
Microsoft Owin
Microsoft Owin is a powerful library introduced by Microsoft to facilitate authentication in web applications. It provides a standardized way to implement authentication protocols, making it easier for developers to secure their APIs. Owin is particularly useful in ASP.NET projects, allowing for seamless integration with various authentication methods such as OAuth and OpenID Connect.
In this tutorial, we will explore how to implement Owin authentication in an ASP.NET MVC API. This approach is widely adopted for securing APIs, ensuring that only authorized users can access sensitive resources. We will go through the steps of setting up an ASP.NET MVC project, configuring Owin, and creating a simple authentication mechanism.
Prerequisites
Before we dive into the implementation, ensure that you have the following prerequisites:
- Visual Studio 2019 or later installed on your machine.
- Basic knowledge of C# and ASP.NET MVC.
- Familiarity with using NuGet packages.
Additionally, you should have a working understanding of RESTful APIs and how they communicate over HTTP. This knowledge will help you grasp the concepts we will discuss in this article.
Setting Up Your ASP.NET MVC Project
To begin, create a new ASP.NET MVC project in Visual Studio. Choose the Web API template to set up a project structure that is conducive for API development.
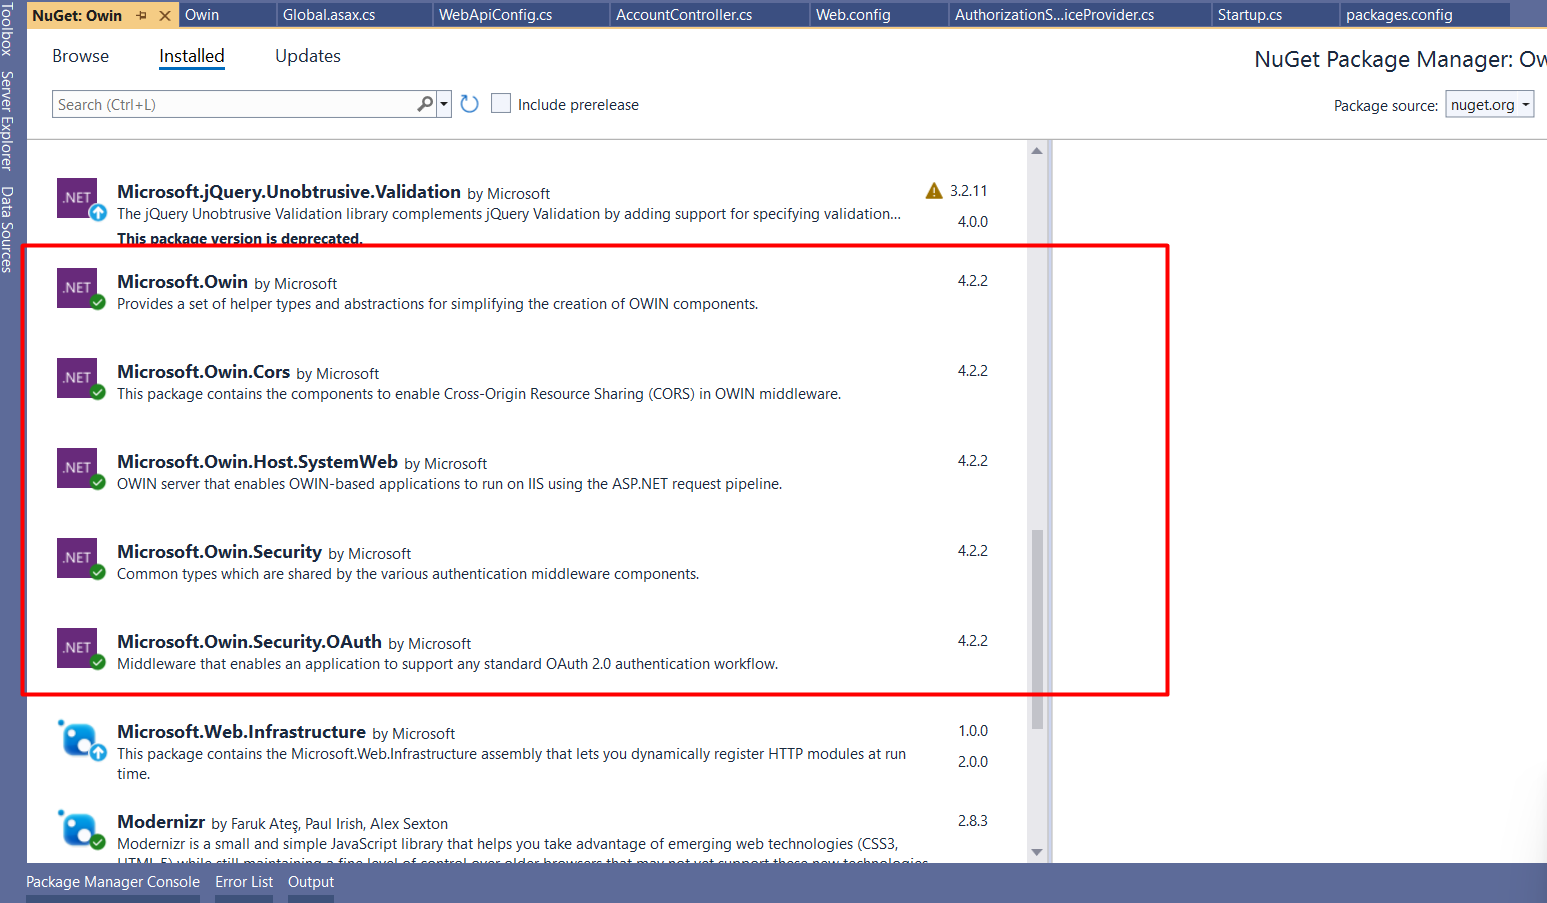
Once your project is created, open the NuGet Package Manager and install the following packages:
- Microsoft.Owin
- Microsoft.Owin.Security.OAuth
- Microsoft.Owin.Cors
These packages will provide the necessary libraries for implementing Owin authentication in your API.
Configuring Owin Authentication
Next, we need to configure Owin authentication. Create a new class file named Startup.cs in your project. This file will contain the configuration settings for Owin.
public class Startup {
    public void Configuration(IAppBuilder app) {
        app.UseCors(Microsoft.Owin.Cors.CorsOptions.AllowAll);
        OAuthAuthorizationServerOptions options = new OAuthAuthorizationServerOptions {
            AllowInsecureHttp = true,
            TokenEndpointPath = new PathString("/api/Account/Login/token"),
            AccessTokenExpireTimeSpan = TimeSpan.FromDays(1),
            Provider = new AuthorizationServerProvider()
        };
        app.UseOAuthAuthorizationServer(options);
        app.UseOAuthBearerAuthentication(new OAuthBearerAuthenticationOptions());
    }
}
In the above code, we configure the CORS options to allow all origins and define the token endpoint path, where clients will send their credentials to obtain an access token. The access token is set to expire in 24 hours, and we specify our custom AuthorizationServerProvider class to handle user authentication.
Implementing the AuthorizationServerProvider
Now, create another class file named AuthorizationServerProvider.cs. This class will handle the logic for validating user credentials and generating tokens.
public class AuthorizationServerProvider : OAuthAuthorizationServerProvider {
public override async Task ValidateClientAuthentication(OAuthValidateClientAuthenticationContext context) {
context.Validated();
}
public override async Task GrantResourceOwnerCredentials(OAuthGrantResourceOwnerCredentialsContext context) {
if (string.IsNullOrEmpty(context.UserName) || string.IsNullOrEmpty(context.Password)) {
context.SetError("invalid_grant", "UserName or Password is missing!");
return;
}
// Add code to check from database
if (context.UserName != "Admin" || context.Password != "123") {
context.SetError("invalid_grant", "Provided username and password is incorrect");
return;
}
// Add code to get roles from database
var identity = new ClaimsIdentity(context.Options.AuthenticationType);
identity.AddClaim(new Claim(ClaimTypes.Role, "Admin"));
identity.AddClaim(new Claim(ClaimTypes.Name, "TestUser"));
var props = new AuthenticationProperties(new Dictionary {
{ "UserName", "TestUser" },
{ "Id", "1" },
});
var newTicket = new AuthenticationTicket(identity, props);
context.Validated(newTicket);
}
public override Task TokenEndpoint(OAuthTokenEndpointContext context) {
foreach (KeyValuePair property in context.Properties.Dictionary) {
context.AdditionalResponseParameters.Add(property.Key, property.Value);
}
return Task.FromResult In the GrantResourceOwnerCredentials method, we validate the user's credentials against a database or any data source. If the credentials are valid, we create a new ClaimsIdentity, adding claims such as role and username, and then generate an authentication ticket that is returned to the client.
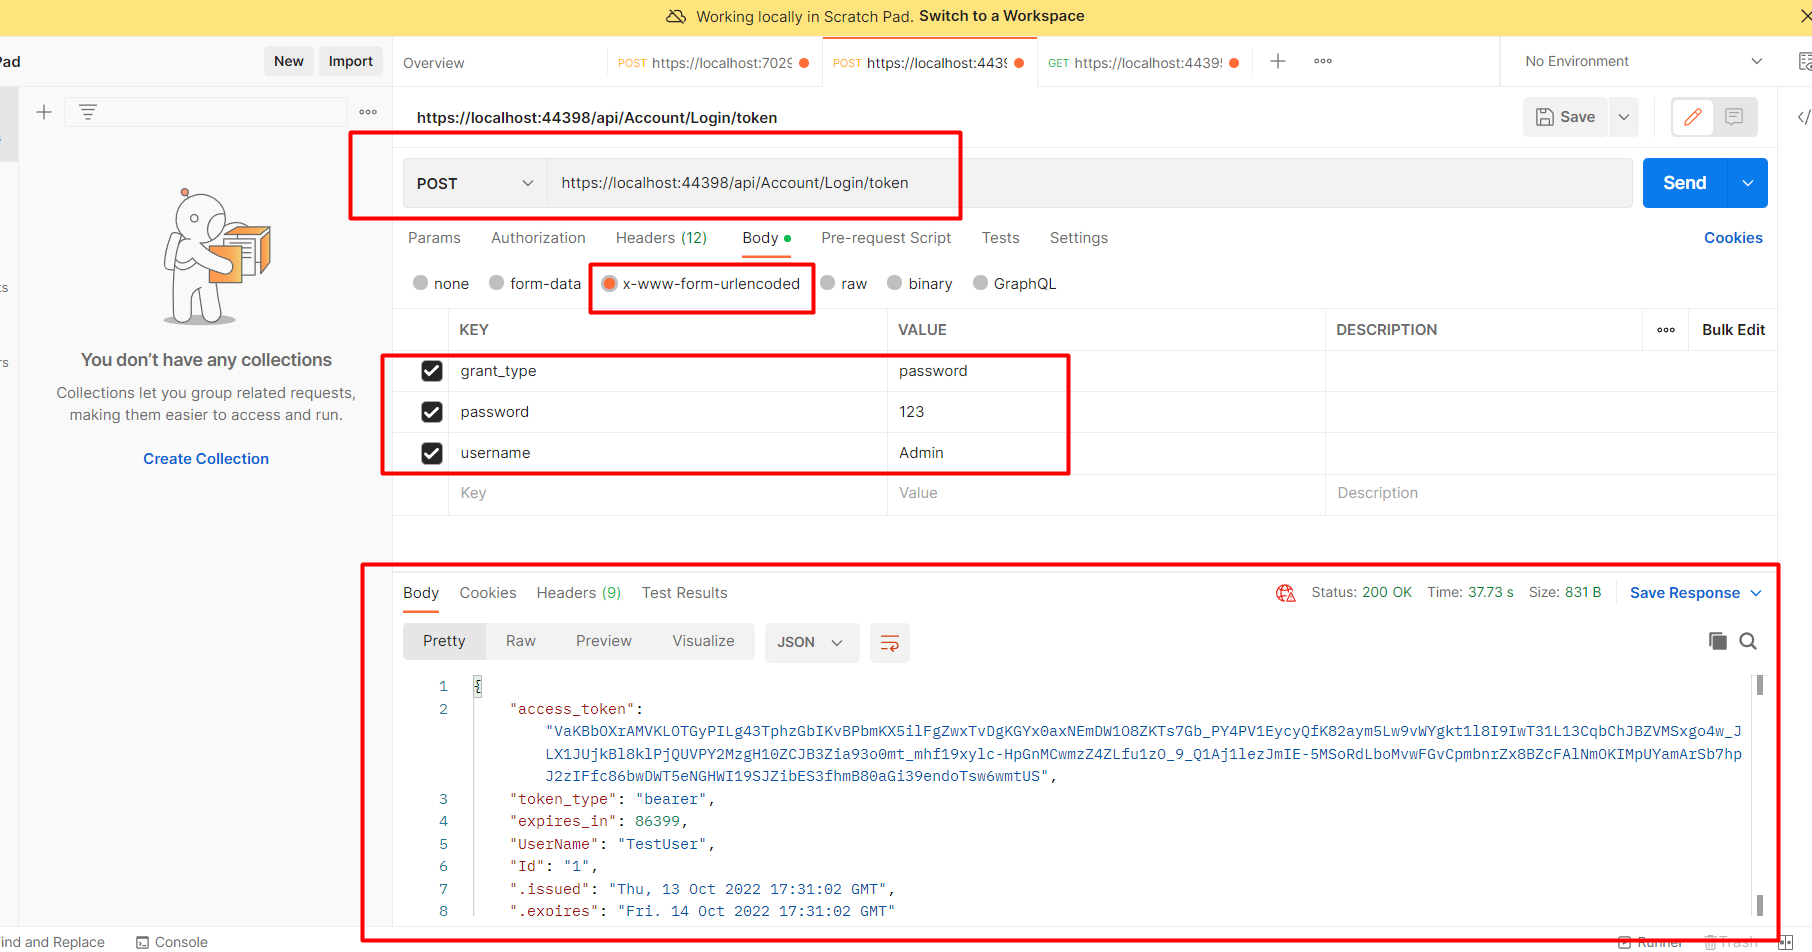
Testing Authentication with Postman
To test the authentication process, run your application and open Postman. Set the request method to POST and enter the URL for your token endpoint, as specified in the Startup.cs file.
In the request body, include the following parameters:
- grant_type: password
- username: Admin
- password: 123
Make sure to set the appropriate headers, including Content-Type: application/x-www-form-urlencoded. Upon successful authentication, you will receive a token in the response.
Edge Cases & Gotchas
While implementing Owin authentication, there are several edge cases and potential issues to be mindful of:
- Invalid Credentials: Ensure that you handle invalid username/password combinations gracefully. Always return appropriate error messages to guide users.
- Token Expiration: Tokens should have a reasonable expiration time to enhance security. Implement token refresh mechanisms if necessary.
- Concurrent Logins: Decide how to handle concurrent logins for the same user account. This may involve invalidating previous tokens or allowing multiple sessions.
Performance & Best Practices
To ensure optimal performance and security when using Owin authentication, consider the following best practices:
- Use HTTPS: Always serve your API over HTTPS to protect sensitive data during transmission.
- Implement Rate Limiting: Protect your API from abuse by implementing rate limiting on authentication attempts.
- Secure Token Storage: Ensure that tokens are stored securely on the client-side to prevent unauthorized access.
- Regularly Update Dependencies: Keep your Owin and related packages up to date to benefit from security patches and improvements.
Conclusion
In this article, we explored how to implement Owin authentication in an ASP.NET MVC API. We covered the necessary setup, configuration, and testing procedures to secure your API effectively. Here are the key takeaways:
- Owin is a powerful library for implementing authentication in ASP.NET applications.
- Proper configuration of Owin and the AuthorizationServerProvider is essential for secure authentication.
- Testing your authentication implementation with tools like Postman is crucial for validating functionality.
- Adhering to best practices helps ensure the security and performance of your API.
