How to use Swagger in Existing Asp.Net Core MVC Project
What is Swagger?
Swagger is a set of open-source tools that helps developers design, build, document, and consume RESTful web services. It provides a user-friendly interface for testing APIs, making it easier for developers to understand how their APIs work. Swagger is based on the OpenAPI Specification, which is a standard for defining REST APIs. By using Swagger, developers can create interactive documentation that describes their API endpoints, request/response formats, and authentication methods.
In real-world applications, Swagger is invaluable for both development and collaboration. It allows developers to quickly test API endpoints, generate client SDKs, and share API documentation with stakeholders. This reduces the learning curve for new team members and ensures consistent API usage across different projects.
Prerequisites
- Visual Studio 2019 or later installed
- Basic knowledge of ASP.NET Core MVC
- An existing ASP.NET Core MVC project
- The NuGet package manager for installing required packages
Integrating Swagger UI in an Existing ASP.NET Core Project
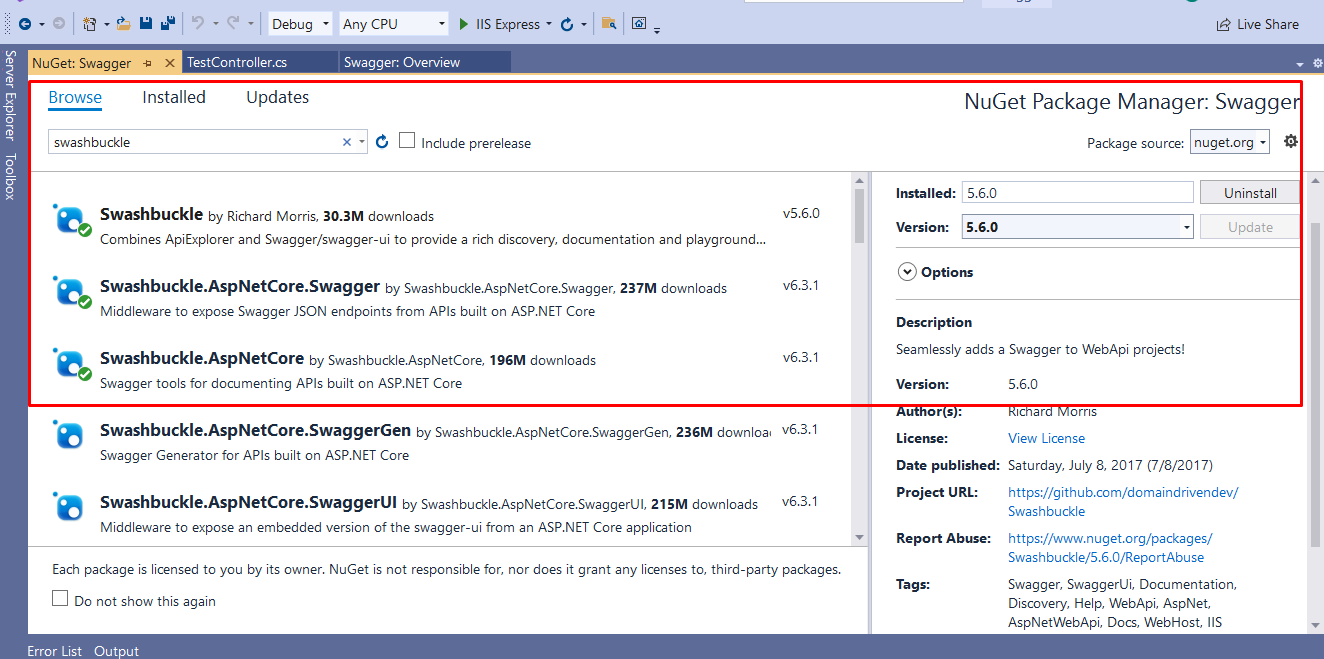
To integrate Swagger into your existing ASP.NET Core project, you need to install the required NuGet packages. Open the Package Manager Console and run the following commands:
Install-Package Swashbuckle -Version 5.6.0
Install-Package Swashbuckle.AspNetCore -Version 6.3.1
Install-Package Swashbuckle.AspNetCore.Swagger -Version 6.3.1
You can also install these packages directly through the NuGet Package Manager in Visual Studio, as shown in the image below:
Once the packages are installed, you need to configure Swagger in your Startup.cs file. Start by adding the following namespace:
using Swashbuckle.AspNetCore.Swagger;Next, you will need to update the Configure method to enable Swagger and Swagger UI:
public void Configure(IApplicationBuilder app, IWebHostEnvironment env) {
    if (env.IsDevelopment()) {
        app.UseDeveloperExceptionPage();
    } else {
        app.UseExceptionHandler("/Error");
        app.UseHsts();
    }
    app.UseHttpsRedirection();
    app.UseStaticFiles();
    app.UseRouting();
    app.UseAuthorization();
    // Add these lines for Swagger
    app.UseSwagger();
    app.UseSwaggerUI(c => {
        c.SwaggerEndpoint("/swagger/v1/swagger.json", "My Test API v1");
    });
    app.UseEndpoints(endpoints => {
        endpoints.MapRazorPages();
        endpoints.MapControllerRoute("areaRoute", "{area:exists}/{controller=Home}/{action=Index}/{id?}");
        endpoints.MapControllerRoute("default", "{controller=Home}/{action=Index}/{id?}");
    });
}
After adding the Swagger configuration code in the Configure method, you also need to update the ConfigureServices method:
public void ConfigureServices(IServiceCollection services) {
services.AddControllersWithViews();
services.AddRazorPages();
services.AddSwaggerGen(c => {
c.SwaggerDoc("v1", new OpenApiInfo { Title = "Your API Title", Version = "v1" });
c.AddSecurityDefinition("Bearer", new OpenApiSecurityScheme {
Description = @"JWT Authorization header using the Bearer scheme. \r\n\r\n Enter 'Bearer' [space] and then your token in the text input below. \r\n\r\nExample: 'Bearer 12345abcdef'",
Name = "Authorization",
In = ParameterLocation.Header,
Type = SecuritySchemeType.ApiKey,
Scheme = "Bearer"
});
c.AddSecurityRequirement(new OpenApiSecurityRequirement() {
{
new OpenApiSecurityScheme {
Reference = new OpenApiReference { Type = ReferenceType.SecurityScheme, Id = "Bearer" },
Scheme = "oauth2",
Name = "Bearer",
In = ParameterLocation.Header,
},
new List<string>() { }
}
});
});
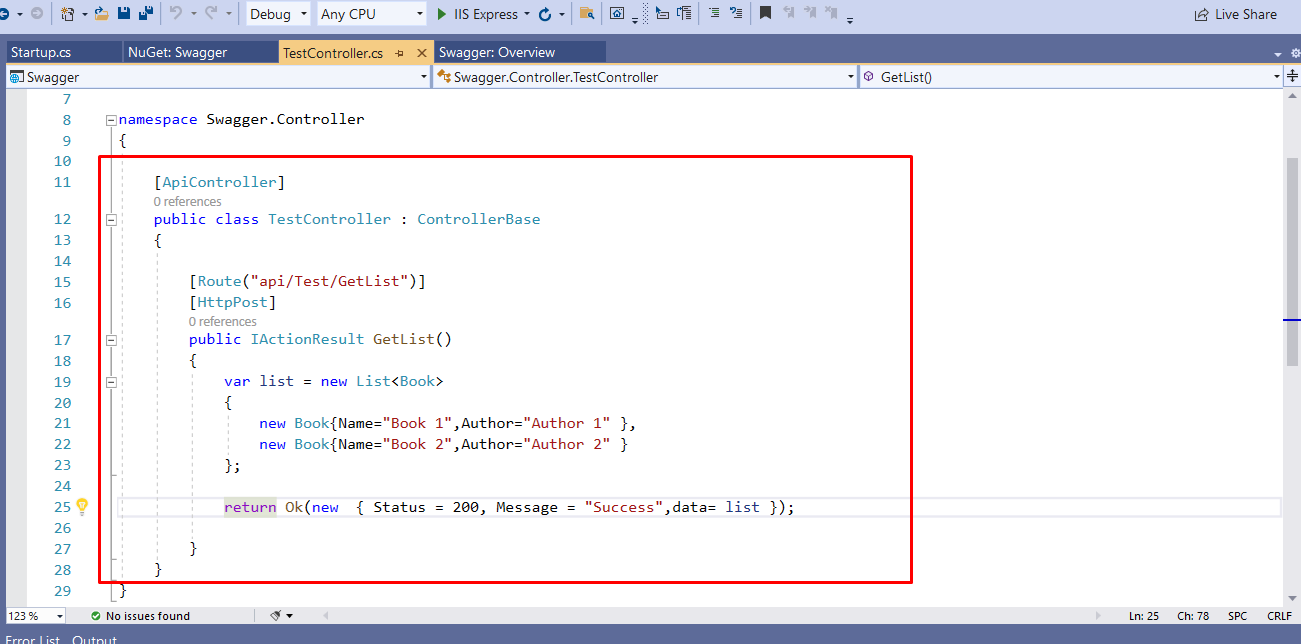
}Now that Swagger is set up, you can create a simple API controller. Create a new controller named TestController and add a sample API action:
[ApiController]
[Route("api/[controller]")]
public class TestController : ControllerBase {
[HttpGet]
public IActionResult Get() {
return Ok(new { Message = "Hello, World!" });
}
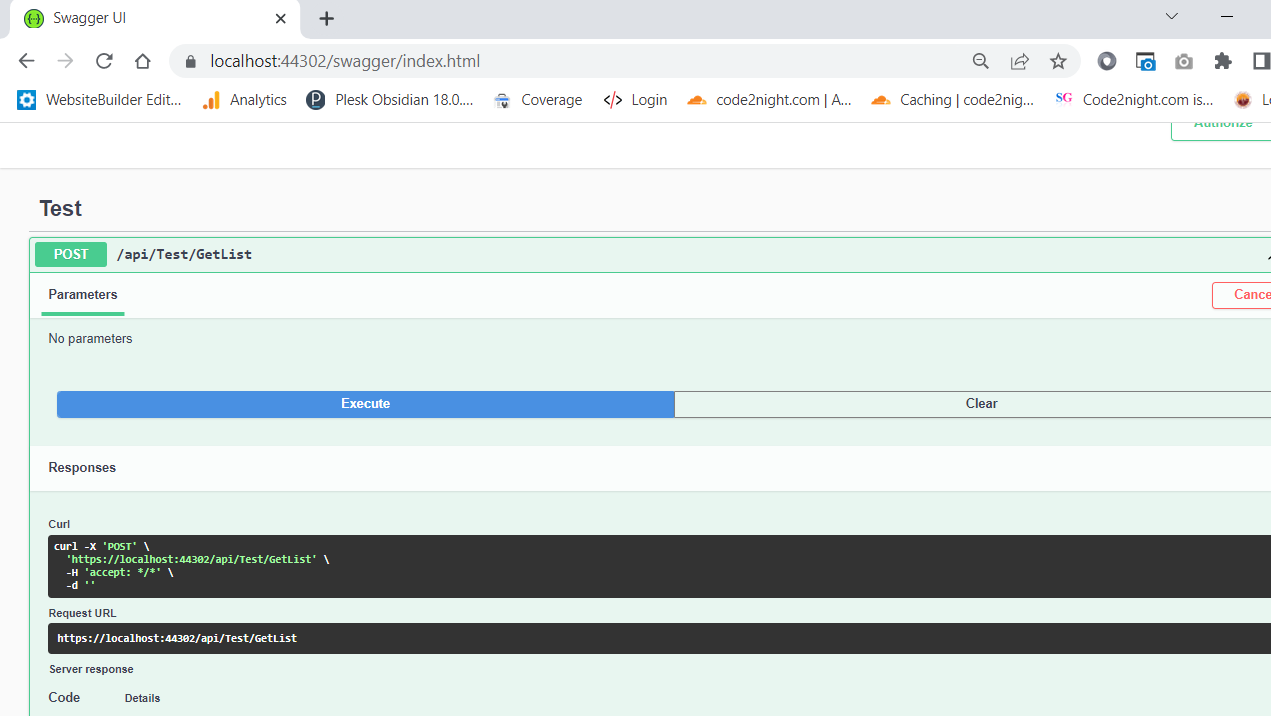
}After implementing the controller, run your application and navigate to /swagger/index.html. You will see your Swagger documentation and the interactive API interface:
Testing Your API with Swagger
Swagger UI allows you to test your API endpoints directly from the documentation interface. You can make requests to your API and see the responses in real-time. To test your API, follow these steps:
- Navigate to the Swagger UI in your browser.
- Locate the endpoint you want to test (e.g., /api/test).
- Click on the Try it out button.
- Click Execute to send the request.
The response will be displayed below the request area, showing the status code, response body, and any other relevant information. This feature is incredibly useful for debugging and understanding how your API behaves.
Edge Cases & Gotchas
While integrating Swagger into your ASP.NET Core project is straightforward, there are some common edge cases and gotchas to be aware of:
- Versioning: If your API has multiple versions, ensure you create separate Swagger documents for each version. You can do this by calling c.SwaggerDoc multiple times with different names.
- Security Schemes: If your API uses multiple authentication methods, ensure you define each method in the Swagger configuration. This will help users understand how to authenticate properly.
- Custom Route Attributes: If you use custom routing attributes, make sure they are correctly reflected in your Swagger documentation. You may need to adjust your Swagger configuration to accommodate these routes.
Performance & Best Practices
To get the most out of Swagger in your ASP.NET Core project, consider the following best practices:
- Keep Documentation Updated: Always keep your Swagger documentation in sync with your API changes. Outdated documentation can lead to confusion and errors.
- Utilize XML Comments: By enabling XML comments in your project and configuring Swagger to include them, you can enhance your API documentation with detailed descriptions for each endpoint.
- Limit Exposure of Sensitive Data: Be cautious about exposing sensitive information in your API responses. Use the ApiResponse attribute to control what data is displayed in Swagger.
- Use API Versioning: Implement API versioning to manage breaking changes and ensure backward compatibility. Swagger can help document these versions effectively.
Conclusion
Integrating Swagger into your ASP.NET Core MVC project is a valuable step towards creating a well-documented and easily testable API. By following the steps outlined in this guide, you can enhance your development process and make it easier for users to interact with your API.
- Swagger provides interactive API documentation for better understanding and testing.
- Installation involves adding NuGet packages and configuring the Startup.cs file.
- Testing APIs directly from Swagger UI streamlines debugging and development.
- Be aware of edge cases and best practices to optimize your Swagger integration.
