
Publish in local folder
So, there are few ways of publishing .net project from visual studio. However, in this article we will learn how to publish .net project in local folder and than uploading the files on plesk. So it will be multiple steps process and we will explain all of them one by one.
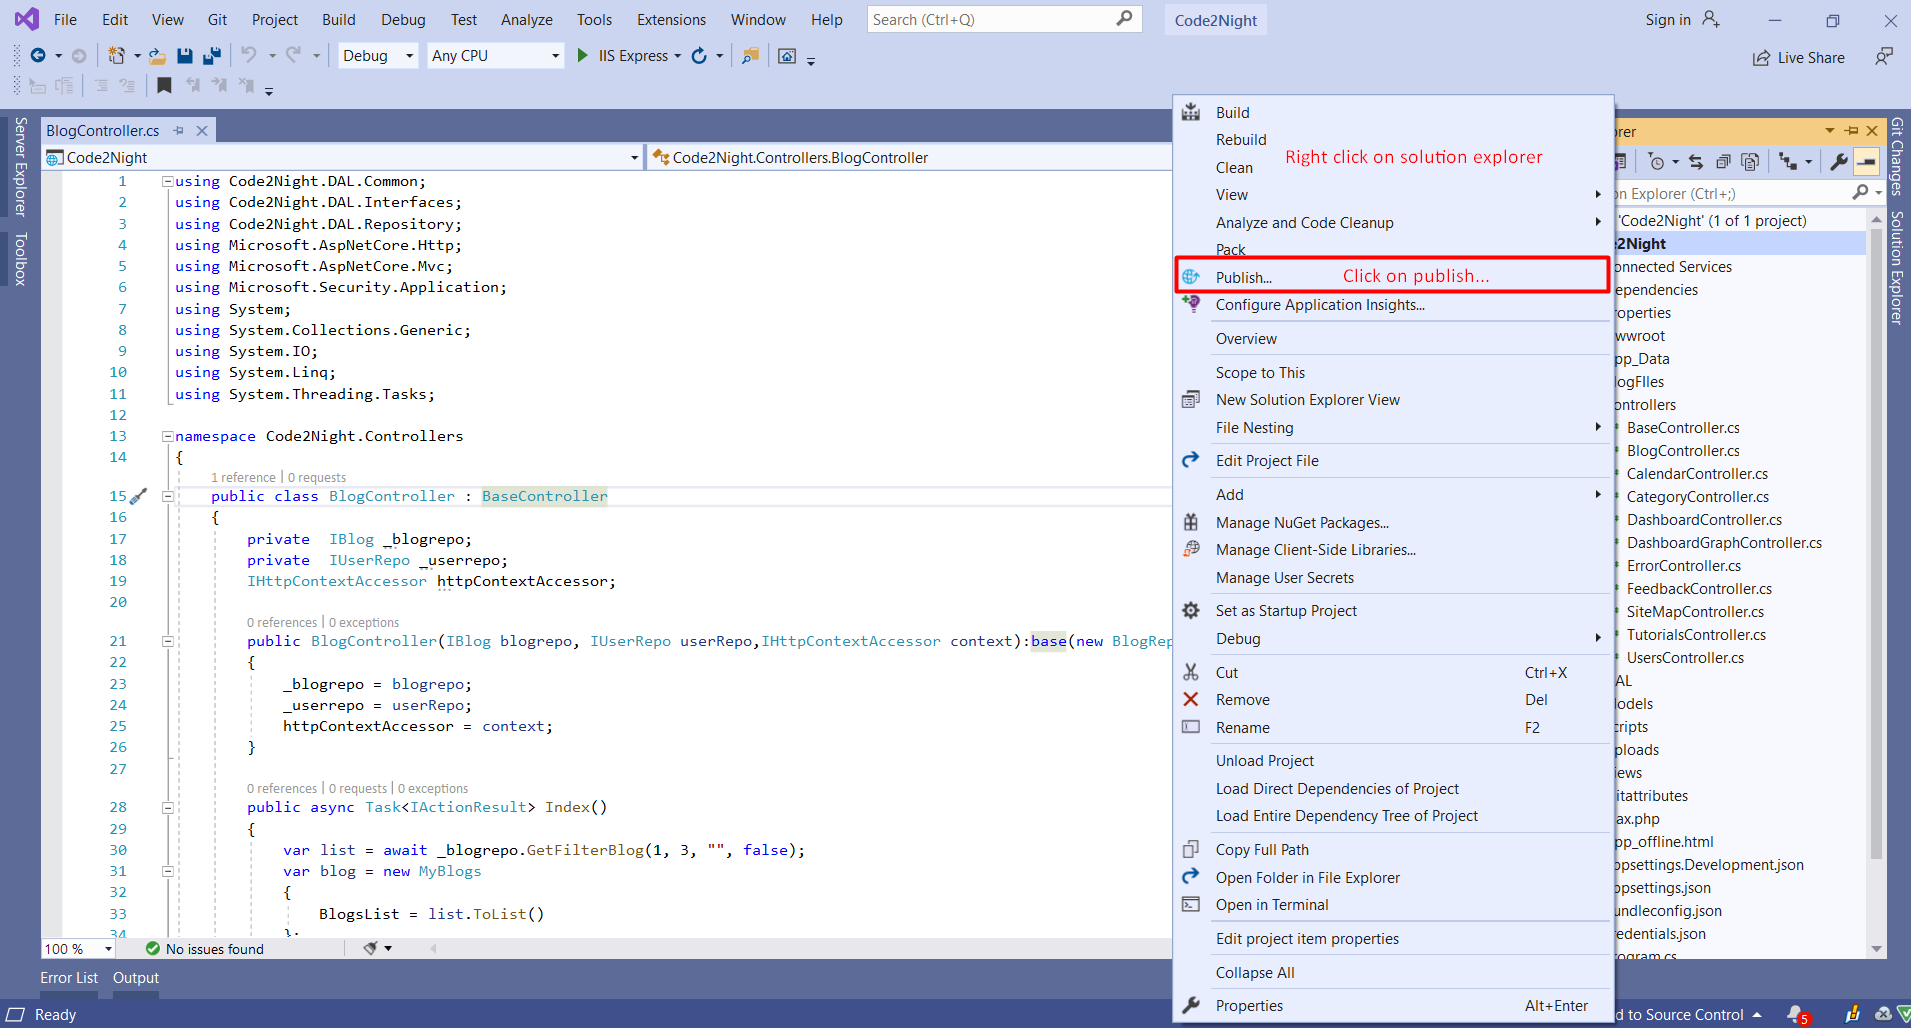
Step 1:Rebuild and Set Publish Location
So, first of all you have to go to solution explorer and here right click on solution and rebuild your project and now right click on the solution explorer click on the publish then new popup window will open, which is showed in the image below. Publish location is basically a folder on your system where you will get your final compiled files for uploading on server.
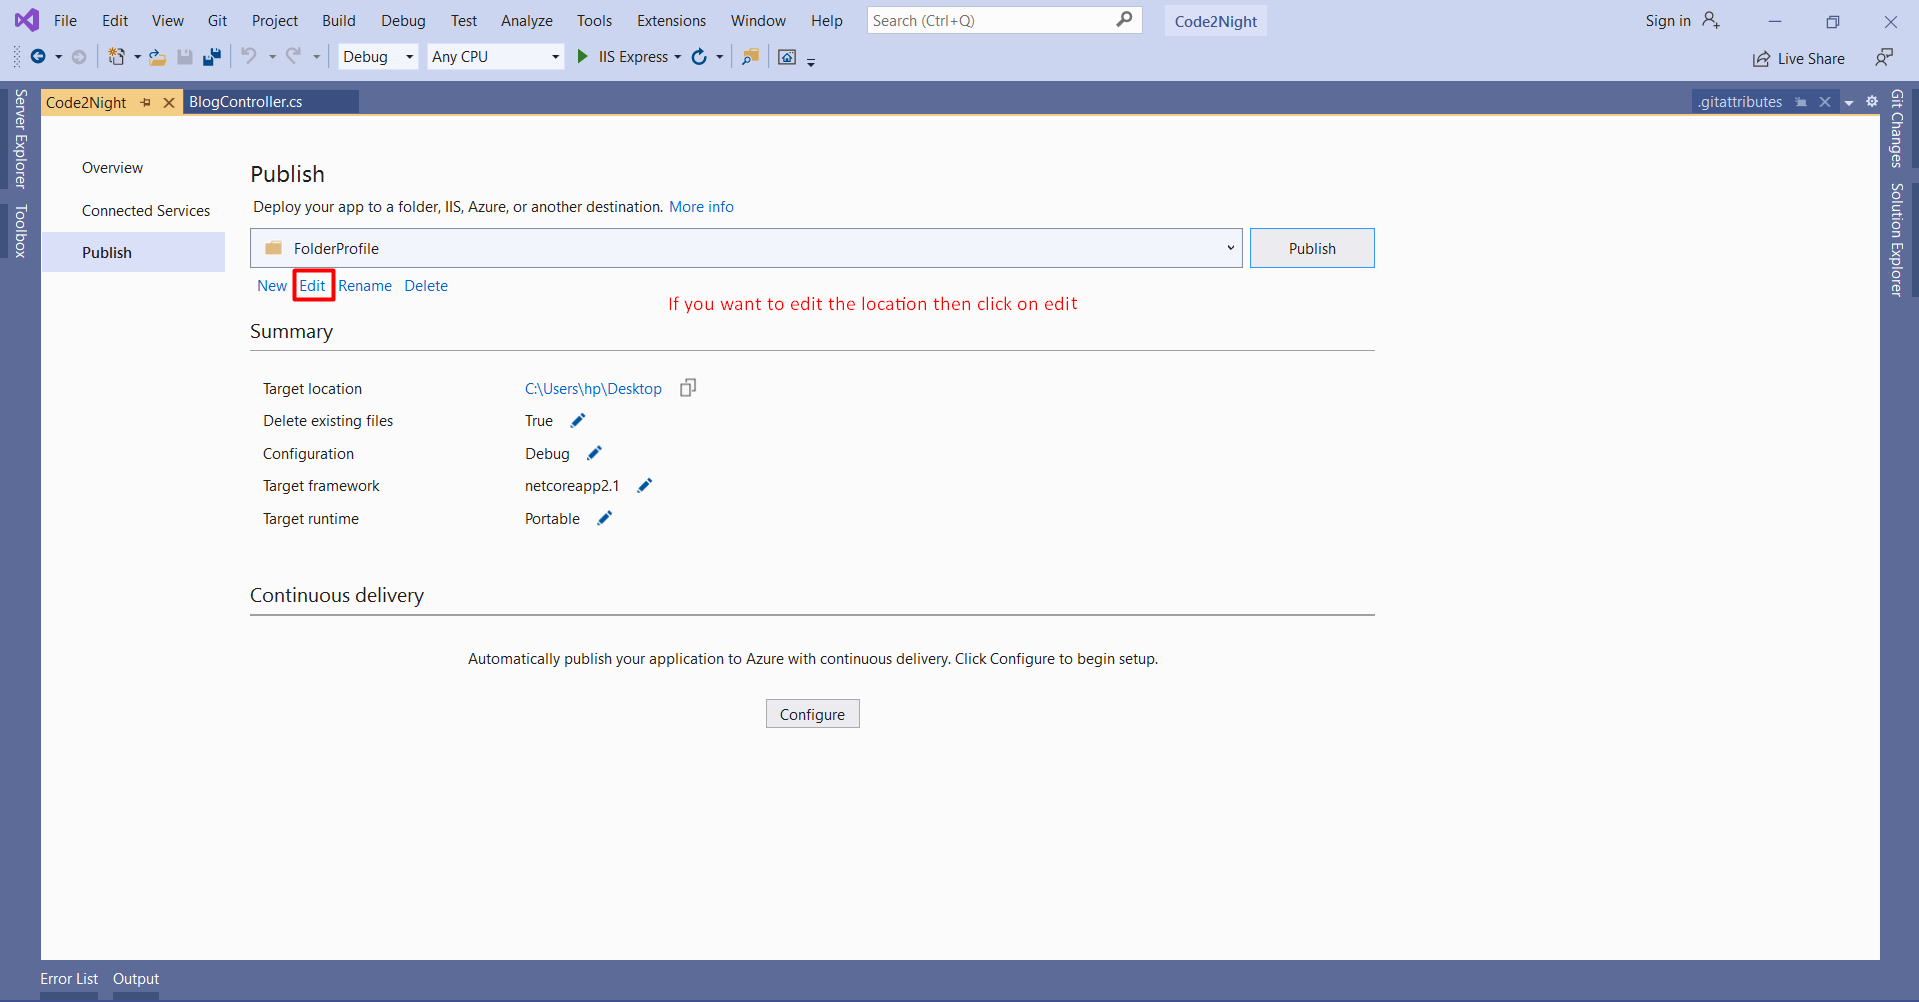
You can change the location of your publish folder by clicking on edit as showed in next image, you can select any other location from here.
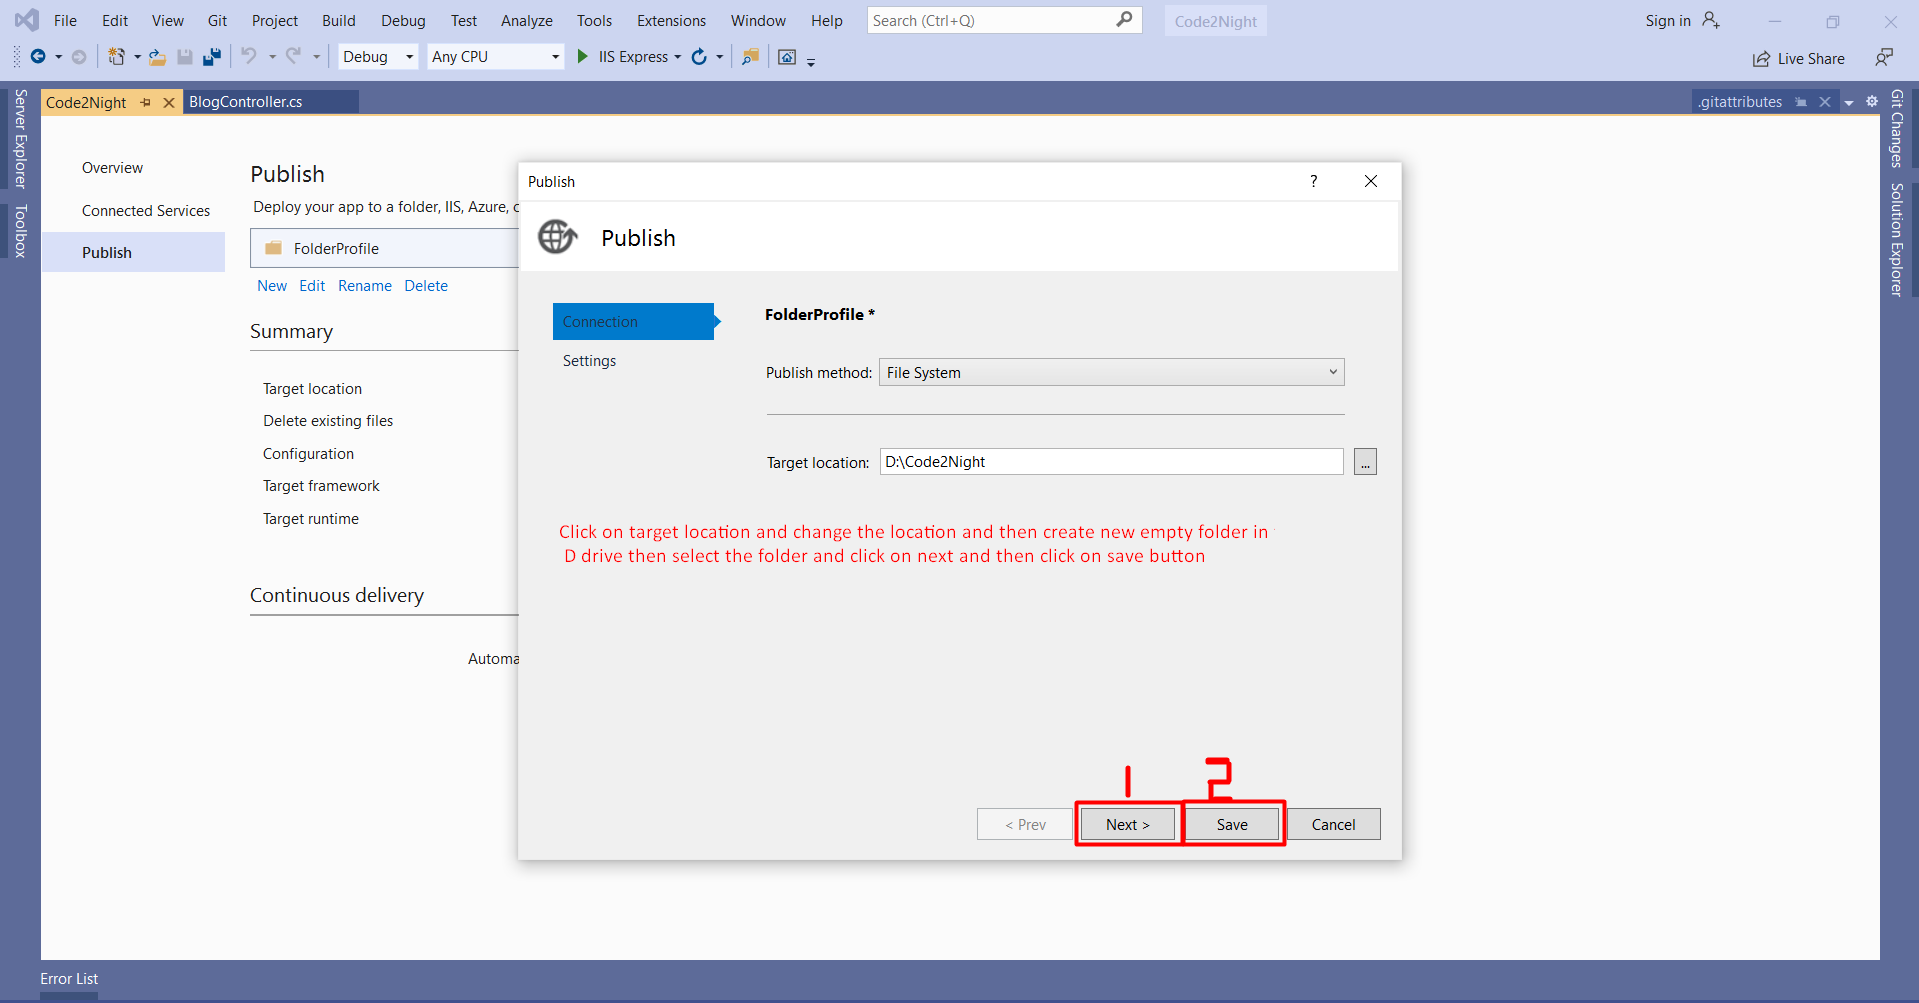
Step 2: Change Publish Location
If you want to change the location then click on edit then new pop up window will open then click on target location and change the location and then create the new empty folder and click on next and then click on save button as showed in the image below
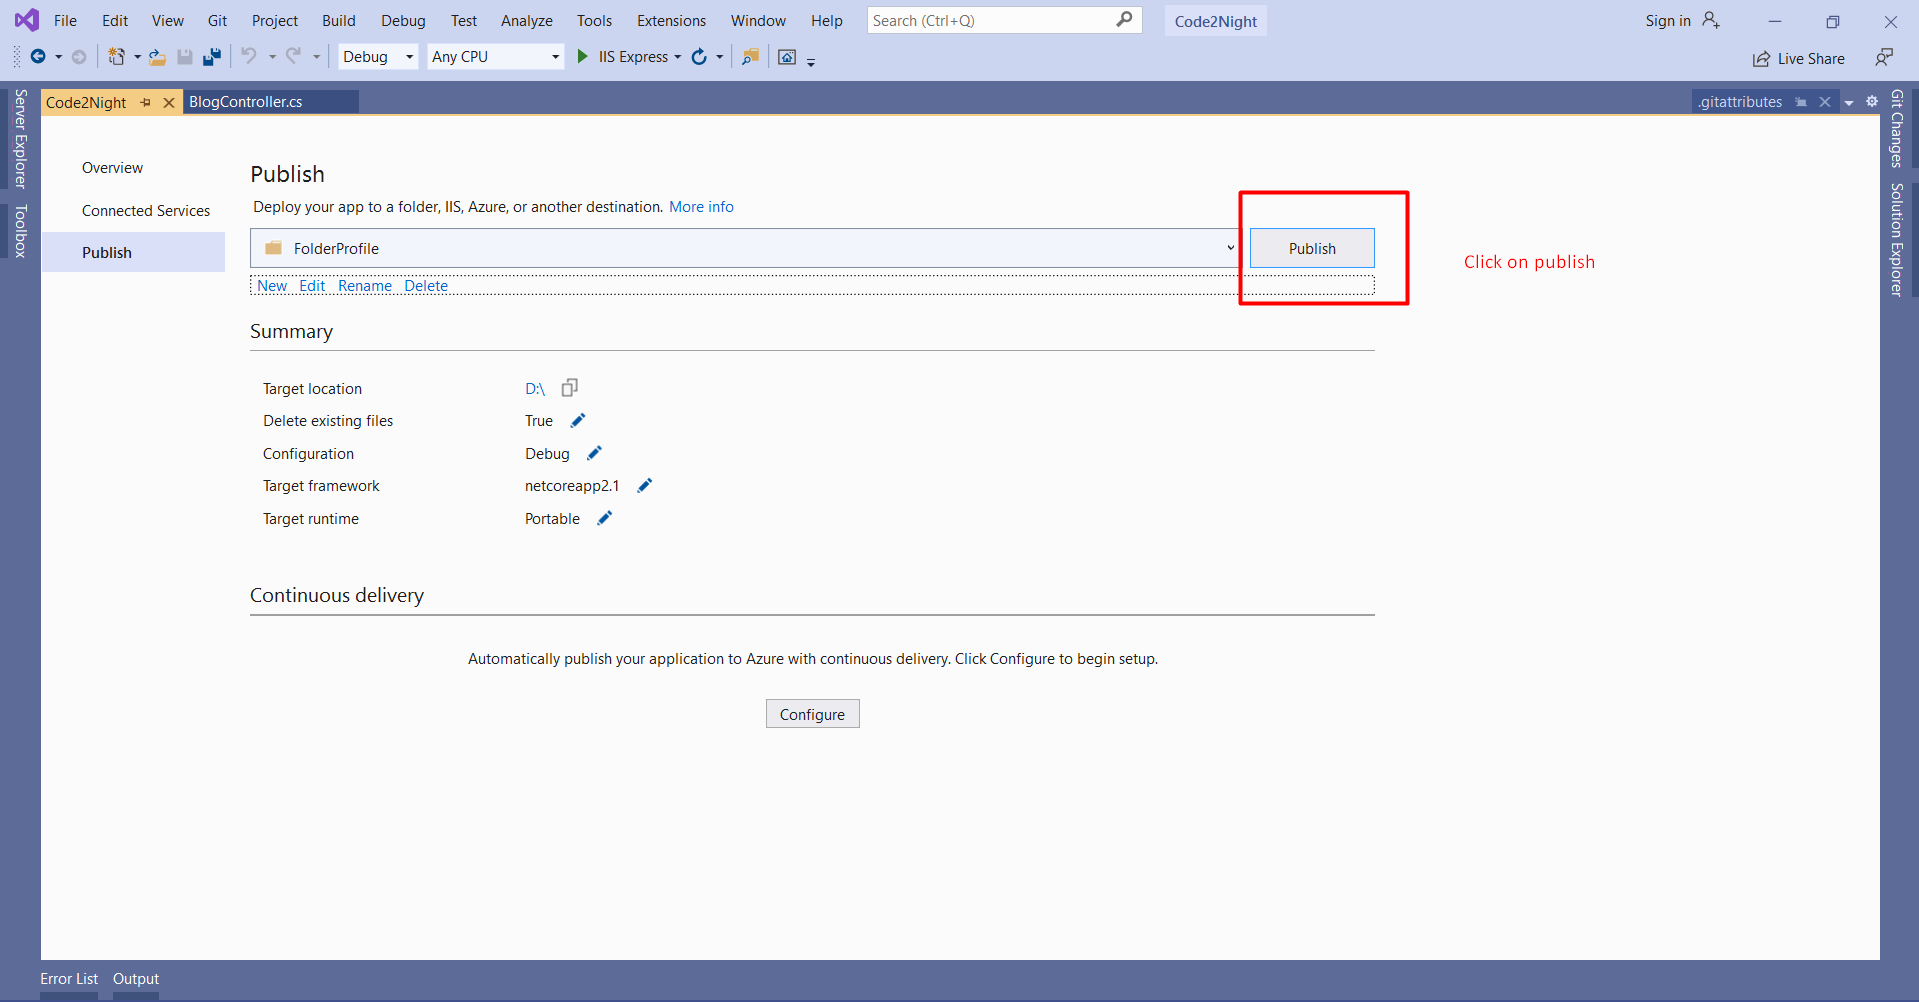
Step 3: Save and Publish
After change the location then click on publish to publish your project.
Step 4: Check final files
After click on publish you can see your published file on which location you choose on step second. So now our files are ready for publishing on server. We will see the next steps in next article .

