Realtime face detection aon web cam in Python using OpenCV
What is Face Detection?
Face detection is a vital component of computer vision that focuses on identifying human faces in images or video streams. It serves as a precursor to more complex tasks such as facial recognition, emotion detection, and even augmented reality applications. The significance of face detection spans multiple domains including security systems, user interaction in applications, and even social media platforms where tagging and filtering content is essential.
Real-time face detection allows systems to continuously monitor and analyze video feeds, making it an essential feature in surveillance and smart camera systems. By integrating face detection into your projects, you can create intelligent applications that respond dynamically to user presence and behavior.
Prerequisites
Before diving into the coding aspect, ensure you have the following prerequisites in place:
- Python 3.x: Make sure you have Python installed on your system. You can download it from the official Python website.
- OpenCV Library: This tutorial uses OpenCV, a powerful library for image processing and computer vision. Ensure you have it installed by following the instructions below.
- Basic Knowledge of Python: Familiarity with Python programming will help you understand the code and concepts discussed in this tutorial.
Setting Up OpenCV for Face Detection
To get started with face detection, you need to install the OpenCV library. Follow these steps to set up your environment:
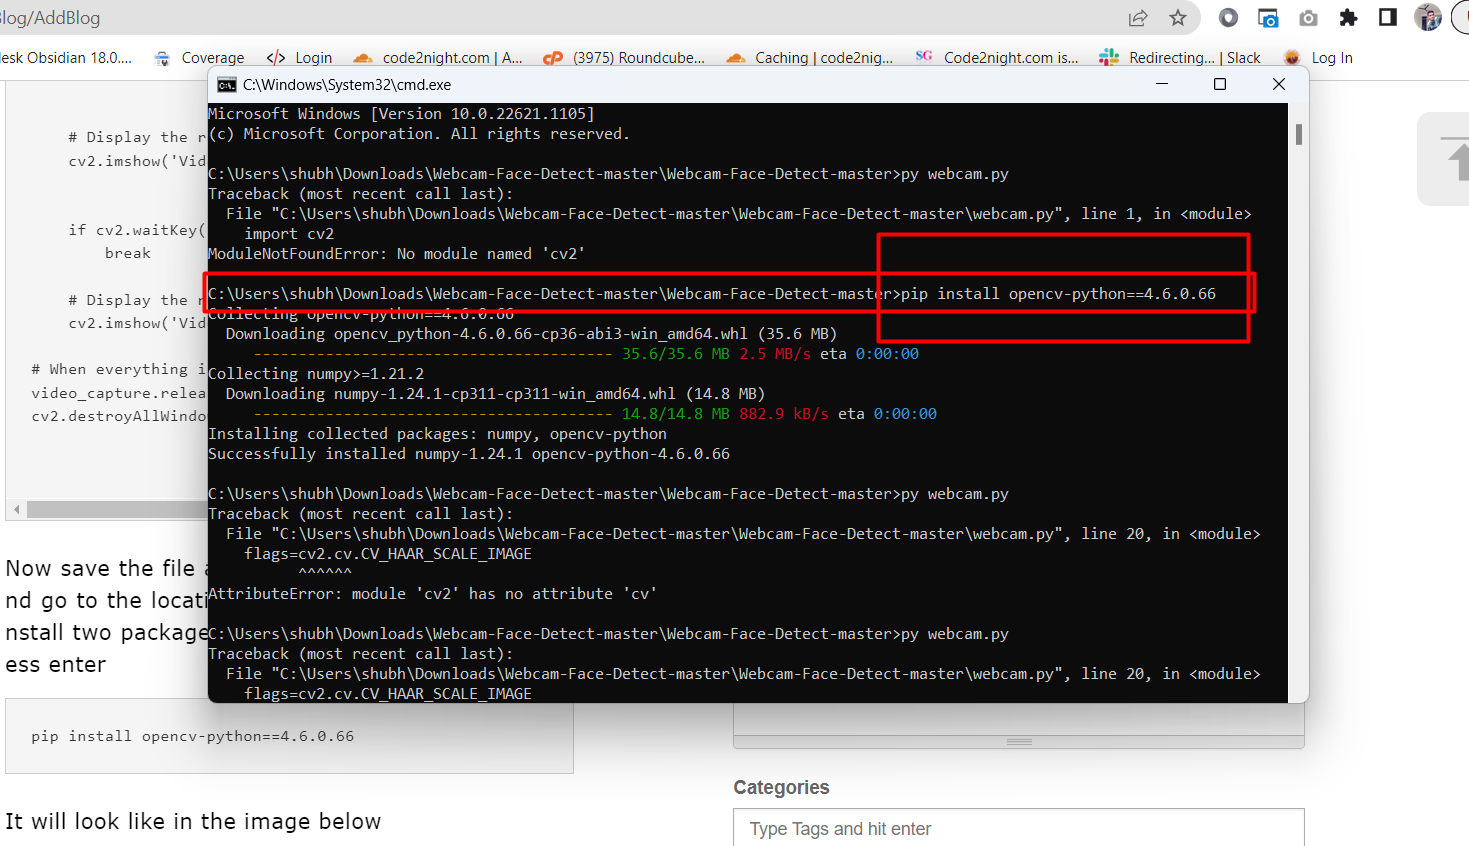
pip install opencv-python==4.6.0.66
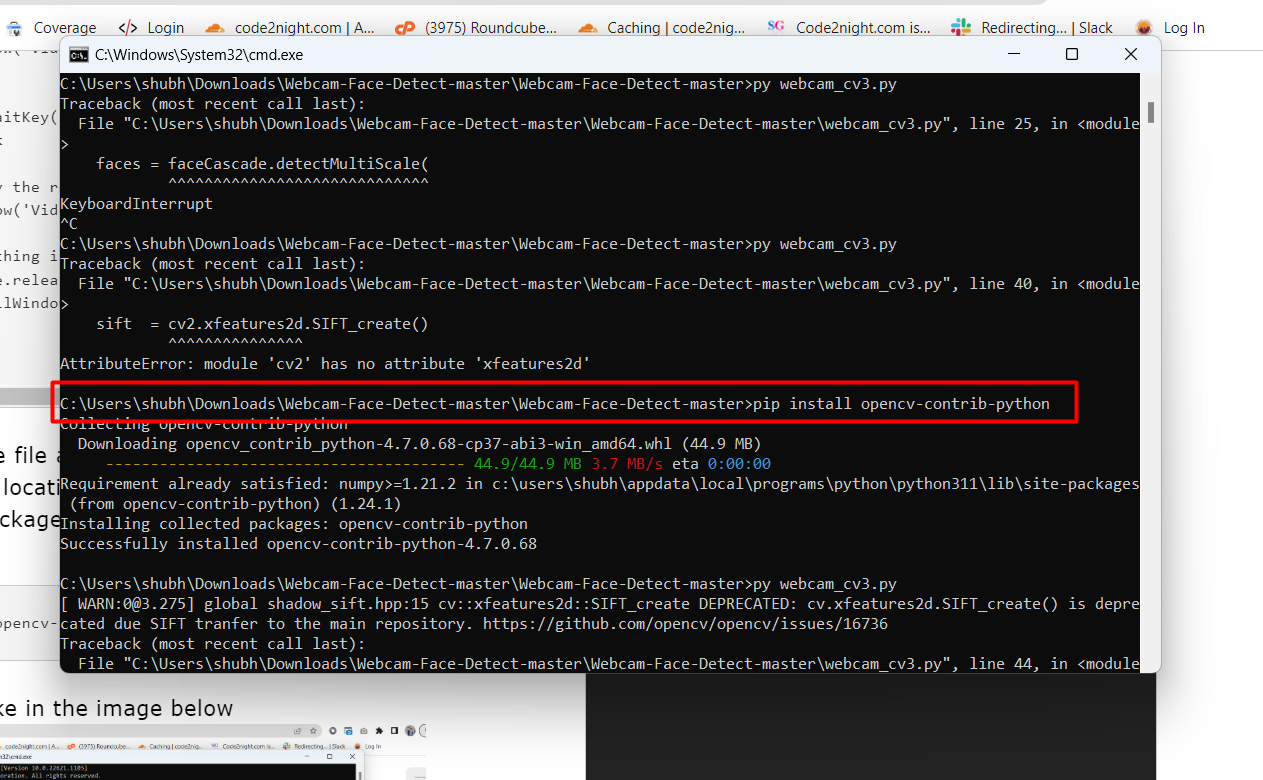
pip install opencv-contrib-pythonAfter installing the necessary packages, you will need to download the Haar Cascade XML file used for face detection. This file contains the data required to detect faces in images. You can find the Haar Cascade file here.
Implementing Real-Time Face Detection
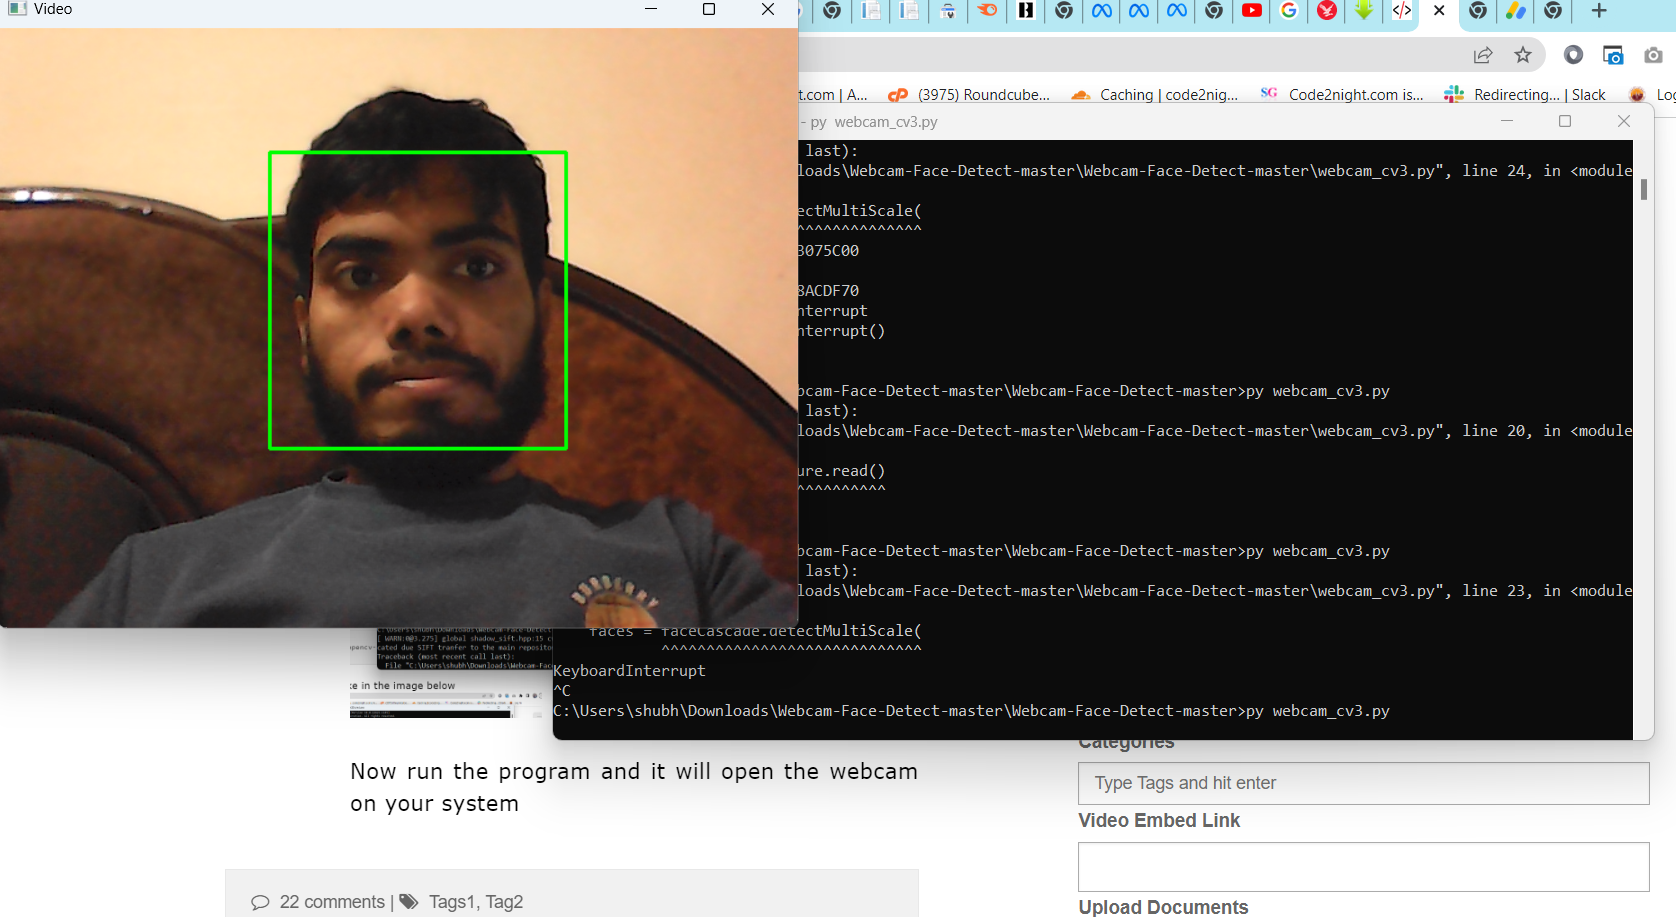
Now that you have everything set up, let's implement real-time face detection using your webcam. Create a new Python file named facedetection.py and copy the following code:
import cv2
import sys
from time import sleep
cascPath = "haarcascade_frontalface_default.xml"
faceCascade = cv2.CascadeClassifier(cascPath)
video_capture = cv2.VideoCapture(0)
anterior = 0
while True:
if not video_capture.isOpened():
print('Unable to load camera.')
sleep(5)
pass
# Capture frame-by-frame
ret, frame = video_capture.read()
gray = cv2.cvtColor(frame, cv2.COLOR_BGR2GRAY)
faces = faceCascade.detectMultiScale(
gray,
scaleFactor=1.1,
minNeighbors=5,
minSize=(30, 30)
)
# Draw a rectangle around the faces
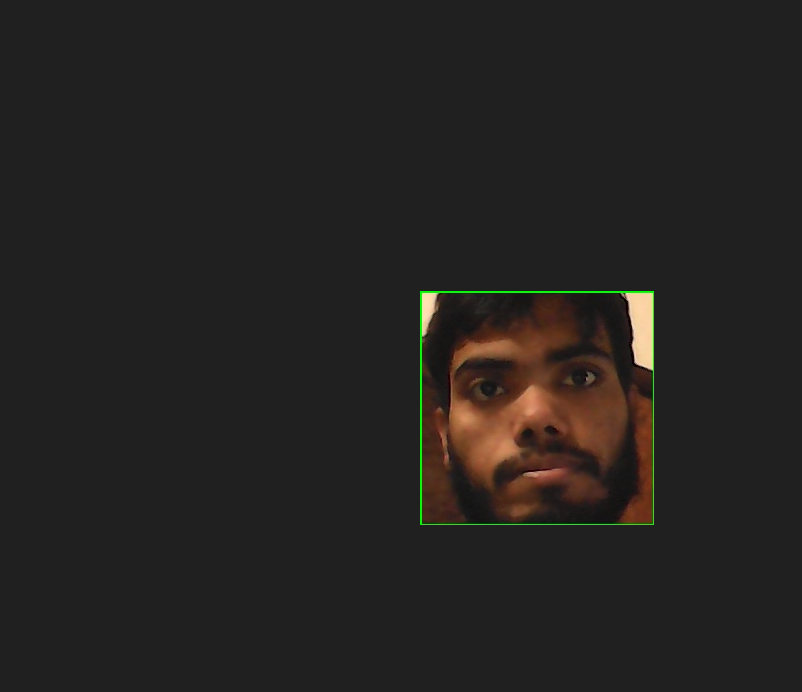
for i, (x, y, w, h) in enumerate(faces):
cv2.rectangle(frame, (x, y), (x+w, y+h), (0, 255, 0), 2)
face = frame[y:y+h, x:x+w]
cv2.imwrite(f'face{i}.jpg', face)
if anterior != len(faces):
anterior = len(faces)
# Display the resulting frame
cv2.imshow('Video', frame)
if cv2.waitKey(1) & 0xFF == ord('q'):
break
# When everything is done, release the capture
video_capture.release()
cv2.destroyAllWindows()In this code, we initialize the webcam and continuously capture frames. The frames are converted to grayscale for processing, and the face detection is performed using the Haar Cascade classifier. Detected faces are highlighted with rectangles, and each detected face is saved as a separate image file.
Understanding the Code
Let's break down the code to understand how it works:
- Importing Libraries: We start by importing the necessary libraries:
cv2for OpenCV functionalities,sysfor system-level operations, andsleepfrom thetimemodule to pause execution when needed. - Loading the Haar Cascade: The Haar Cascade is loaded using
cv2.CascadeClassifier, which takes the path to the XML file as an argument. - Capturing Video: We initialize the webcam using
cv2.VideoCapture(0). The parameter0indicates that we are using the default camera. - Face Detection: The
detectMultiScalemethod detects faces in the grayscale image. The parametersscaleFactor,minNeighbors, andminSizehelp to fine-tune the detection process.
Edge Cases & Gotchas
While implementing face detection, you may encounter several edge cases and issues. Here are some common ones:
- Camera Access Issues: Ensure that your webcam is functioning correctly and that no other application is using it. If the camera fails to open, the program will print an error message and pause execution.
- Lighting Conditions: Face detection can be significantly affected by poor lighting. Make sure you are in a well-lit environment for optimal detection results.
- Multiple Faces: The algorithm may struggle with detecting multiple faces in certain configurations, such as faces that are too close together or occluded by other objects.
Performance & Best Practices
To enhance the performance of your face detection application, consider the following best practices:
- Optimize Parameters: Adjust the parameters of
detectMultiScalebased on your specific use case. For instance, loweringminNeighborsmay help detect more faces but could also lead to false positives. - Frame Rate Management: Limit the frame rate of your webcam feed to reduce CPU usage. You can do this by processing every nth frame instead of every single frame.
- Use GPU Acceleration: If available, leverage GPU acceleration for faster processing. Libraries such as TensorFlow or PyTorch can be integrated with OpenCV to utilize GPU resources for more complex models.
Conclusion
In this tutorial, we explored the implementation of real-time face detection using Python and OpenCV. We covered the setup process, coding implementation, and best practices for optimizing performance. Here are the key takeaways:
- Face detection is a critical application of computer vision with numerous real-world applications.
- OpenCV provides a robust framework for implementing face detection in real-time.
- Understanding the parameters of the detection algorithm is crucial for optimizing results.
- Addressing edge cases and implementing best practices can significantly improve the performance of your application.