Owin Authentication in Asp.net MVC Api
Microsoft Owin
Microsoft Owin is a library introduced by Microsoft for Authentication in projects. It is widely used in api's in Asp.Net projects. So we will see how to implemented owin autnetication in Asp.net MVC Api .
First of all you have to add one new asp.net mvc project and add new api controller in that.
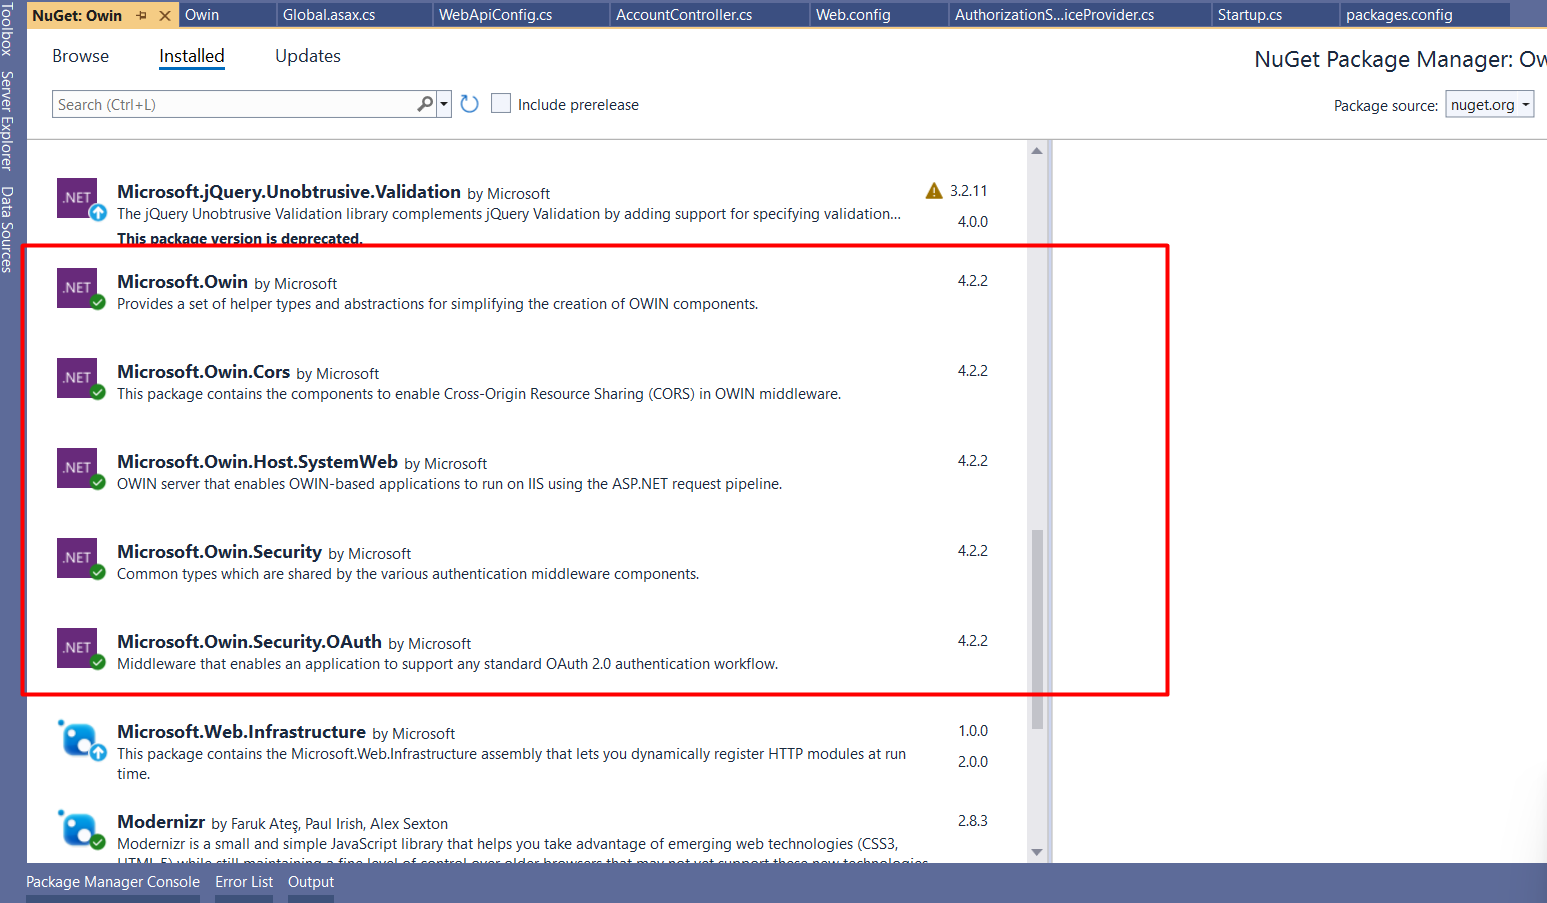
Now you have to go to nuget packages and add these packages

After installing these nuget packages now we will use these libraries for owin authentication.
Now right click on your project and add new class file and name it Startup.cs and paste this code
 public class Startup
    {
        public void Configuration(IAppBuilder app)
        {
            // For more information on how to configure your application, visit https://go.microsoft.com/fwlink/?LinkID=316888
            app.UseCors(Microsoft.Owin.Cors.CorsOptions.AllowAll);
            OAuthAuthorizationServerOptions options = new OAuthAuthorizationServerOptions
            {
                AllowInsecureHttp = true,
                //The Path For generating the Toekn
                TokenEndpointPath = new PathString("/api/Account/Login/token"),
                //Setting the Token Expired Time (24 hours)
                AccessTokenExpireTimeSpan = TimeSpan.FromDays(1),
                //MyAuthorizationServerProvider class will validate the user credentials
                Provider = new AuthorizationServerProvider()
            };

            //Token Generations
            app.UseOAuthAuthorizationServer(options);
            app.UseOAuthBearerAuthentication(new OAuthBearerAuthenticationOptions());

        }
    }
TokenEndpointpath - This will have the path which you will use as endpoint for login api and that api will return you a autentication token along with other custom data if needed.
Now right click on your project and add a new class file and name it AuthorizationServerProvider .
paste below code in that file for autentication
  public class AuthorizationServerProvider : OAuthAuthorizationServerProvider
    {
        public override async Task ValidateClientAuthentication(OAuthValidateClientAuthenticationContext context)
        {
            context.Validated();
        }
        public override async Task GrantResourceOwnerCredentials(OAuthGrantResourceOwnerCredentialsContext context)
        {


            if (string.IsNullOrEmpty(context.UserName) && string.IsNullOrEmpty(context.Password))
            {

                context.SetError("invalid_grant", "UserName or Password is missing!");
                return;


            }
            else
            {
                // Add code to check from database
                if (context.UserName != "Admin" || context.Password != "123")
                {
                    context.SetError("invalid_grant", "Provided username and password is incorrect");
                    return;
                }
            }

            // Add code to get roles from database
            var identity = new ClaimsIdentity(context.Options.AuthenticationType);

            identity.AddClaim(new Claim(ClaimTypes.Role, "Admin"));


            identity.AddClaim(new Claim(ClaimTypes.Name, "TestUser"));


            var props = new AuthenticationProperties(new Dictionary<string, string>
                {

                { "UserName", "TestUser" },
                 { "Id", "1" },

            });
            var newTicket = new AuthenticationTicket(identity, props);
            context.Validated(newTicket);


        }
        public override Task TokenEndpoint(OAuthTokenEndpointContext context)
        {
            foreach (KeyValuePair<string, string> property in context.Properties.Dictionary)
            {
                context.AdditionalResponseParameters.Add(property.Key, property.Value);
            }


            return Task.FromResult<object>(null);
        }
        public override Task TokenEndpointResponse(OAuthTokenEndpointResponseContext context)
        {
            string authenticationToken = context.AccessToken;
            var requestHeaders = context.Request.Headers;

            return Task.FromResult<object>(null);
        }
    }
As you can see in the GrantResourceOwnerCredentials method we have to check the credentials from the database and verify the roles and also if it is a valid login. We can pass dynamic username and id and other role values which will be used while generating token.
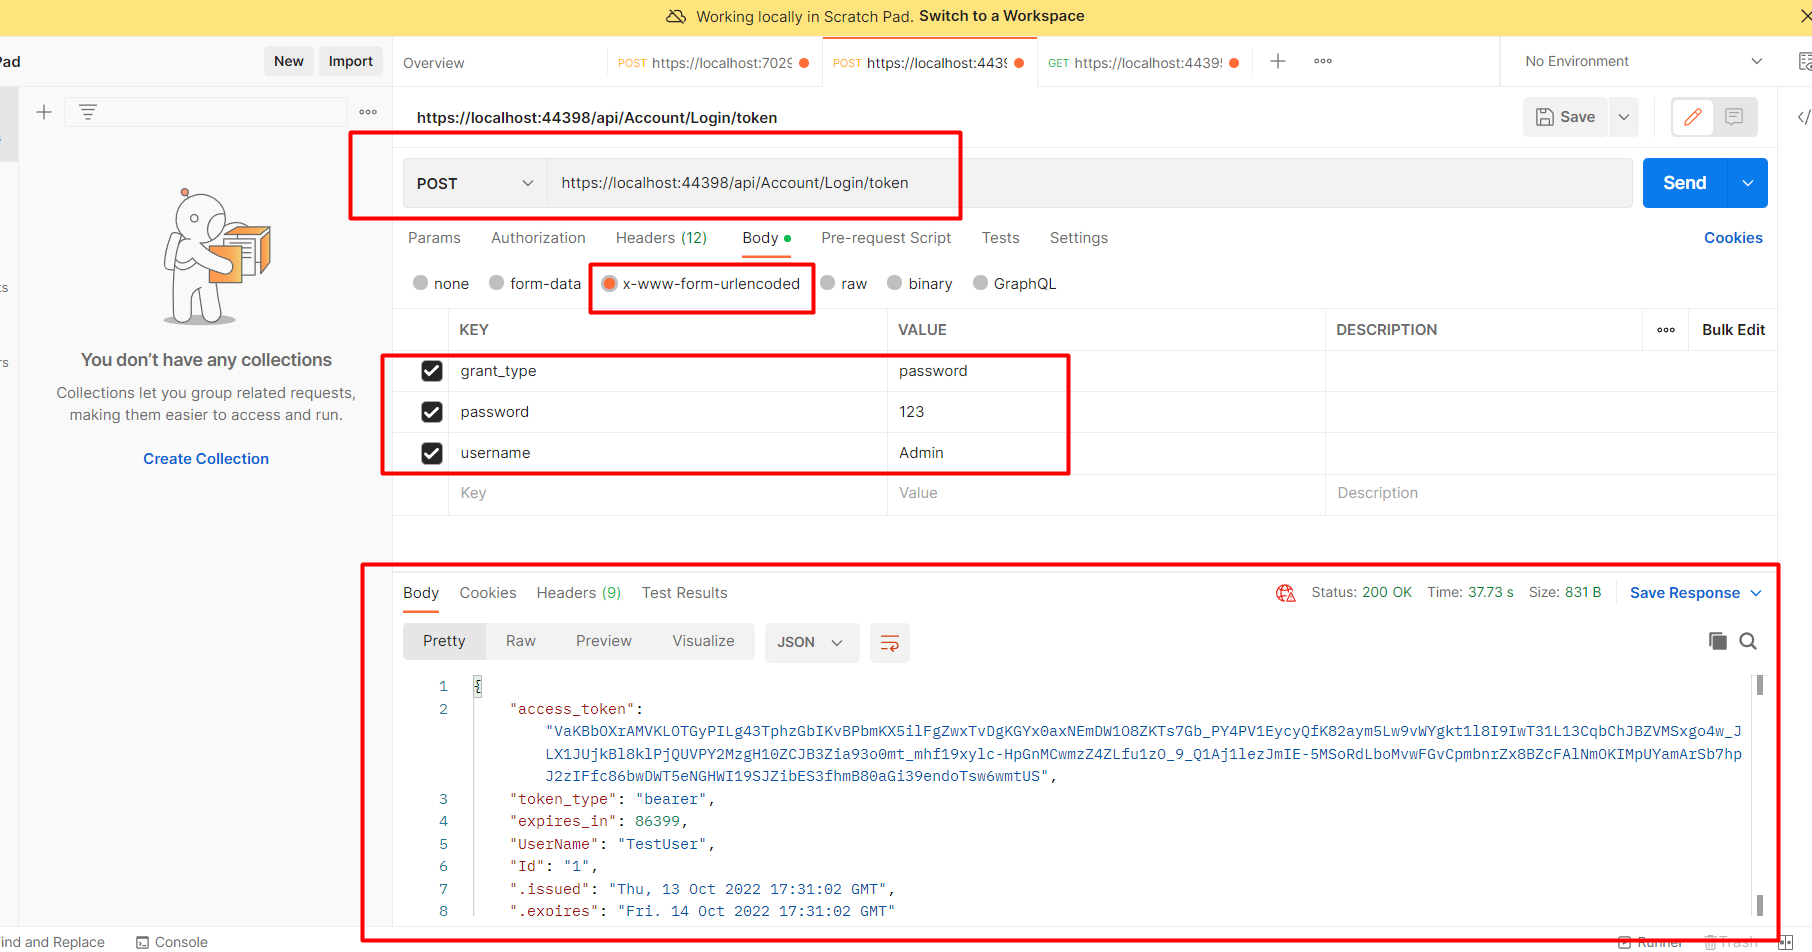
Now run the application and go to your postman application and set url and username password like showed in the image below

You can hit the same endpoint which you have passed in the startup.cs file in the postman api and pass your credentials. You have to remember to keep grant_type password always . And you will see the token in the response.
So this is how you can add owin authentication in your asp.net api.

