
Login With Microsoft in Asp.net
Microsoft Authentication
Hello everyone and welcome to Code2Night! In today's digital era, incorporating social logins into our web applications has become increasingly important. It provides users with a seamless and convenient way to access various platforms without the hassle of creating new accounts. In this article, we will dive into the world of .net and explore how to implement the "Login With Microsoft" feature. So, grab your coding hats, and let's get started on this exciting journey of integrating Microsoft login functionality into our asp.net applications!
Login with MS is used nowadays for login in web applications. For implementing this we will need to create a new project and API credentials in Microsoft Azure Portal. So you can check in the next steps for implementing MS Authentication
First of all, we have to log in to Azure Portal. You have to search for the App Registration option in the search bar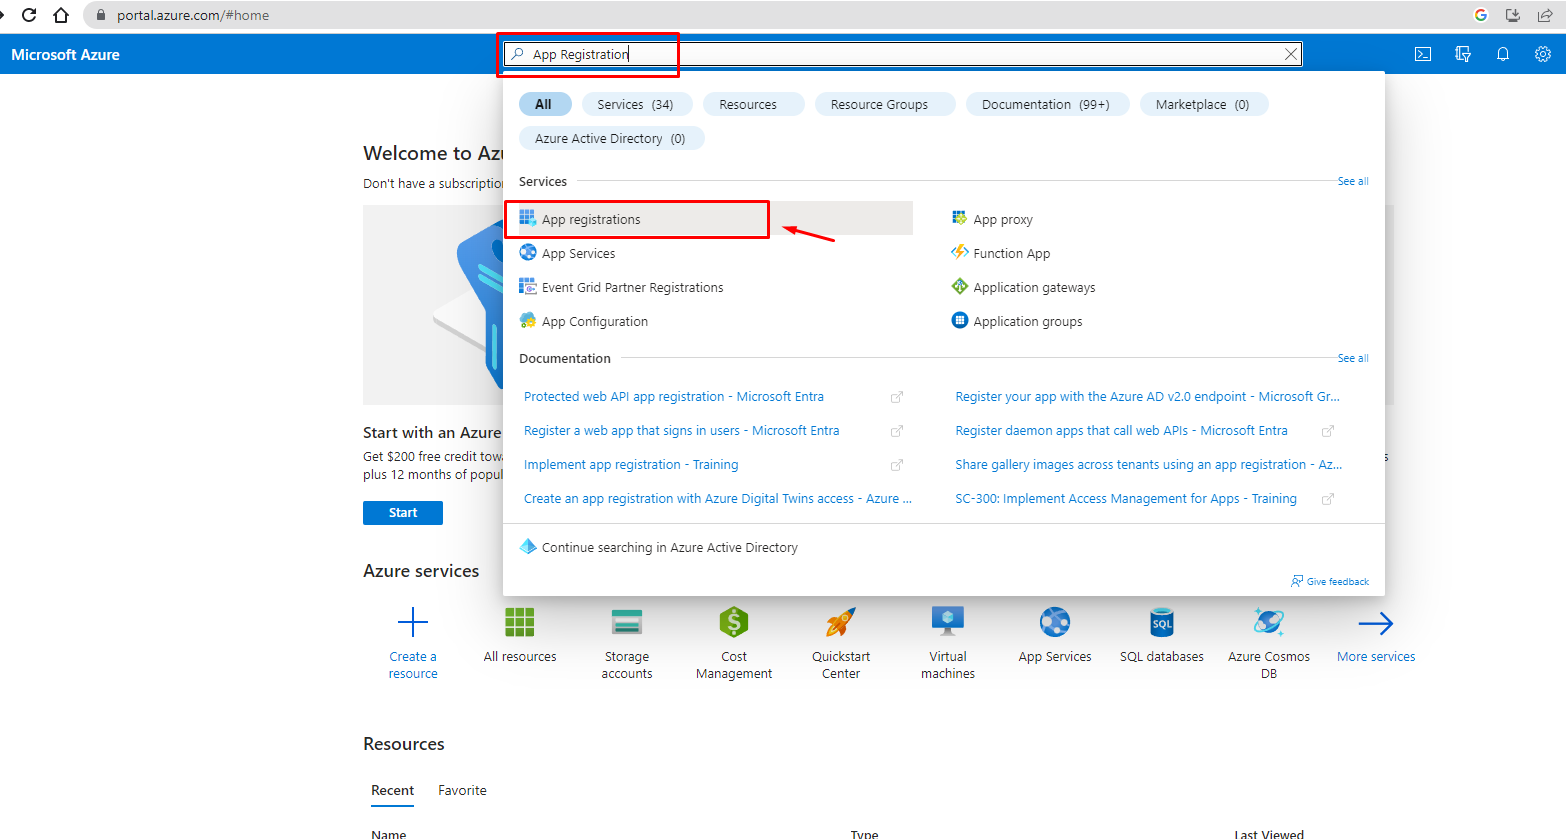
After this, we have to click on App registration which will lead to a page where you will create a new application as shown in the next image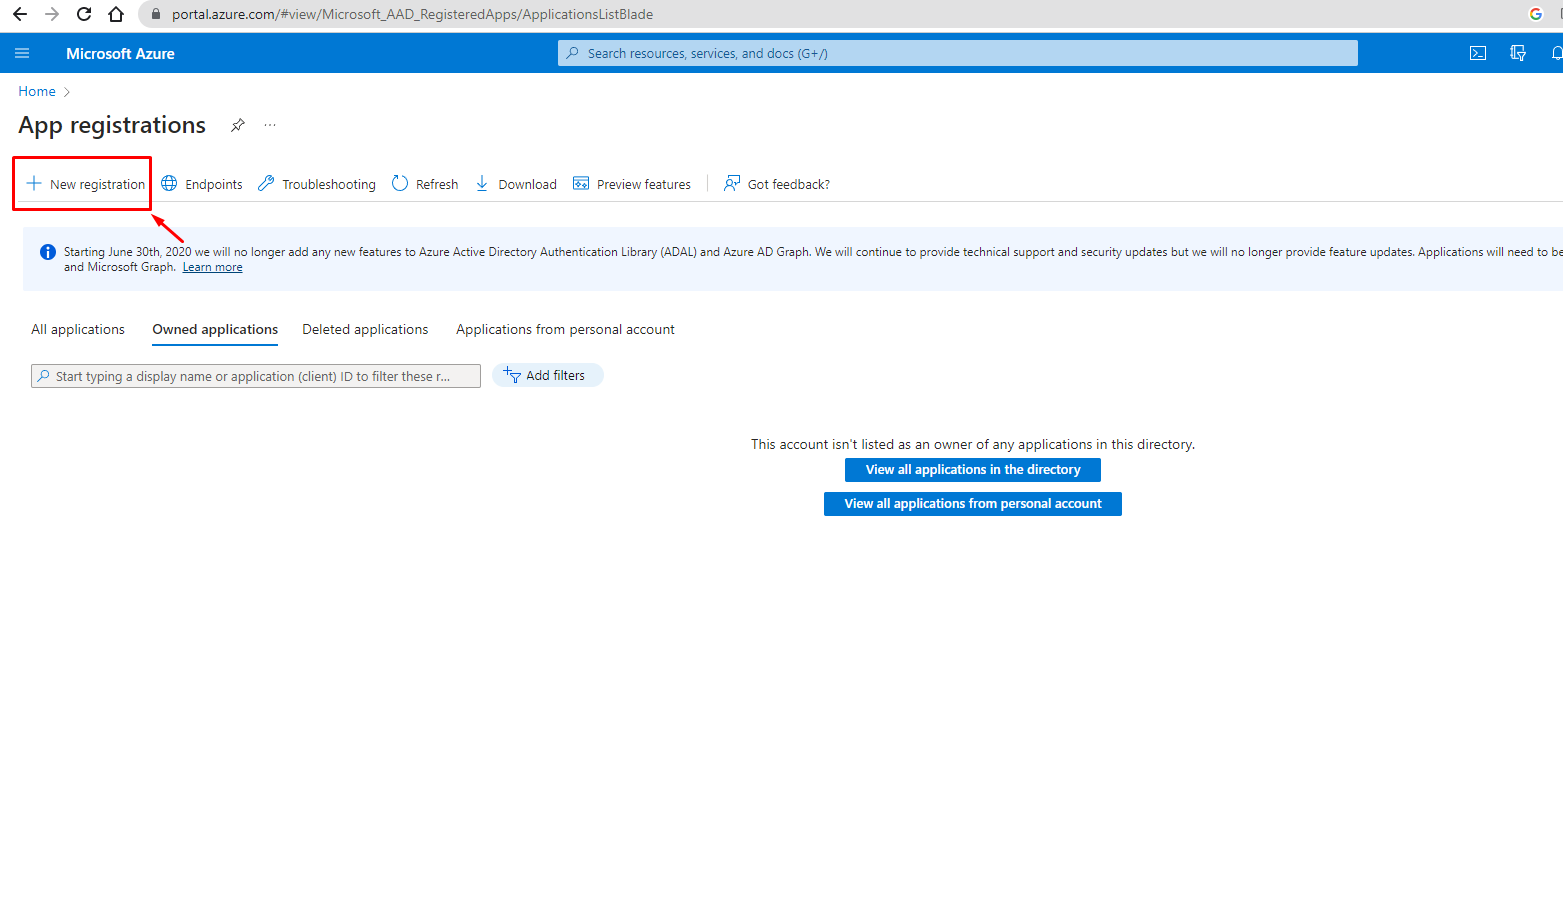
Clicking on this new registration button will redirect you to a new page where you have to add your application details and redirect URLs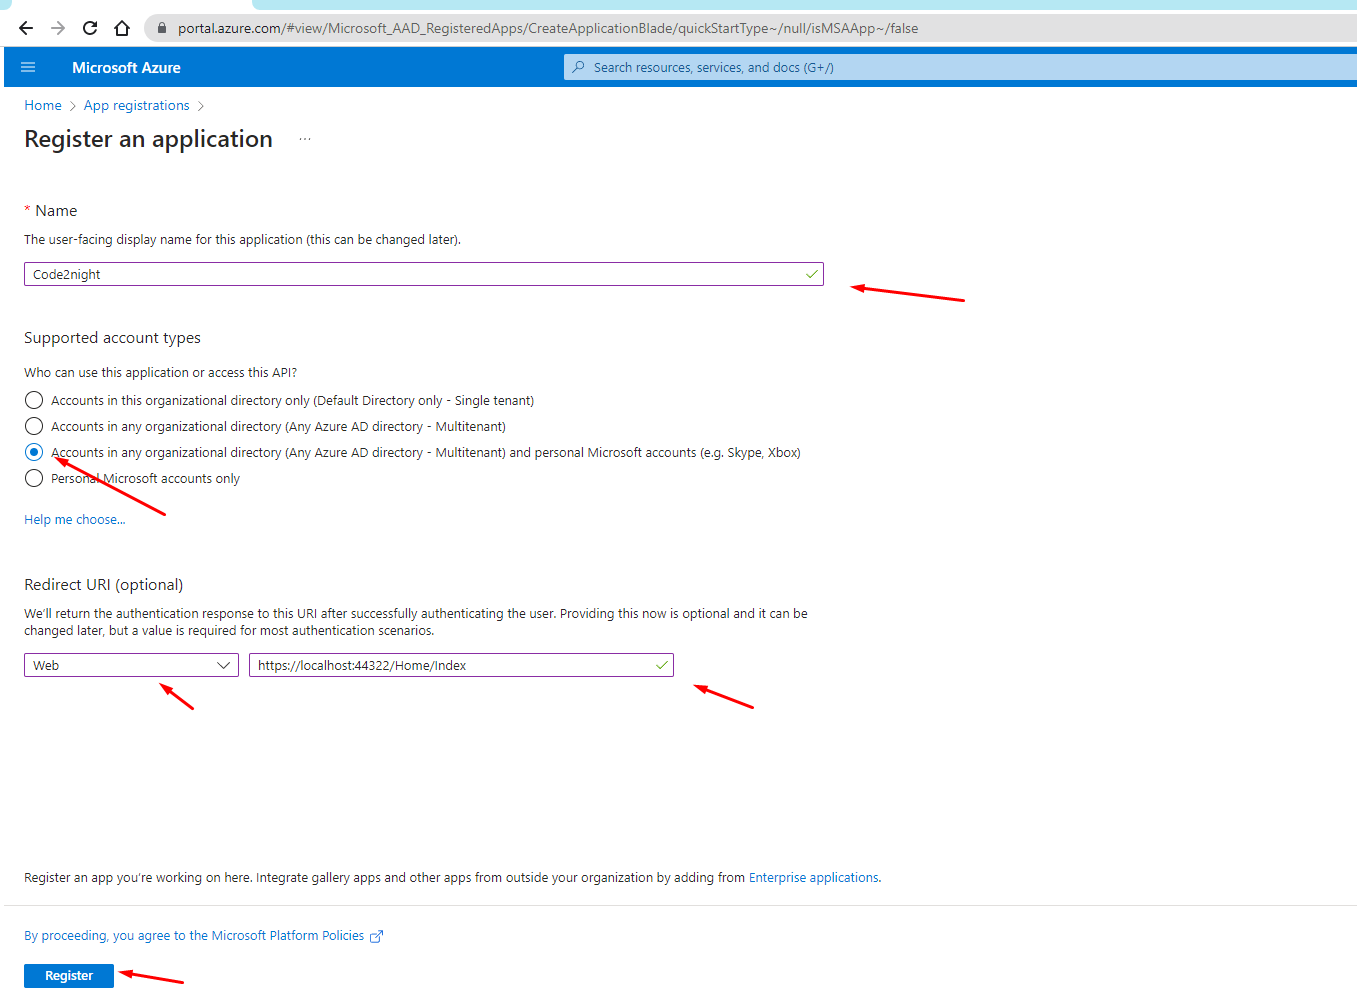
After clicking on register you will redirect to a new screen where you will be able to see client id and application details. You will see the screen shown in the screenshot below
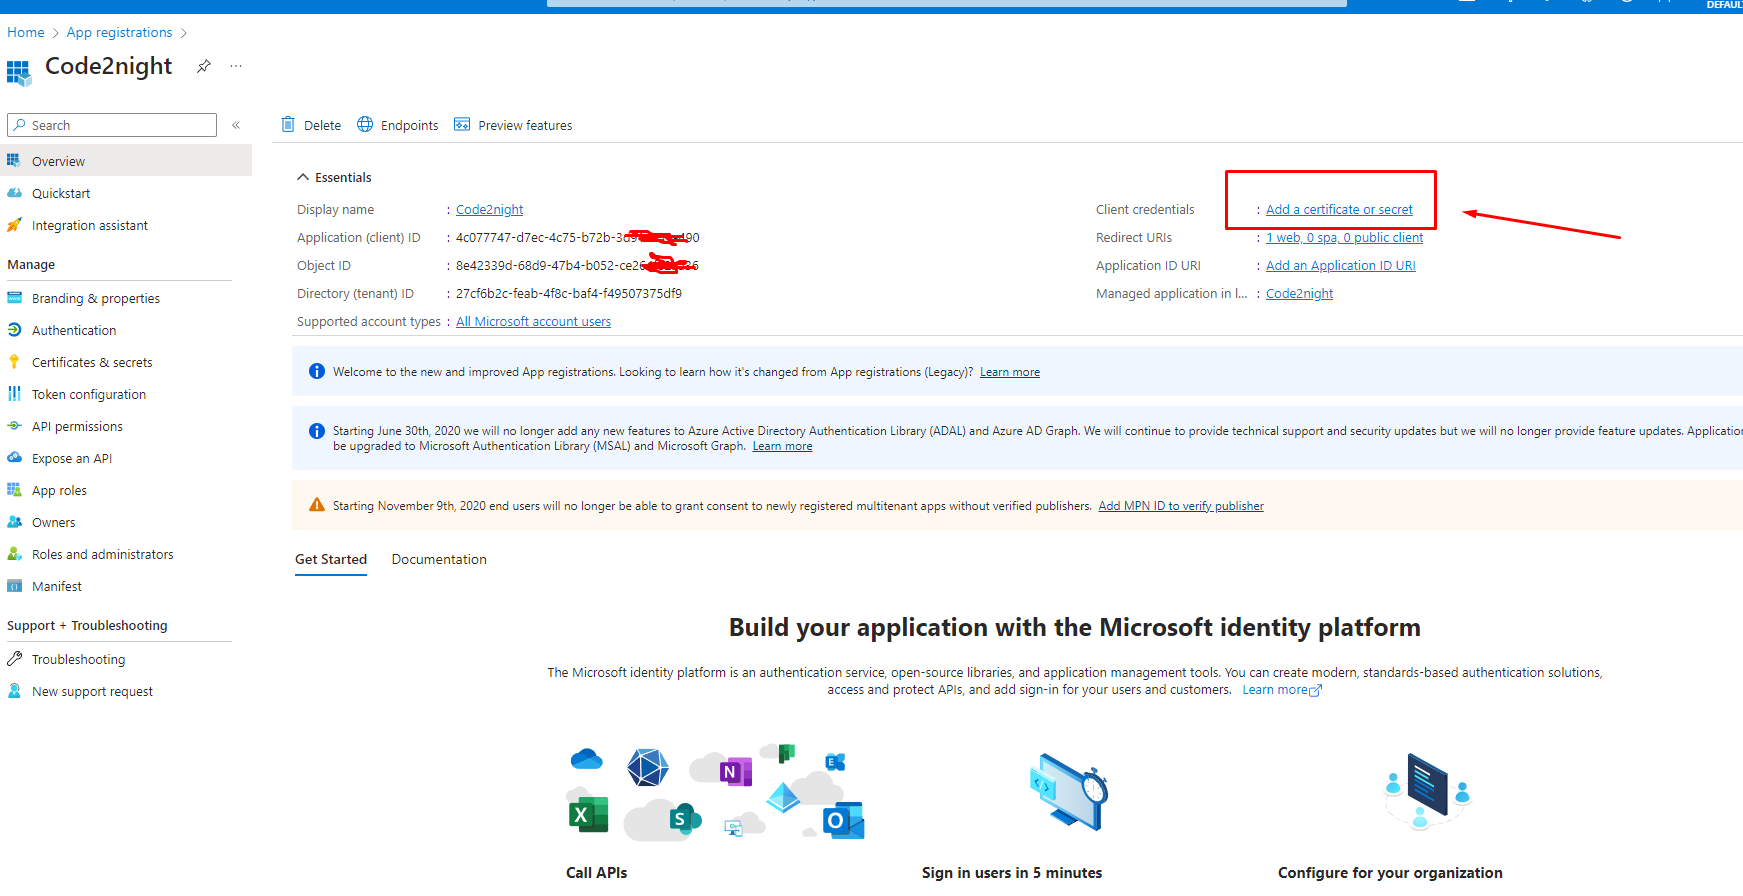
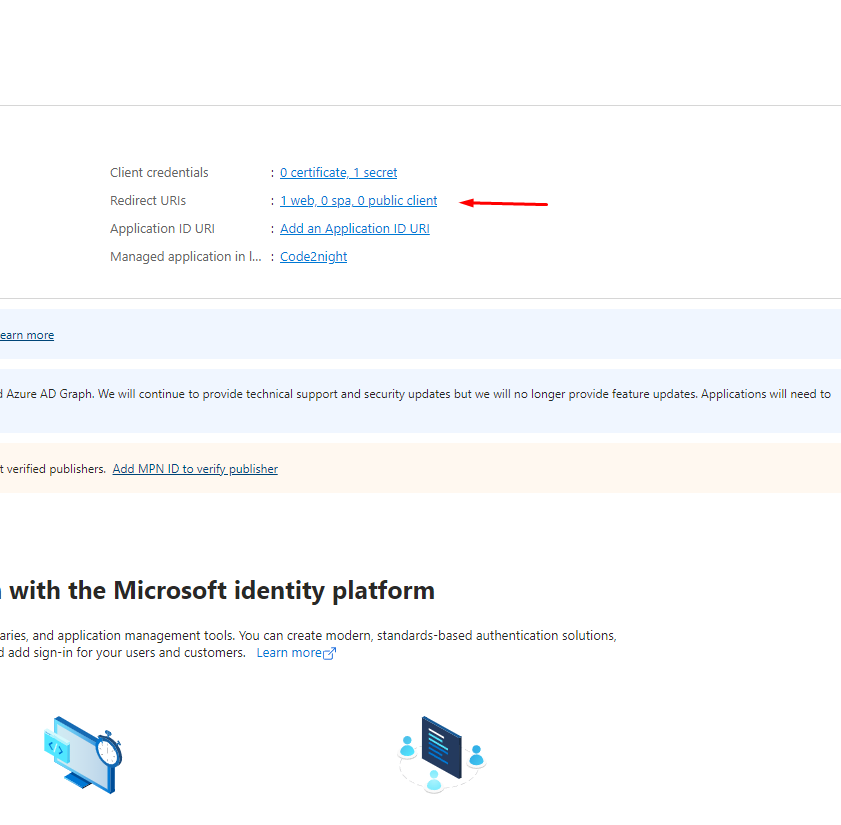
You have to click on the highlighted link above for creating a client secret key for the authentication.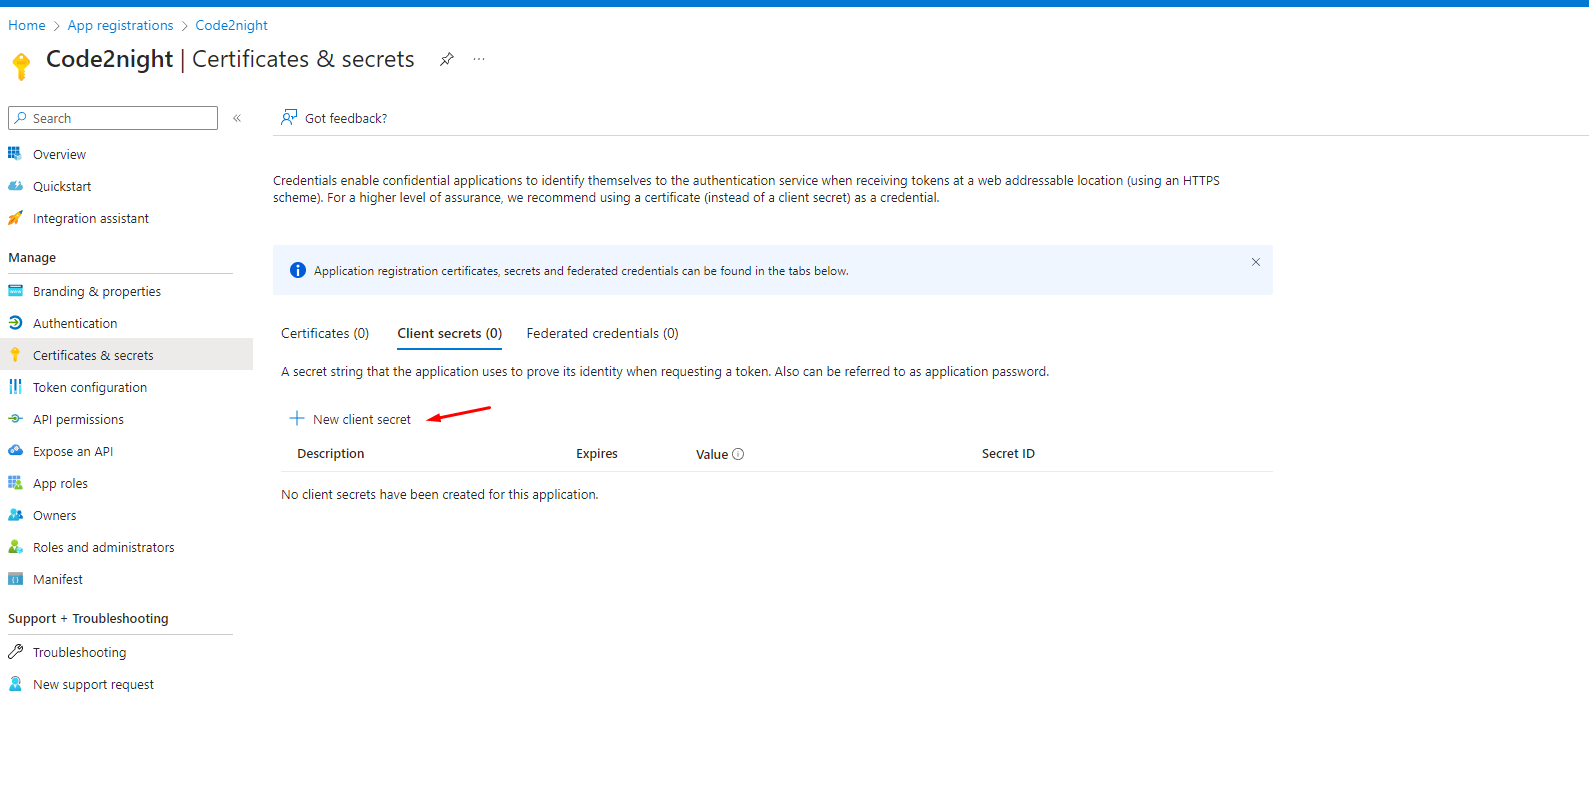
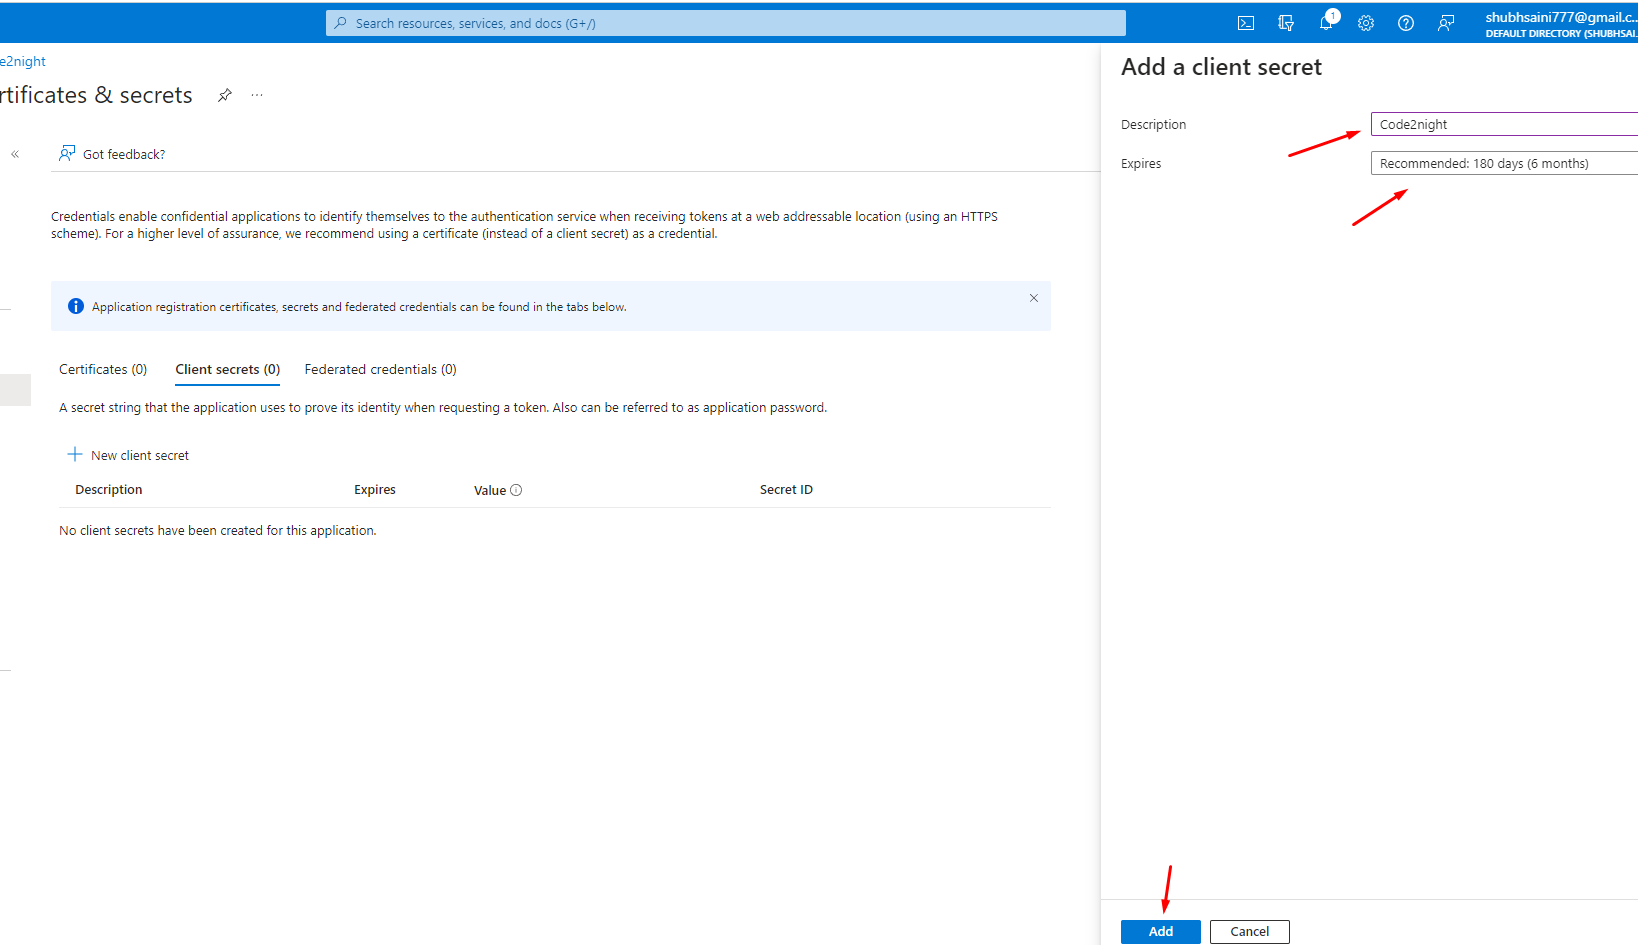 After this step, you will be able to get your client's secret key as shown in the image below
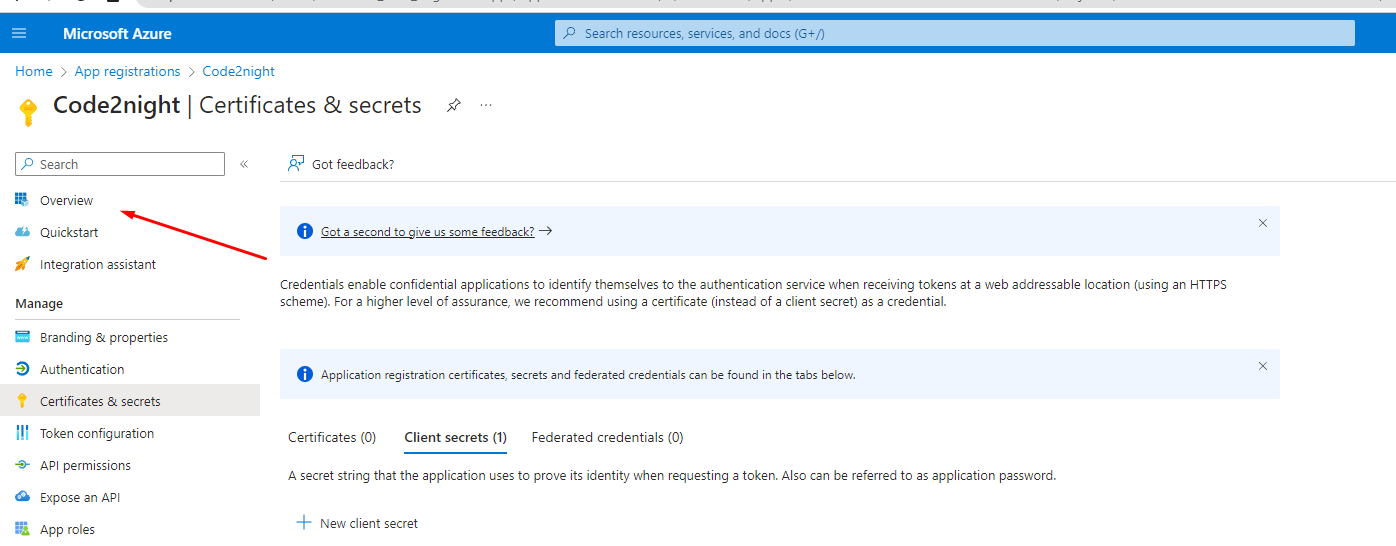
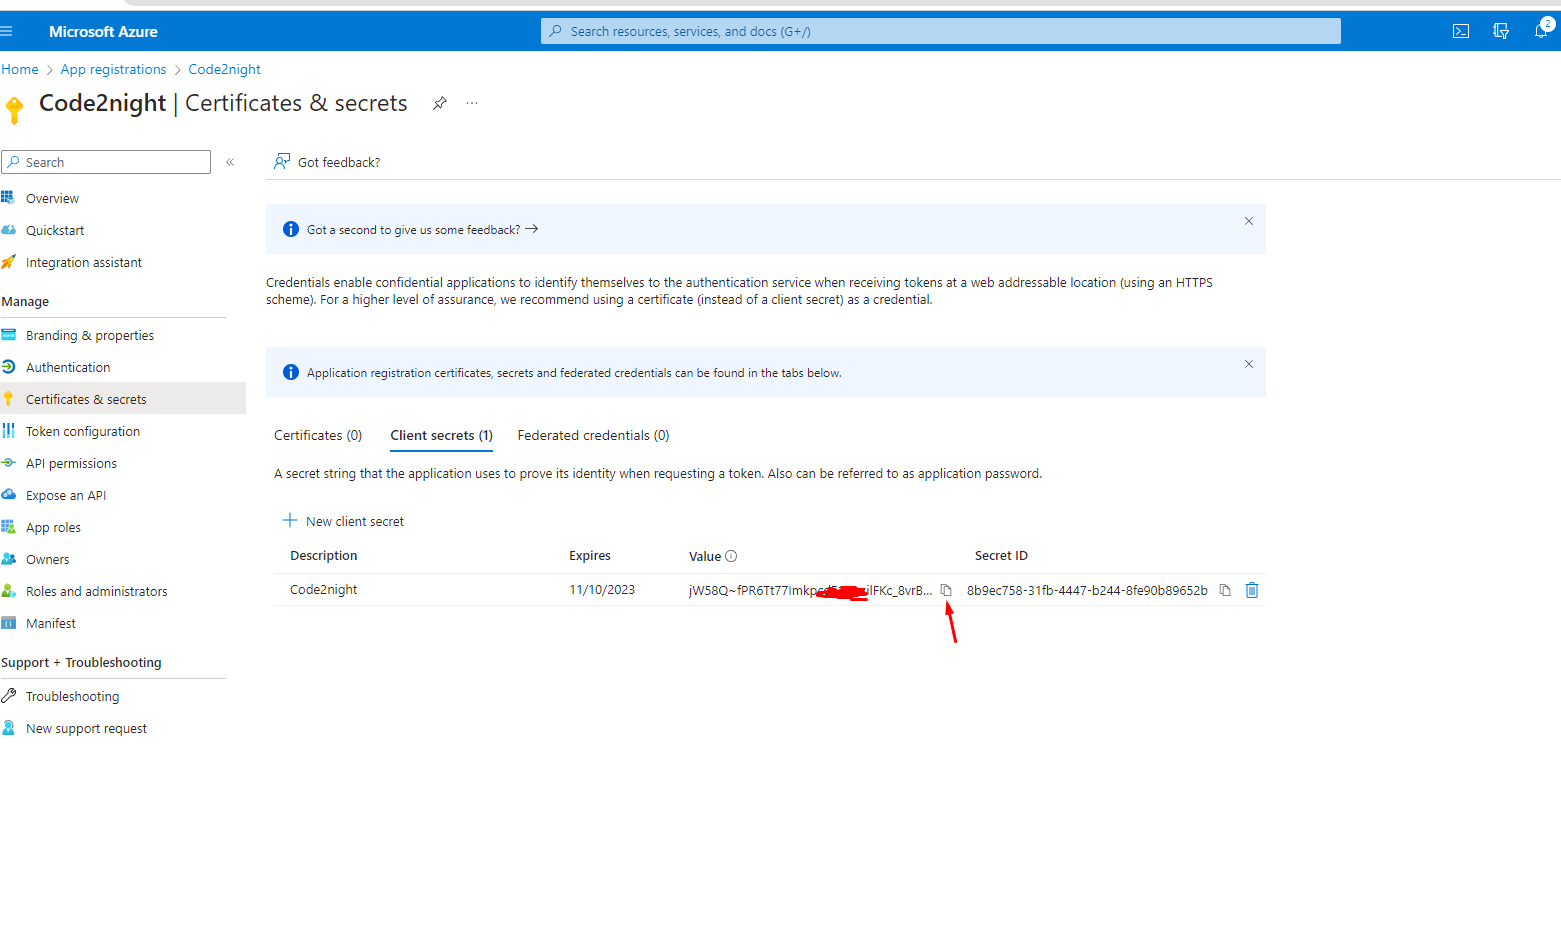 You have to copy the client value and paste it somewhere as we will use this in the code. Now go back to the main screen using the Overview menu
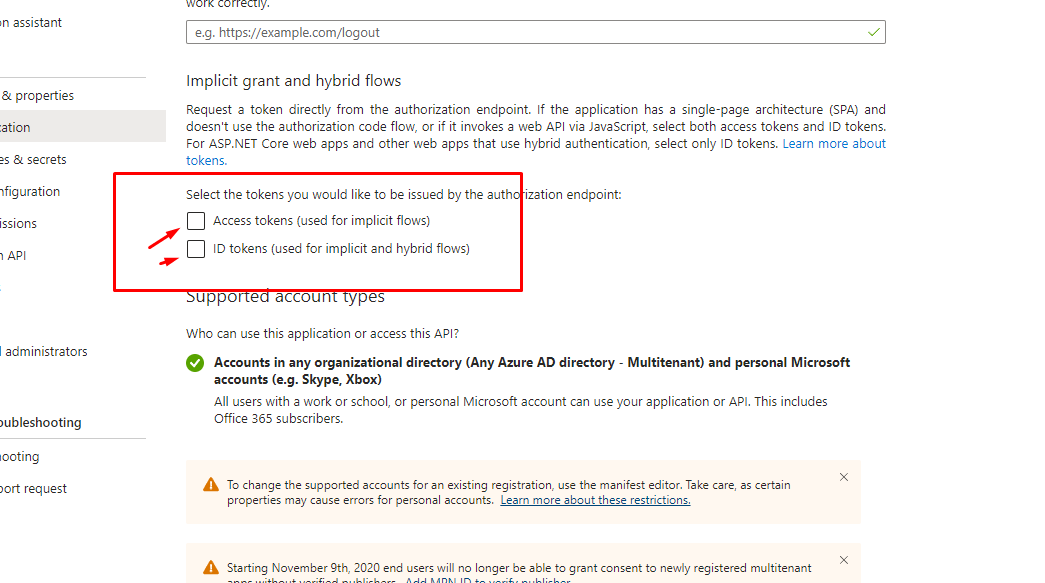
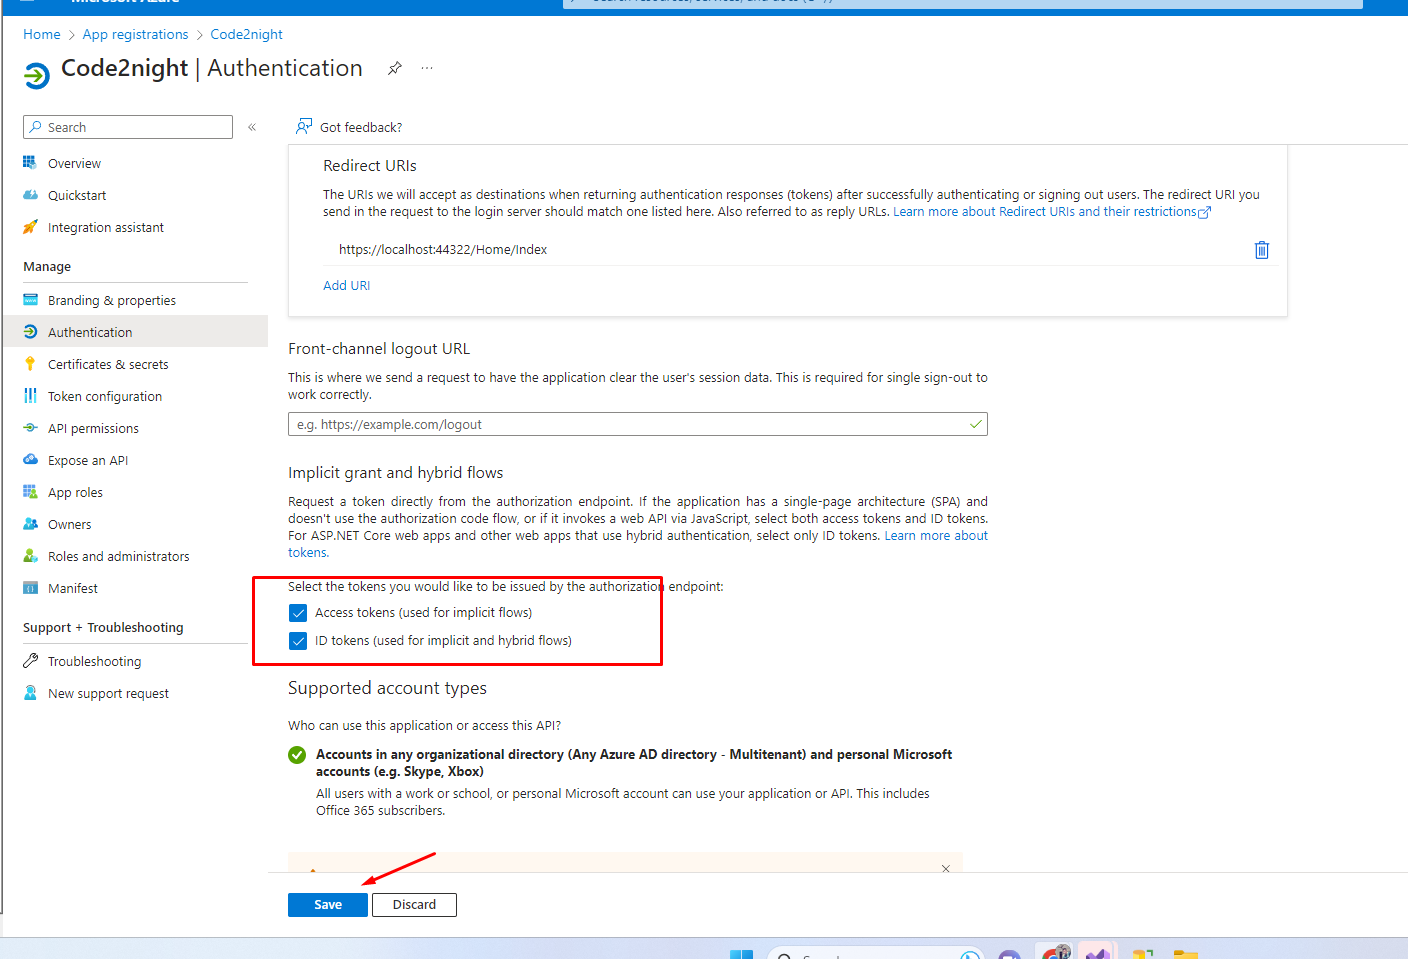
Now you have to click on the option highlighted in the image below
Now, on the below screen, you have to check the following checkboxes and save the page details.
Now just copy the client id from the overview screen as shown below
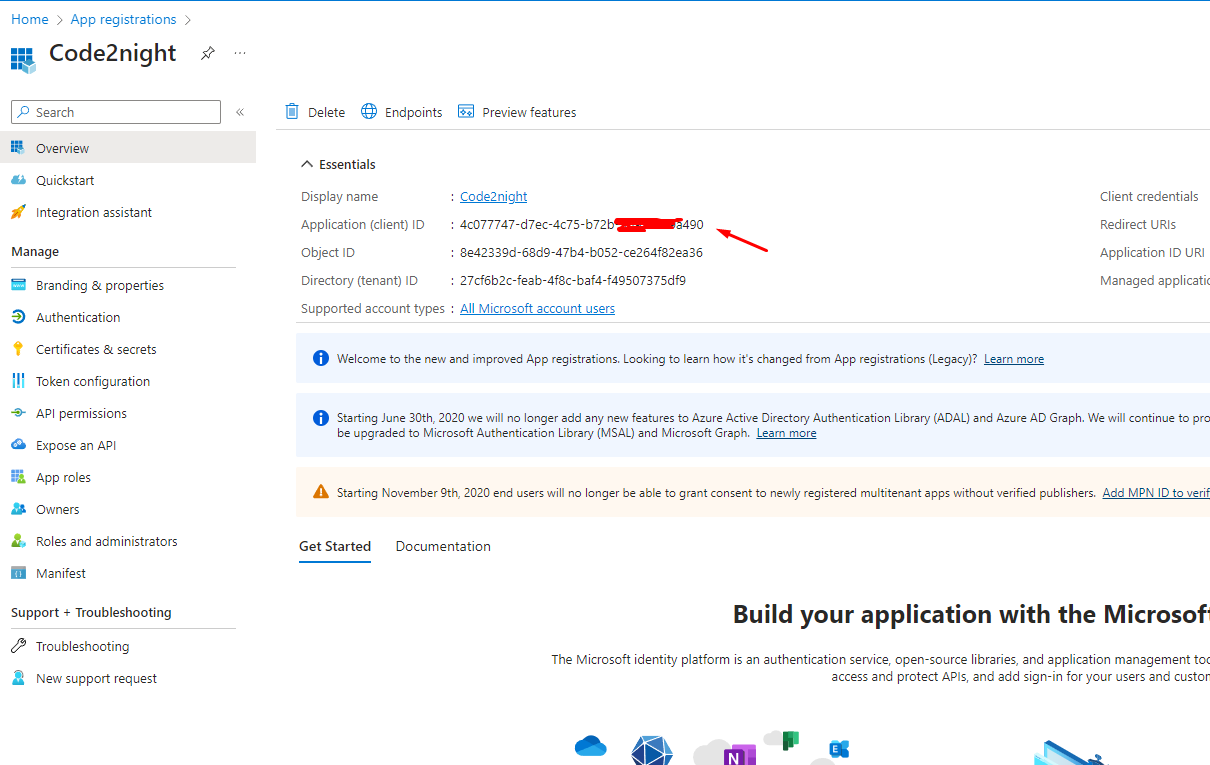
Since now we have both client id and client secret we can move to use that in the code.
So now install the following RestSharp package in your application.

Now, you have to go the action, it must be with the same name which you mentioned in the redirect URL while getting the client. We have to use the following code
  public IActionResult Index(string code)
        {
            if (!string.IsNullOrWhiteSpace(code))
            {
                var client = new RestClient("https://login.microsoftonline.com/common/oauth2/v2.0/token");
                var request = new RestRequest(Method.POST);
                ServicePointManager.SecurityProtocol = (SecurityProtocolType)3072;
                request.AddParameter("grant_type", "authorization_code");
                request.AddParameter("code", code);
                request.AddParameter("redirect_uri", "https://localhost:44322/Home/Index");

                request.AddParameter("client_id", "4c073447-d7ec-4c45-b711-3d9132a9b490");
                request.AddParameter("client_secret", "jW58Q~fPR6Tt77IzapcdF2PwsalFVc_8vrConcMQ");

                IRestResponse response = client.Execute(request);
                var content = response.Content;
                var res = (JObject)JsonConvert.DeserializeObject(content);
                var client2 = new RestClient("https://graph.microsoft.com/v1.0/me");
                client2.AddDefaultHeader("Authorization", "Bearer " + res["access_token"]);
                request = new RestRequest(Method.GET);
                var response2 = client2.Execute(request);

                var content2 = response2.Content;

                var useremail = (JObject)JsonConvert.DeserializeObject(content2);
            }
            return View();
        }
@{
ViewData["Title"] = "Home Page";
}
<div class="text-center">
<h1 class="display-4">Welcome</h1>
<p>Learn about <a href="https://docs.microsoft.com/aspnet/core">building Web apps with ASP.NET Core</a>.</p>
</div>
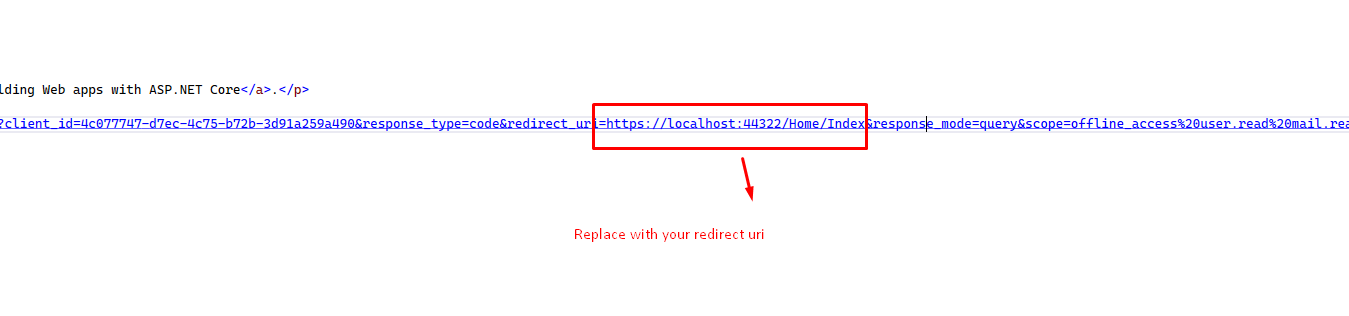
<a href="https://login.microsoftonline.com/common/oauth2/v2.0/authorize?client_id=4c077747-d7ec-4c75-b72b-3d91a259a490&response_type=code&redirect_uri=https://localhost:44322/Home/Index&response_mode=query&scope=offline_access%20user.read%20mail.read&state=12345">Login With Microsoft</a>
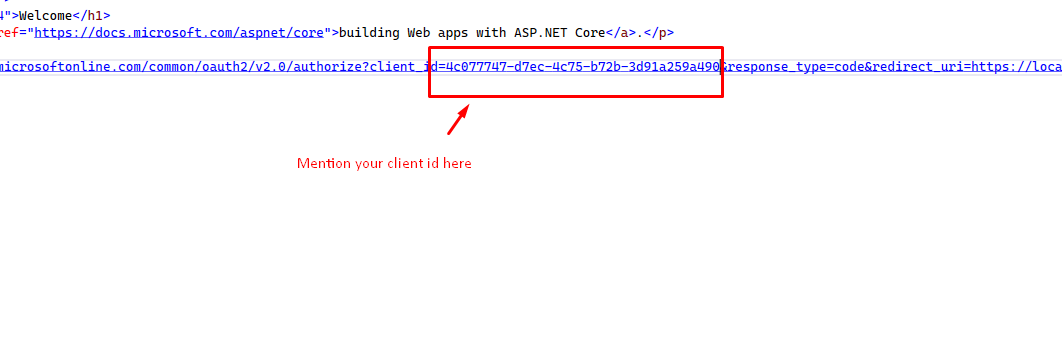
Replace this client id and redirect URL, with your created credentials
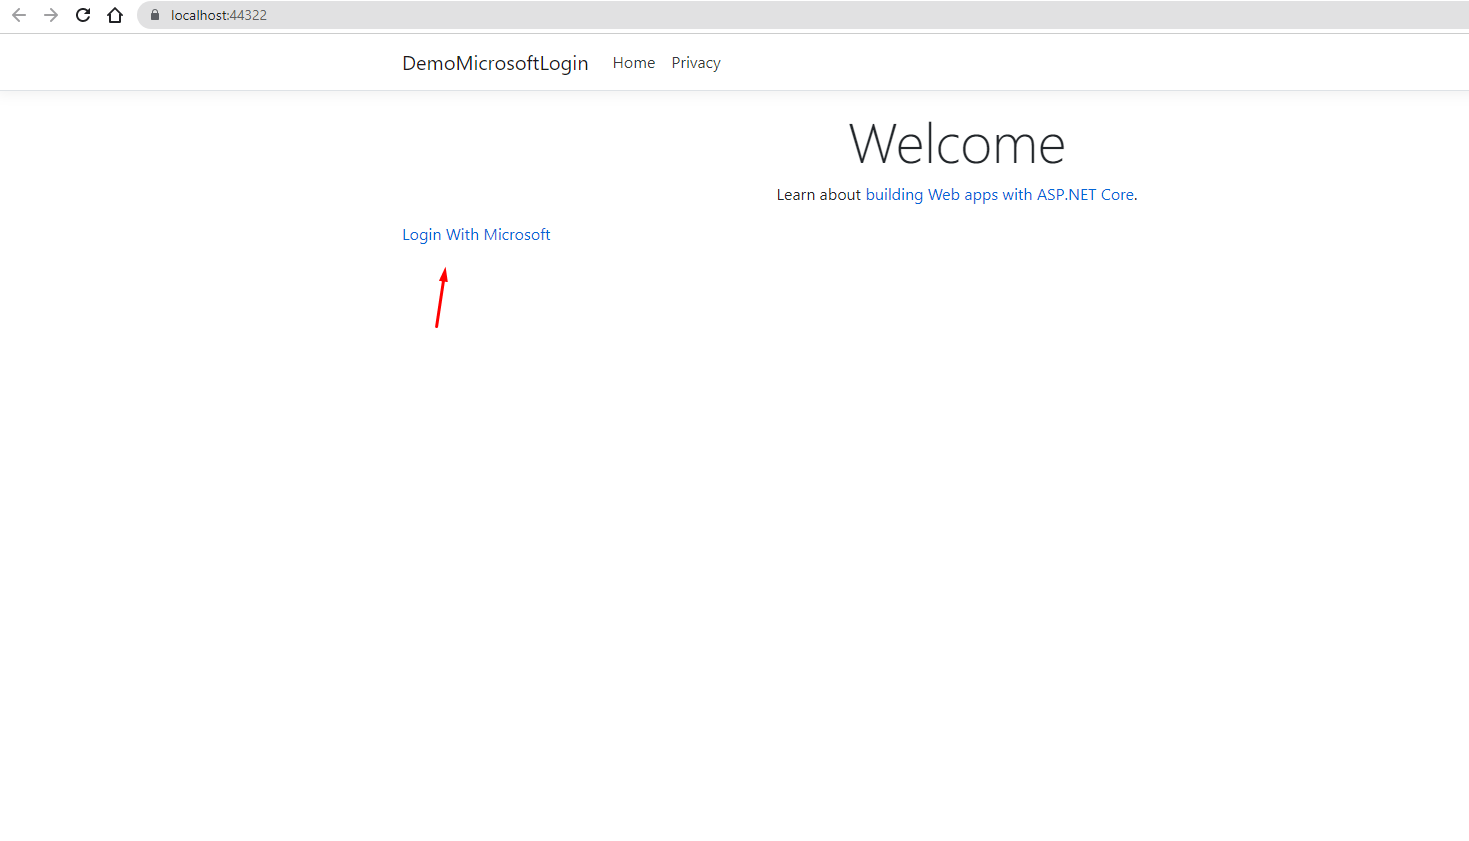
Now you can run the project and see you will see Login with Microsoft button, now on clicking that it will go to the Google sign-in screen
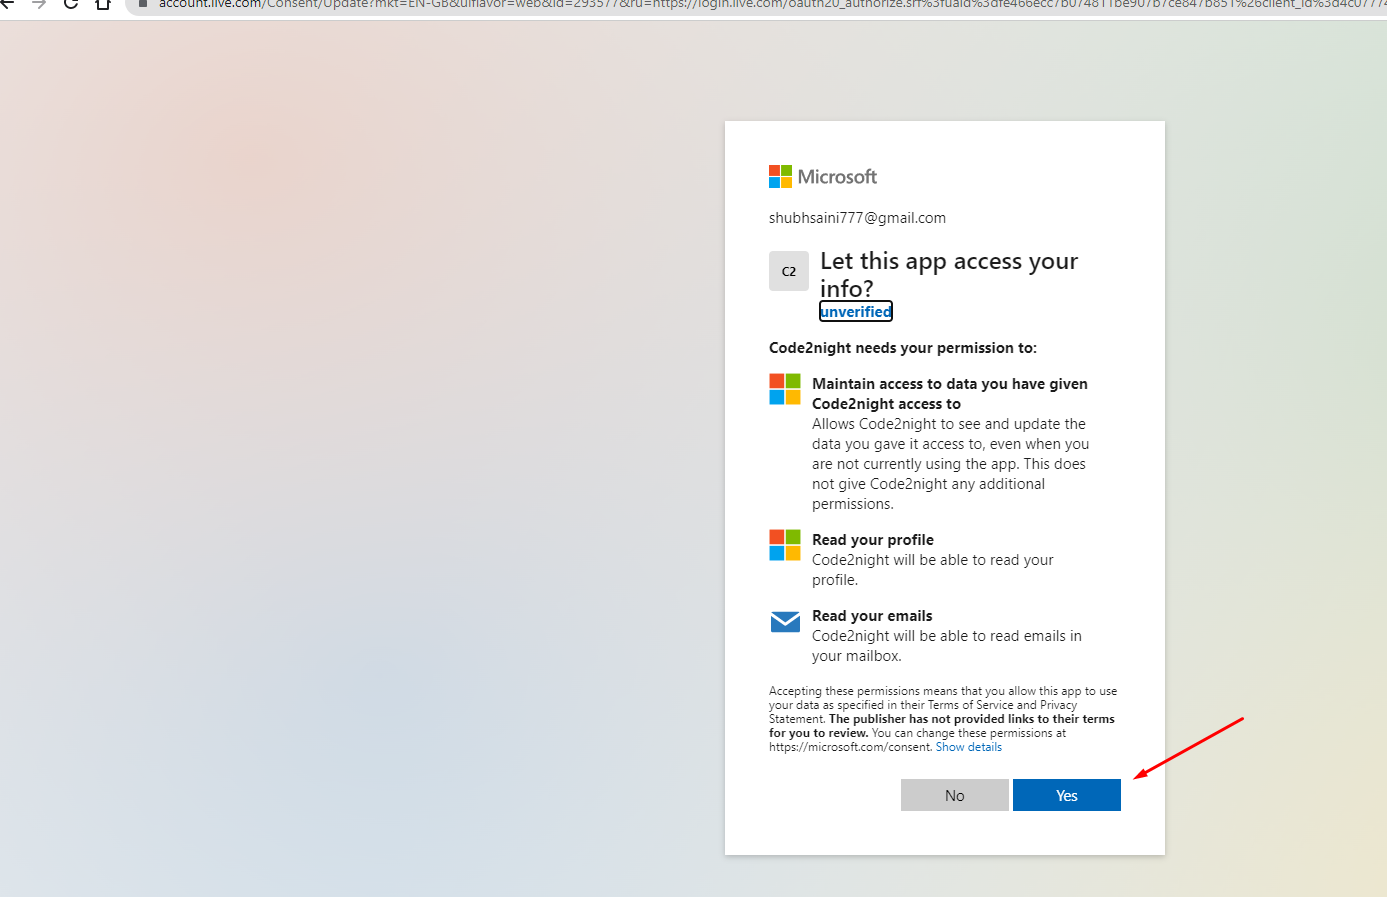
This is what you will get after clicking on the button, you can Add a new Google account or use an existing one. On the selection, it will go to your callback method.
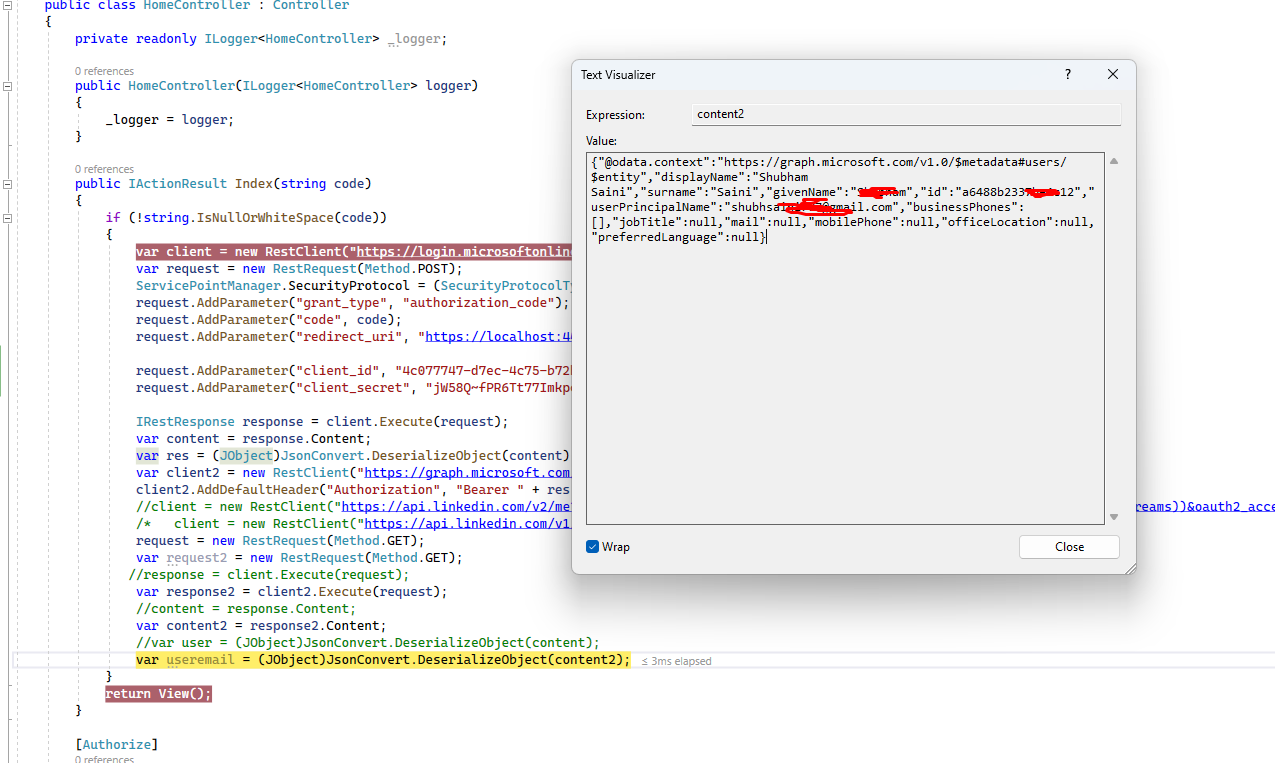
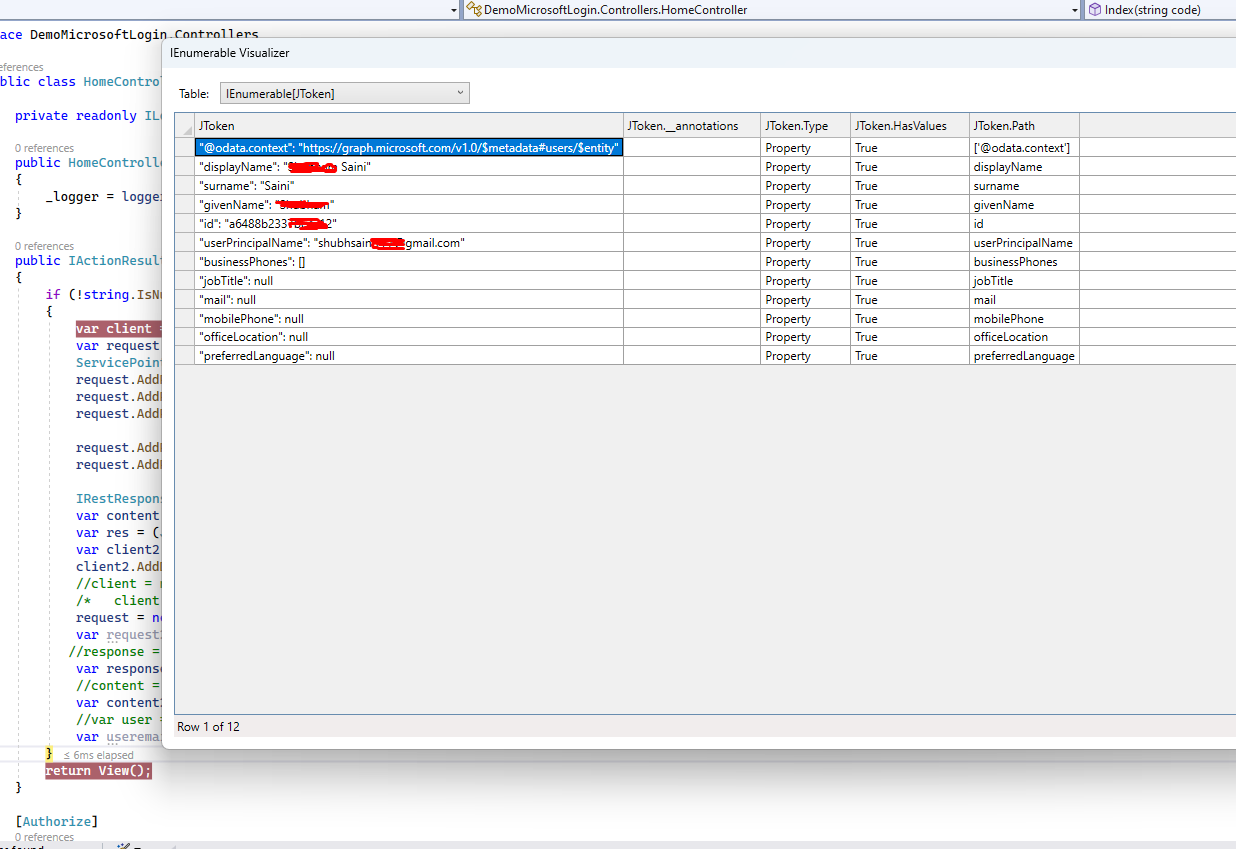
You will get the logged-in user details like this in the callback method.
 You can get the complete code by downloading the attachment. Let us know if you face any issues.
This is how we can implement Login With Microsoft in .Net.
