Integrating ChatGPT API in ASP.NET
Integrating ChatGPT API in ASP.NET MVC
In this tutorial, we'll explore how to integrate the ChatGPT API into an ASP.NET MVC application. The ChatGPT API, provided by OpenAI, allows developers to interact with the powerful language model for various applications like chatbots, content generation, and more.
Prerequisites
Before you begin, ensure you have:
- An ASP.NET MVC project set up.
- A valid API key from OpenAI for accessing the ChatGPT API.
- The
Newtonsoft.Jsonpackage installed for handling JSON serialization.
Step-by-Step Code Explanation
1. Setting Up the Controller
The first step is to create a controller named HomeController that will handle the API integration. Here's a breakdown of the key components:
using Newtonsoft.Json;
using System;
using System.Collections.Generic;
using System.Configuration;
using System.Linq;
using System.Net.Http;
using System.Net.Http.Headers;
using System.Text;
using System.Threading.Tasks;
using System.Web;
using System.Web.Mvc;
Imports: The necessary namespaces are imported, including Newtonsoft.Json for JSON serialization and System.Net.Http for making HTTP requests.
2. Defining the API URL
private static readonly string apiUrl = "https://api.openai.com/v1/chat/completions";API URL: The API endpoint for sending requests to the ChatGPT API is defined as a static string.
3. Creating the Index Action
public ActionResult Index()
{
    return View();
}
Index Action: The Index action returns the default view for the HomeController. This view could contain a form where users can input their prompts.
4. Handling the POST Request
[HttpPost]
public async Task<ActionResult> GetChatGptResponse(string prompt)
{
    var response = await GetChatGPTResponseAsync(prompt);
    return Json(response);
}
GetChatGptResponse Action: This action handles the form submission when a user provides a prompt. It calls the GetChatGPTResponseAsync method, passing the user’s prompt, and then returns the API's response as a JSON object.
5. Making the API Request
private async Task<string> GetChatGPTResponseAsync(string prompt)
{
    var apiKey = ConfigurationManager.AppSettings["chatgptapiKey"].ToString();
    using (var client = new HttpClient())
    {
        client.DefaultRequestHeaders.Authorization = new AuthenticationHeaderValue("Bearer", apiKey);

        var requestBody = new
        {
            model = "gpt-3.5-turbo",
            messages = new[]
            {
                new { role = "system", content = "You are a helpful assistant." },
                new { role = "user", content = prompt }
            },
            max_tokens = 100
        };

        var content = new StringContent(JsonConvert.SerializeObject(requestBody), Encoding.UTF8, "application/json");

        var response = await client.PostAsync(apiUrl, content);
        response.EnsureSuccessStatusCode();

        var responseBody = await response.Content.ReadAsStringAsync();
        dynamic result = JsonConvert.DeserializeObject(responseBody);

        return result.choices[0].message.content.ToString();
    }
}
GetChatGPTResponseAsync Method: This method performs the core functionality of sending the prompt to the ChatGPT API and returning the response.
- API Key: The API key is retrieved from the
web.configfile usingConfigurationManager.AppSettings["chatgptapiKey"]. - HttpClient: A new instance of
HttpClientis used to make the POST request. - Request Body: The request body is constructed with the necessary parameters, including the model name, the user's prompt, and a maximum token limit.
- Sending the Request: The request is sent asynchronously using
PostAsync, and the response is processed. - Processing the Response: The response is deserialized, and the content of the message from the first choice is returned as a string.
6. Add View Code
<div>
    <label for="prompt">Enter your prompt:</label>
    <input type="text" id="prompt" name="prompt" />
    <button id="sendButton">Send</button>
</div>

<div id="responseContainer">
    <h3>Response:</h3>
    <p id="responseText"></p>
</div>

@section Scripts {
    <script src="https://ajax.googleapis.com/ajax/libs/jquery/3.5.1/jquery.min.js"></script>
    <script type="text/javascript">
        $(document).ready(function () {
            $('#sendButton').click(function () {
                var prompt = $('#prompt').val();
                $.post('/Home/GetChatGptResponse', { prompt: prompt }, function (result) {
                    $('#responseText').text(result);
                })
             });
        });
    </script>
}
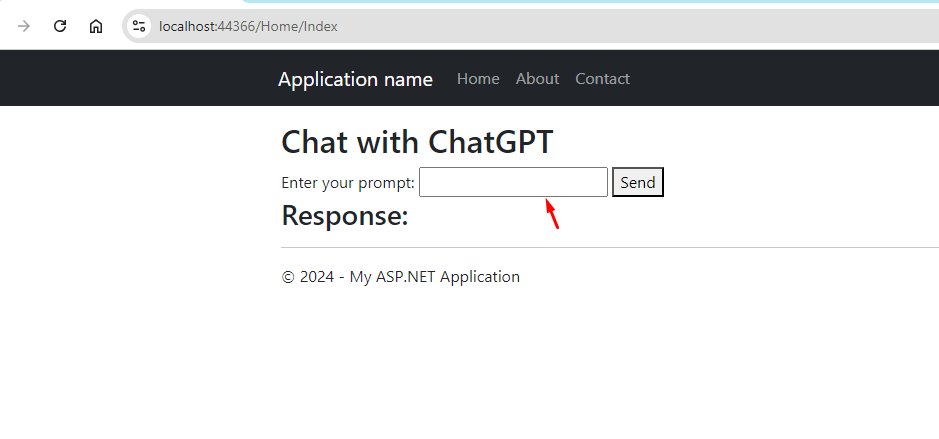
7. Run the Application
Now run the application and you will see below screen
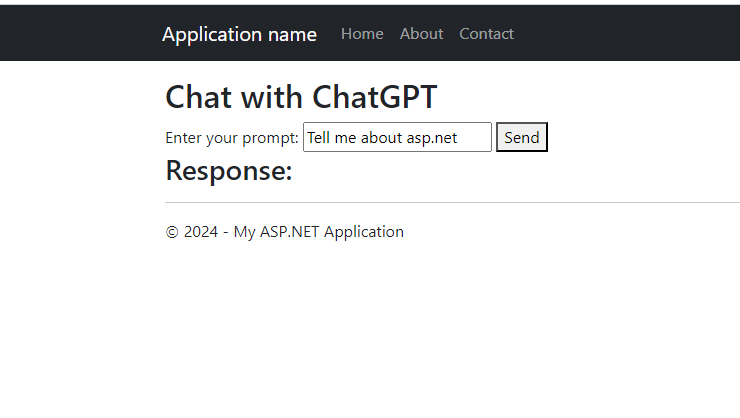
Now search something here
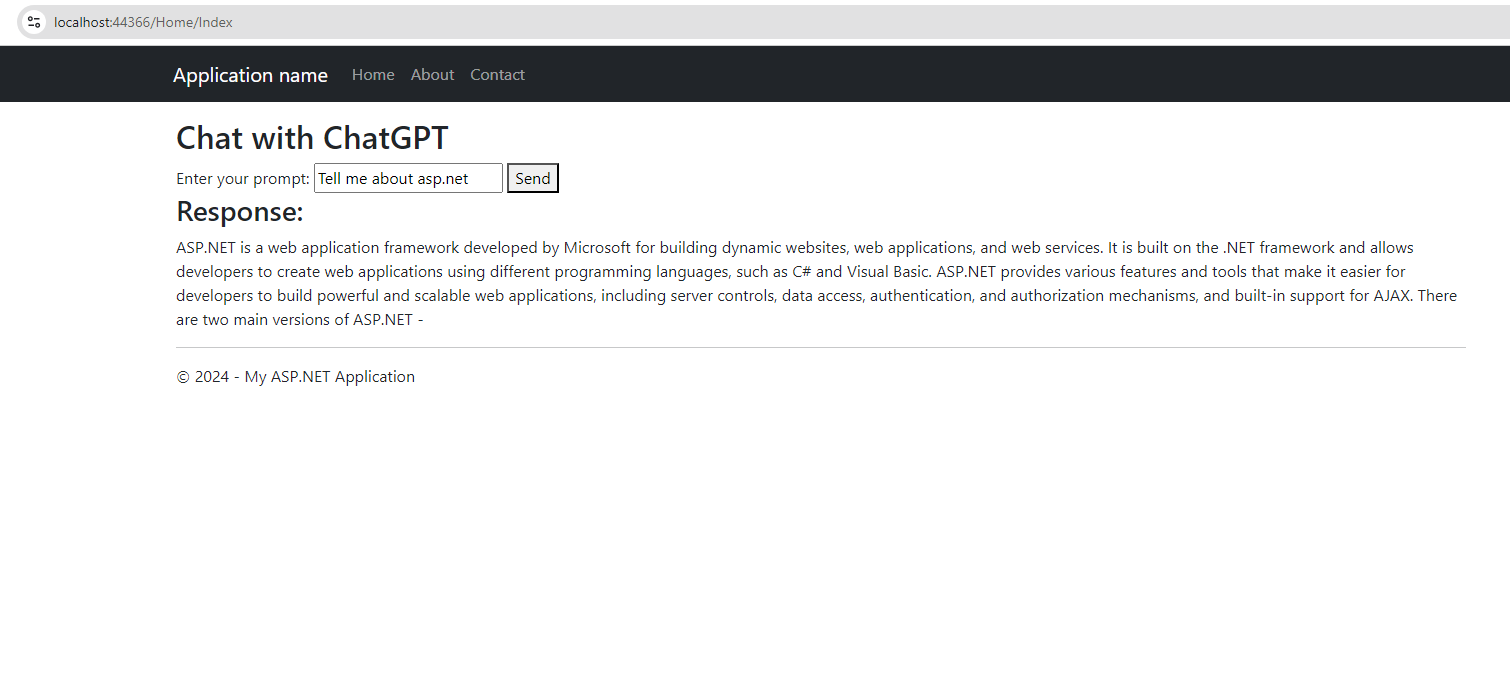
 Result
Conclusion
With this setup, you now have a basic ASP.NET MVC application that can send prompts to the ChatGPT API and display the responses. This integration opens up many possibilities for creating intelligent applications powered by OpenAI's GPT models. So this is how we can integrate chatgpt api in asp.net application
 public class HomeController : Controller
 {
     private static readonly string TranslatorEndpoint = "https://api.cognitive.microsofttranslator.com/translate?api-version=3.0";
     private static readonly string SubscriptionKey = "C5QXgp5nKcnCEVtqdADBWBo5SDoarA1ilMnRHb4BOJljBsFAdVicJQQJ99BAACGhslBXJ3w3AAAbACOGL"; // Replace with your Azure key
     private static readonly string Region = "centralindia"; // Replace with your Azure region if applicable


     protected override void OnActionExecuting(ActionExecutingContext filterContext)
     {
         string culture = (string)filterContext.RouteData.Values["lang"] ?? "en";
         Thread.CurrentThread.CurrentCulture = new CultureInfo(culture);
         Thread.CurrentThread.CurrentUICulture = new CultureInfo(culture);

         base.OnActionExecuting(filterContext);
     }
     public async Task<ActionResult> Index()
     {
      var data=   await TranslateTextAsync("Contact");
         return View();
     }
     private async Task<string> TranslateTextAsync(string text, string targetLanguage="es")
     {
         using (HttpClient client = new HttpClient())
         {
             client.DefaultRequestHeaders.Add("Ocp-Apim-Subscription-Key", SubscriptionKey);
             client.DefaultRequestHeaders.Add("Ocp-Apim-Subscription-Region", Region);

             var requestBody = new[]
             {
             new { Text = text }
         };

             string requestJson = JsonConvert.SerializeObject(requestBody);
             StringContent content = new StringContent(requestJson, Encoding.UTF8, "application/json");

             HttpResponseMessage response = await client.PostAsync($"{TranslatorEndpoint}&to={targetLanguage}", content);
             response.EnsureSuccessStatusCode();

             string responseJson = await response.Content.ReadAsStringAsync();
             var translations = JsonConvert.DeserializeObject<dynamic>(responseJson);
             return translations[0].translations[0].text;
         }
     }
     public ActionResult About()
     {
         ViewBag.Message = "Your application description page.";

         return View();
     }

     public ActionResult Contact()
     {
         ViewBag.Message = "Your contact page.";

         return View();
     }
 }
