
Implement RazorPay Payment Gateway in Asp.net MVC
This tutorial demonstrates how to accept payments with RazorPay Checkout in an ASP.NET MVC application built with C#. The application uses Checkout to accept payments from the card and UPI and demonstrates step by step tutorial.
Razor Pay is a payment gateway that supports payments internationally. In this article, we will be following all steps that we need to implement the Razorpay payment gateway in asp.net mvc.
Code2Night offers a comprehensive guide to help you integrate the RazorPay payment gateway with your Asp.net application.
So first of all you have to create one new asp.net MVC project and after creating the project you have to go to
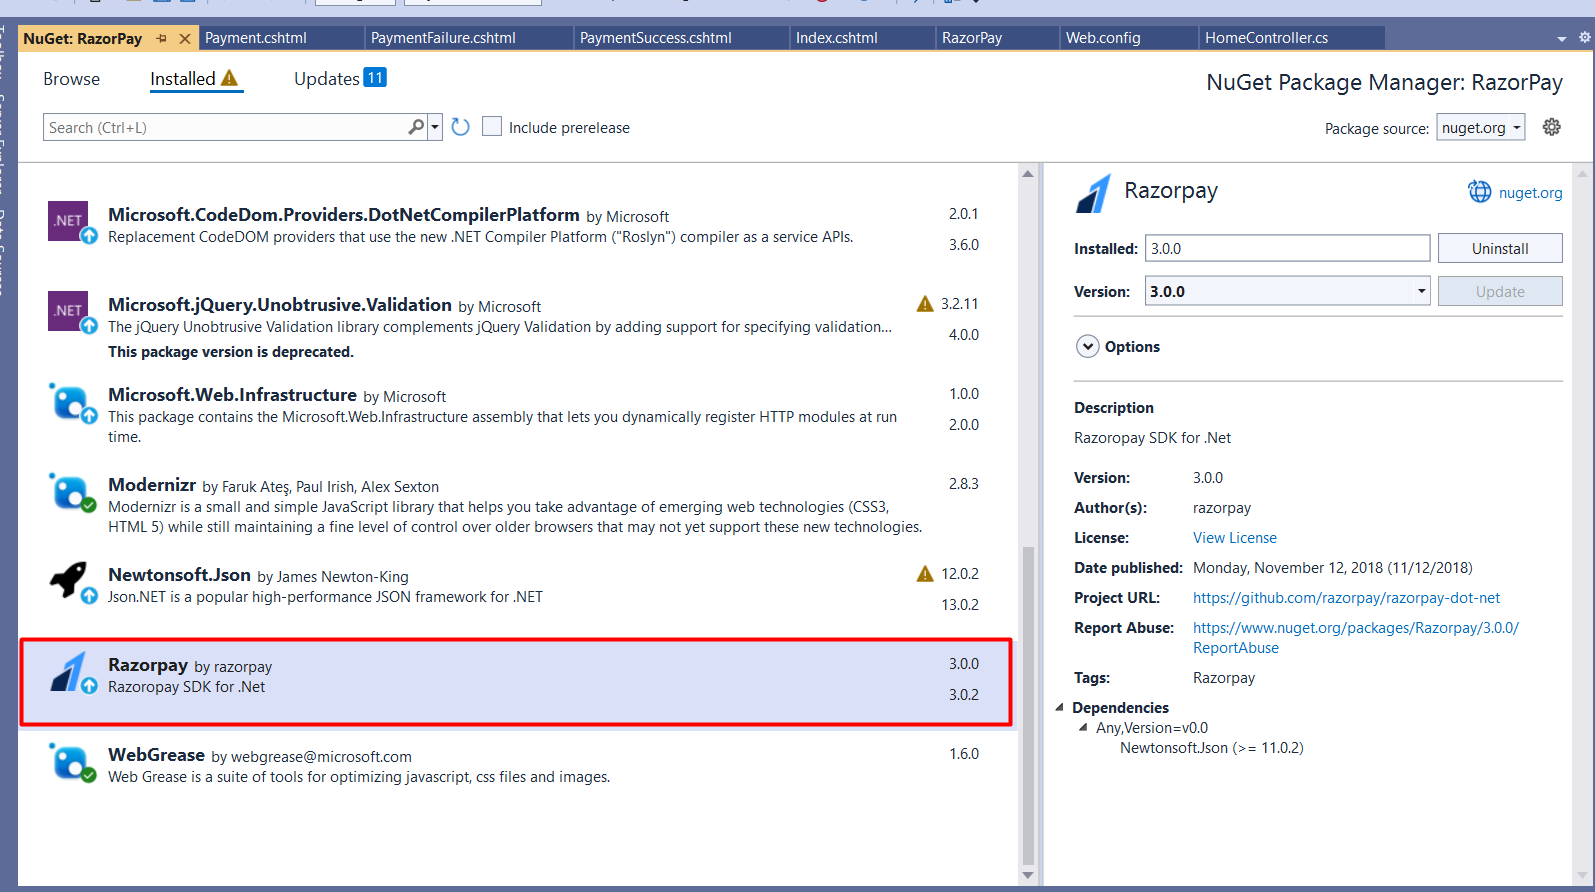
Project -> Manage Nuget Packages
Now search for RazorPay and install version 3.0.0 as you can see in the image below
Adding Client Key and Client Secret
Now we have to get the RazorPay credentials which basically include the client key and client secret and we will add those in the web.config. You can see in the below image we have added the two keys
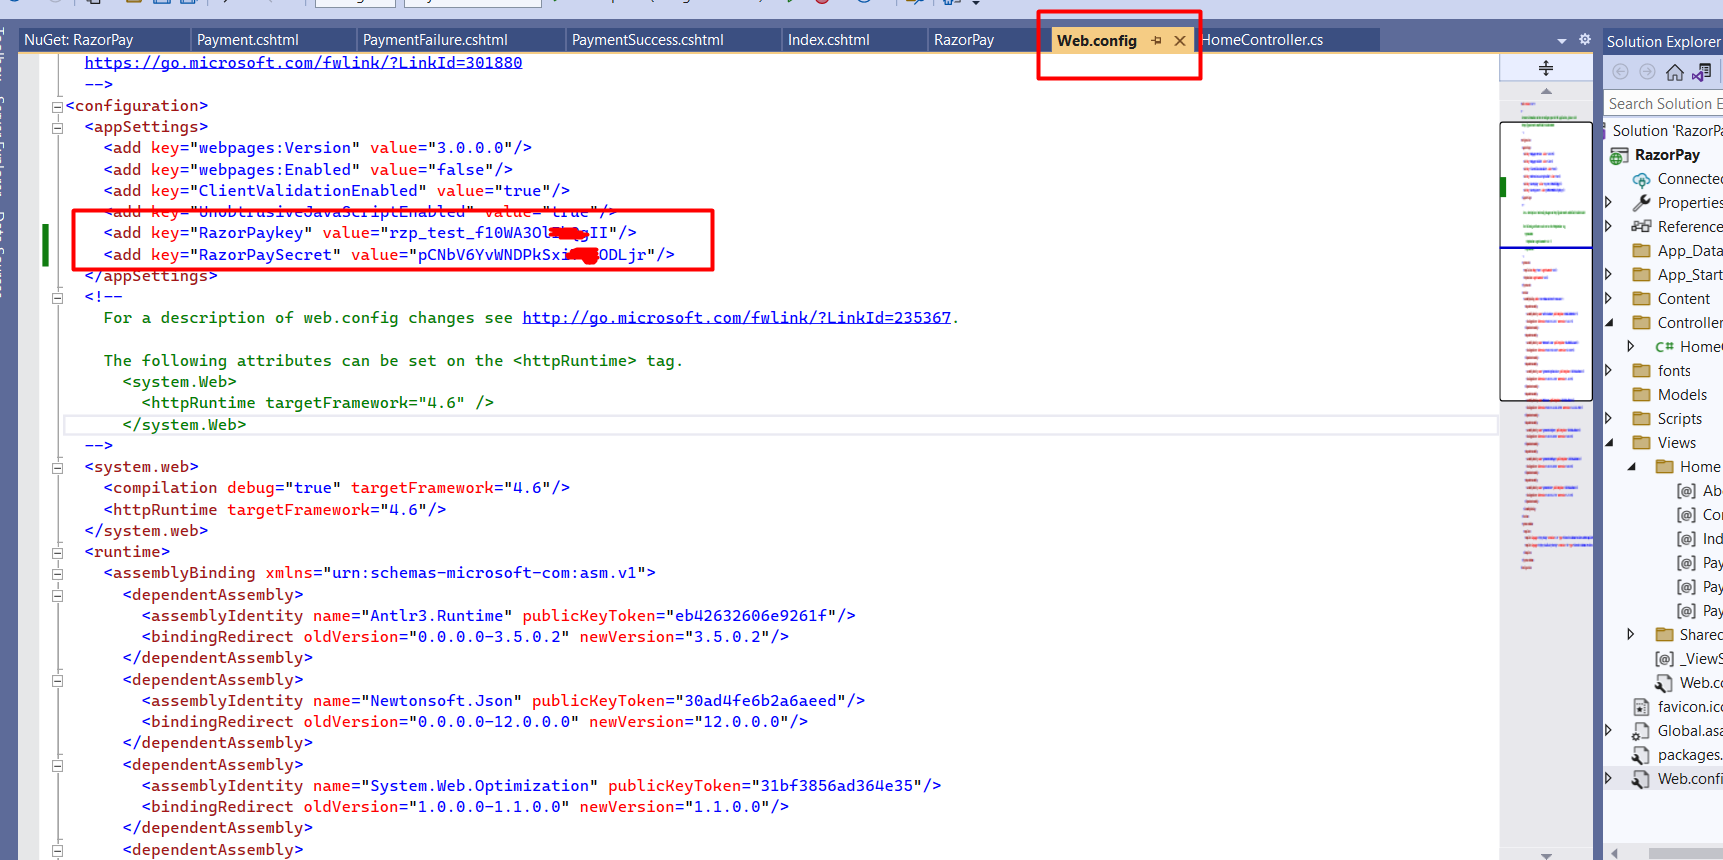
You can also copy the keys below
<?xml version="1.0"?>
<!--
For more information on how to configure your ASP.NET application, please visit
https://go.microsoft.com/fwlink/?LinkId=301880
-->
<configuration>
<appSettings>
<add key="webpages:Version" value="3.0.0.0"/>
<add key="webpages:Enabled" value="false"/>
<add key="ClientValidationEnabled" value="true"/>
<add key="UnobtrusiveJavaScriptEnabled" value="true"/>
<add key="RazorPaykey" value="rzp_test_f10WA$GHIkQgII"/>
<add key="RazorPaySecret" value="pCNbV6YvWNDPkSxVGH2ODLjr"/>
</appSettings>
<!--
For a description of web.config changes see http://go.microsoft.com/fwlink/?LinkId=235367.
The following attributes can be set on the <httpRuntime> tag.
<system.Web>
<httpRuntime targetFramework="4.6" />
</system.Web>
-->
<system.web>
<compilation debug="true" targetFramework="4.6"/>
<httpRuntime targetFramework="4.6"/>
</system.web>
<runtime>
<assemblyBinding xmlns="urn:schemas-microsoft-com:asm.v1">
<dependentAssembly>
<assemblyIdentity name="Antlr3.Runtime" publicKeyToken="eb42632606e9261f"/>
<bindingRedirect oldVersion="0.0.0.0-3.5.0.2" newVersion="3.5.0.2"/>
</dependentAssembly>
<dependentAssembly>
<assemblyIdentity name="Newtonsoft.Json" publicKeyToken="30ad4fe6b2a6aeed"/>
<bindingRedirect oldVersion="0.0.0.0-12.0.0.0" newVersion="12.0.0.0"/>
</dependentAssembly>
<dependentAssembly>
<assemblyIdentity name="System.Web.Optimization" publicKeyToken="31bf3856ad364e35"/>
<bindingRedirect oldVersion="1.0.0.0-1.1.0.0" newVersion="1.1.0.0"/>
</dependentAssembly>
<dependentAssembly>
<assemblyIdentity name="WebGrease" publicKeyToken="31bf3856ad364e35"/>
<bindingRedirect oldVersion="0.0.0.0-1.6.5135.21930" newVersion="1.6.5135.21930"/>
</dependentAssembly>
<dependentAssembly>
<assemblyIdentity name="System.Web.Helpers" publicKeyToken="31bf3856ad364e35"/>
<bindingRedirect oldVersion="1.0.0.0-3.0.0.0" newVersion="3.0.0.0"/>
</dependentAssembly>
<dependentAssembly>
<assemblyIdentity name="System.Web.WebPages" publicKeyToken="31bf3856ad364e35"/>
<bindingRedirect oldVersion="1.0.0.0-3.0.0.0" newVersion="3.0.0.0"/>
</dependentAssembly>
<dependentAssembly>
<assemblyIdentity name="System.Web.Mvc" publicKeyToken="31bf3856ad364e35"/>
<bindingRedirect oldVersion="1.0.0.0-5.2.7.0" newVersion="5.2.7.0"/>
</dependentAssembly>
</assemblyBinding>
</runtime>
<system.codedom>
<compilers>
<compiler language="c#;cs;csharp" extension=".cs" type="Microsoft.CodeDom.Providers.DotNetCompilerPlatform.CSharpCodeProvider, Microsoft.CodeDom.Providers.DotNetCompilerPlatform, Version=2.0.1.0, Culture=neutral, PublicKeyToken=31bf3856ad364e35" warningLevel="4" compilerOptions="/langversion:default /nowarn:1659;1699;1701"/>
<compiler language="vb;vbs;visualbasic;vbscript" extension=".vb" type="Microsoft.CodeDom.Providers.DotNetCompilerPlatform.VBCodeProvider, Microsoft.CodeDom.Providers.DotNetCompilerPlatform, Version=2.0.1.0, Culture=neutral, PublicKeyToken=31bf3856ad364e35" warningLevel="4" compilerOptions="/langversion:default /nowarn:41008 /define:_MYTYPE=\"Web\" /optionInfer+"/>
</compilers>
</system.codedom>
</configuration>Add New Controller and Views for Capturing Payment
Now, the next step we have to follow is to add new controllers and views for our Razorpay integration.
For Demo purposes, we will add one textbox to capture the amount and a payment button on Index.cshtml
Copy the code for the view from here
@{
ViewBag.Title = "Home Page";
}
<div class="jumbotron">
<h1>ASP.NET</h1>
<p class="lead">ASP.NET is a free web framework for building great Web sites and Web applications using HTML, CSS and JavaScript.</p>
<p><a href="https://asp.net" class="btn btn-primary btn-lg">Learn more »</a></p>
</div>
<form action="/Home/Initiatepayment"><input type="text" id="amount" name="amount" />
<input type="submit" value="Pay Now"/></form>
Now, on the home controller, we will add new action IntitiatePayment which will accept the amount as the parameter
using Razorpay.Api;
Add this namespace in the controller where we want to integrate RazorPay Payments
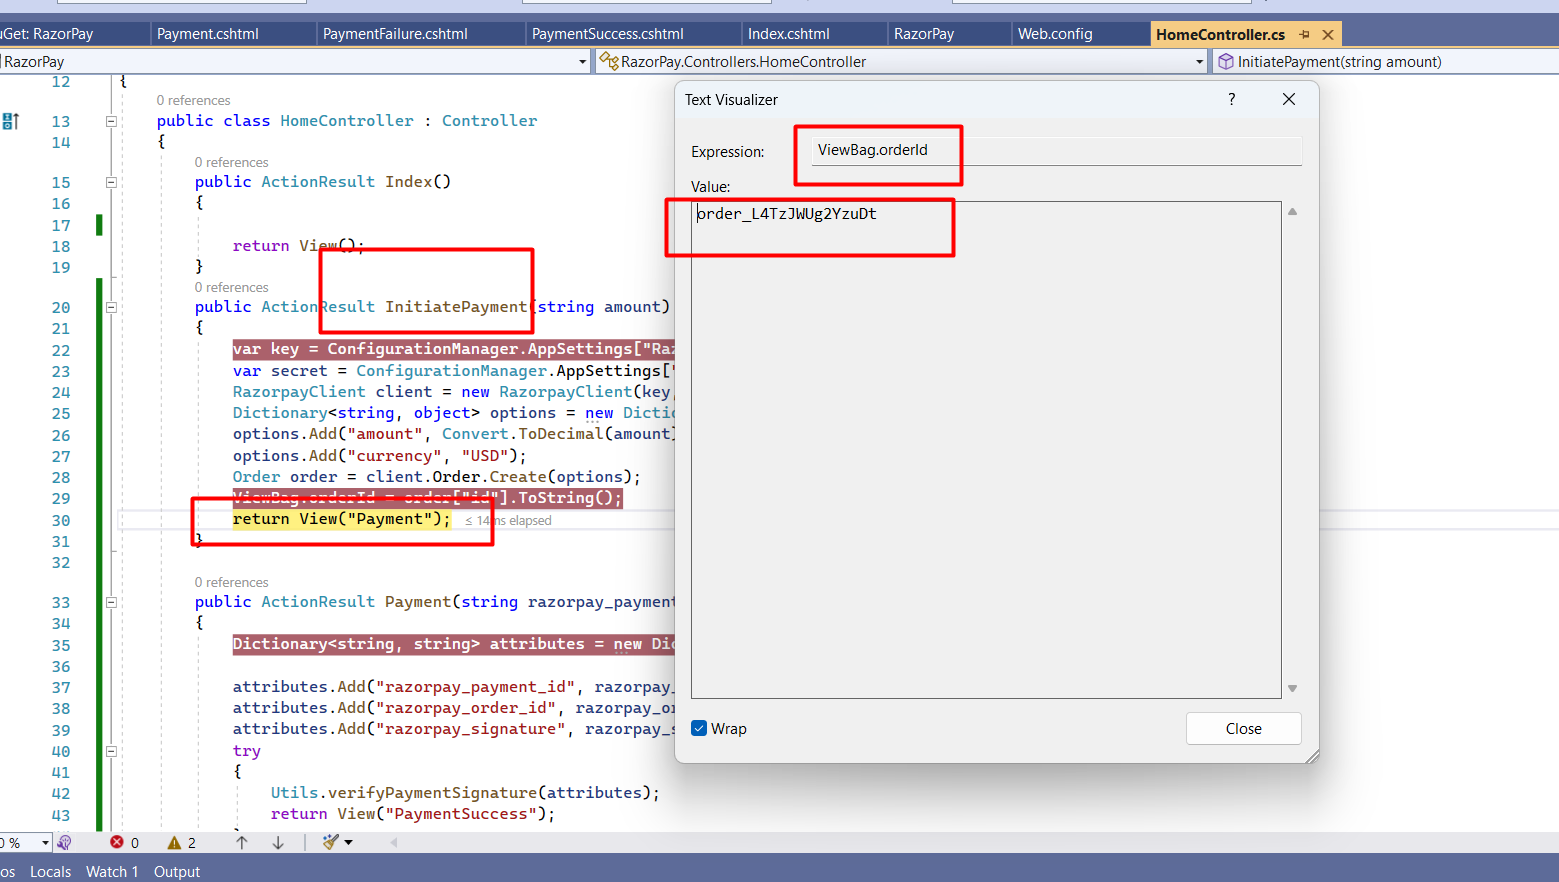
Copy the following code from here and paste it on the controller. Here in the InitiatePayment method, we are creating a new order with the amount we have entered on the screen and returning to the payment view.
using Razorpay.Api;
using System;
using System.Collections.Generic;
using System.Configuration;
using System.Linq;
using System.Security.Cryptography;
using System.Text;
using System.Web;
using System.Web.Mvc;

namespace RazorPay.Controllers
{
    public class HomeController : Controller
    {
        public ActionResult Index()
        {

            return View();
        }
        public ActionResult InitiatePayment(string amount)
        {
            var key = ConfigurationManager.AppSettings["RazorPaykey"].ToString();
            var secret = ConfigurationManager.AppSettings["RazorPaySecret"].ToString();
            RazorpayClient client = new RazorpayClient(key, secret);
            Dictionary<string, object> options = new Dictionary<string, object>();
            options.Add("amount", Convert.ToDecimal(amount) * 100);
            options.Add("currency", "USD");
            Order order = client.Order.Create(options);
            ViewBag.orderId = order["id"].ToString();
            return View("Payment");
        }

        public ActionResult Payment(string razorpay_payment_id,string razorpay_order_id,string razorpay_signature)
        {
            Dictionary<string, string> attributes = new Dictionary<string, string>();

            attributes.Add("razorpay_payment_id", razorpay_payment_id);
            attributes.Add("razorpay_order_id", razorpay_order_id);
            attributes.Add("razorpay_signature", razorpay_signature);
            try
            {
                Utils.verifyPaymentSignature(attributes);
                return View("PaymentSuccess");
            }
            catch(Exception ex)
            {
                return View("PaymentFailure");
            }
            return View();
        }

    }
}
Add new View "Payment" for checkout
Now you can copy the following code for the view and create a new view with the name "Payment" or can change the name accordingly
@{
    ViewBag.Title = "Home Page";
}


    <form action="/Home/payment" method="post" name="razorpayForm">
        <input id="razorpay_payment_id" type="hidden" name="razorpay_payment_id" />
        <input id="razorpay_order_id" type="hidden" name="razorpay_order_id" />
        <input id="razorpay_signature" type="hidden" name="razorpay_signature" />
    </form>


<body>
    <button id="rzp-button1" style="margin-top:20px">Checkout with Razorpay</button>
    <script src="https://checkout.razorpay.com/v1/checkout.js"></script>
    <script>
        var orderId = "@ViewBag.orderId"
        var options = {
            "name": "Code2night",
            "description": "Payment using Razorpay",
            "order_id": orderId,
            "image": "https://www.code2night.com/Content/code2night-C.png",
            "prefill": {
                "name": "Code2night",
                "email": "code2nightblog@gmail.com",
                "contact": "+919999999888",
            },
            "notes": {
                "address": "Test Payment"
            },
            "theme": {
                "color": "#3399cc"
            }
        }
        // Boolean whether to show image inside a white frame. (default: true)
        options.theme.image_padding = false;
        options.handler = function (response) {
            document.getElementById('razorpay_payment_id').value = response.razorpay_payment_id;
            document.getElementById('razorpay_order_id').value = orderId;
            document.getElementById('razorpay_signature').value = response.razorpay_signature;
            document.razorpayForm.submit();
        };
        options.modal = {
            ondismiss: function () {
                console.log("This code runs when the popup is closed");
            },
            // Boolean indicating whether pressing escape key
            // should close the checkout form. (default: true)
            escape: true,
            // Boolean indicating whether clicking translucent blank
            // space outside checkout form should close the form. (default: false)
            backdropclose: false
        };
        var rzp = new Razorpay(options);
        document.getElementById('rzp-button1').onclick = function (e) {
            rzp.open();
            e.preventDefault();
        }
    </script>
</body>
Here, ViewBag.OrderId is an important part as that orderId is what is returned from the controller and needed for further steps of payments. Now run the application 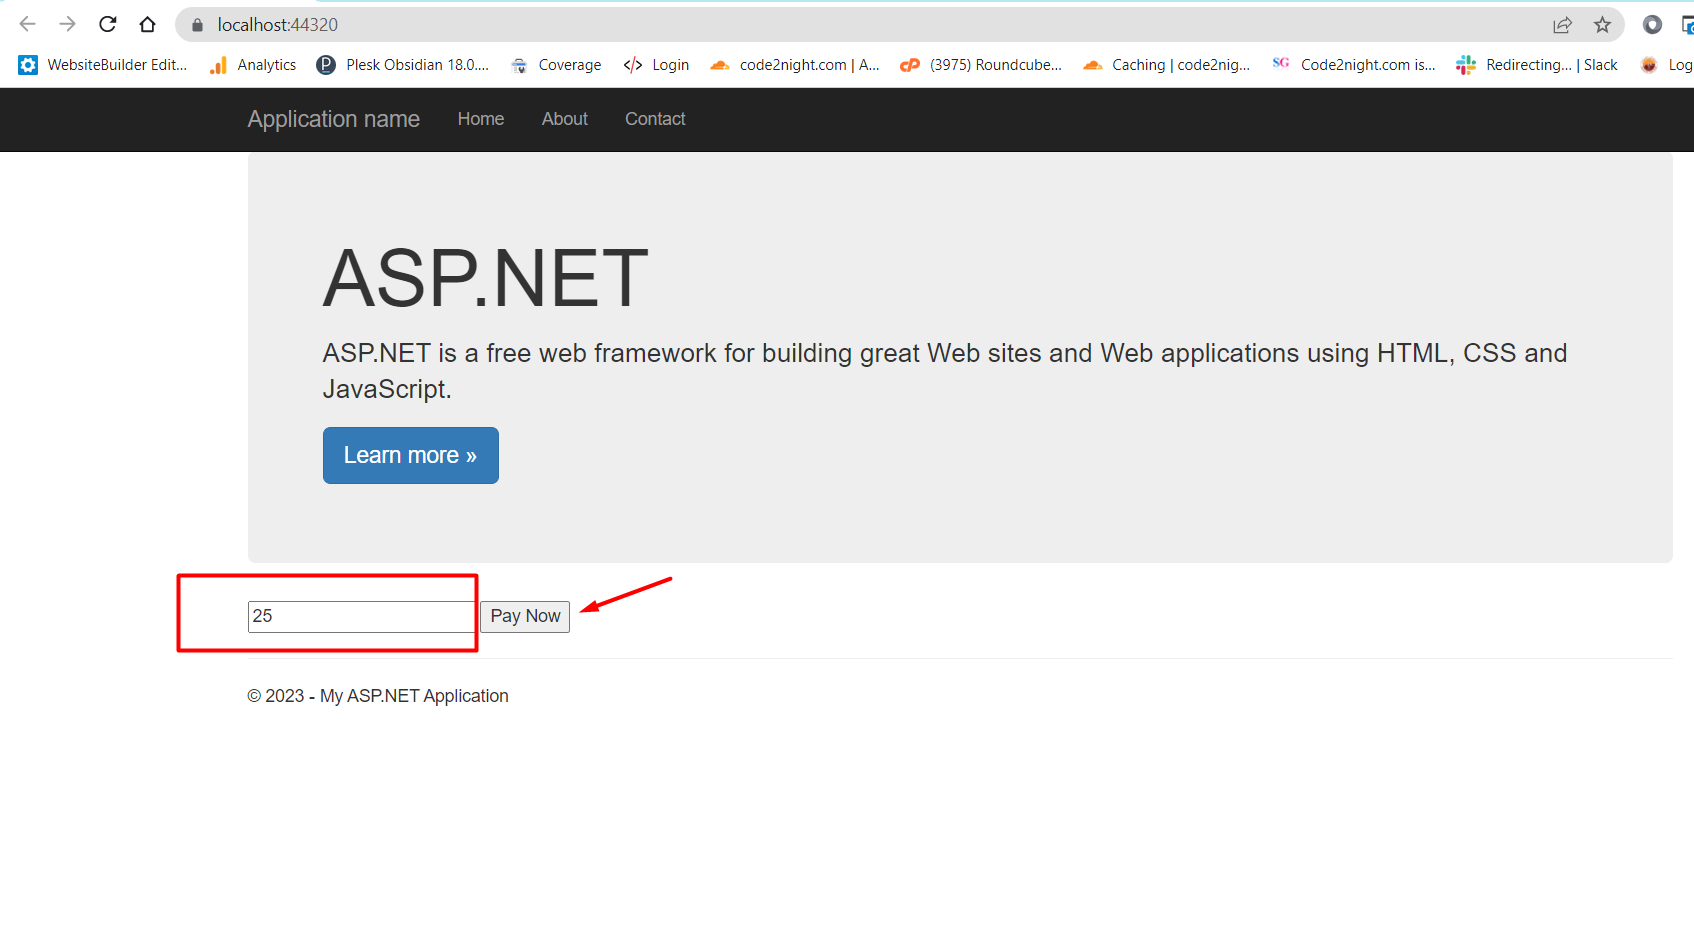
Here we will enter the amount which we want the user to pay and click on the "Pay Now" button. The form will be posted to Intiate payment action and one order will be generated which you can see in the below image
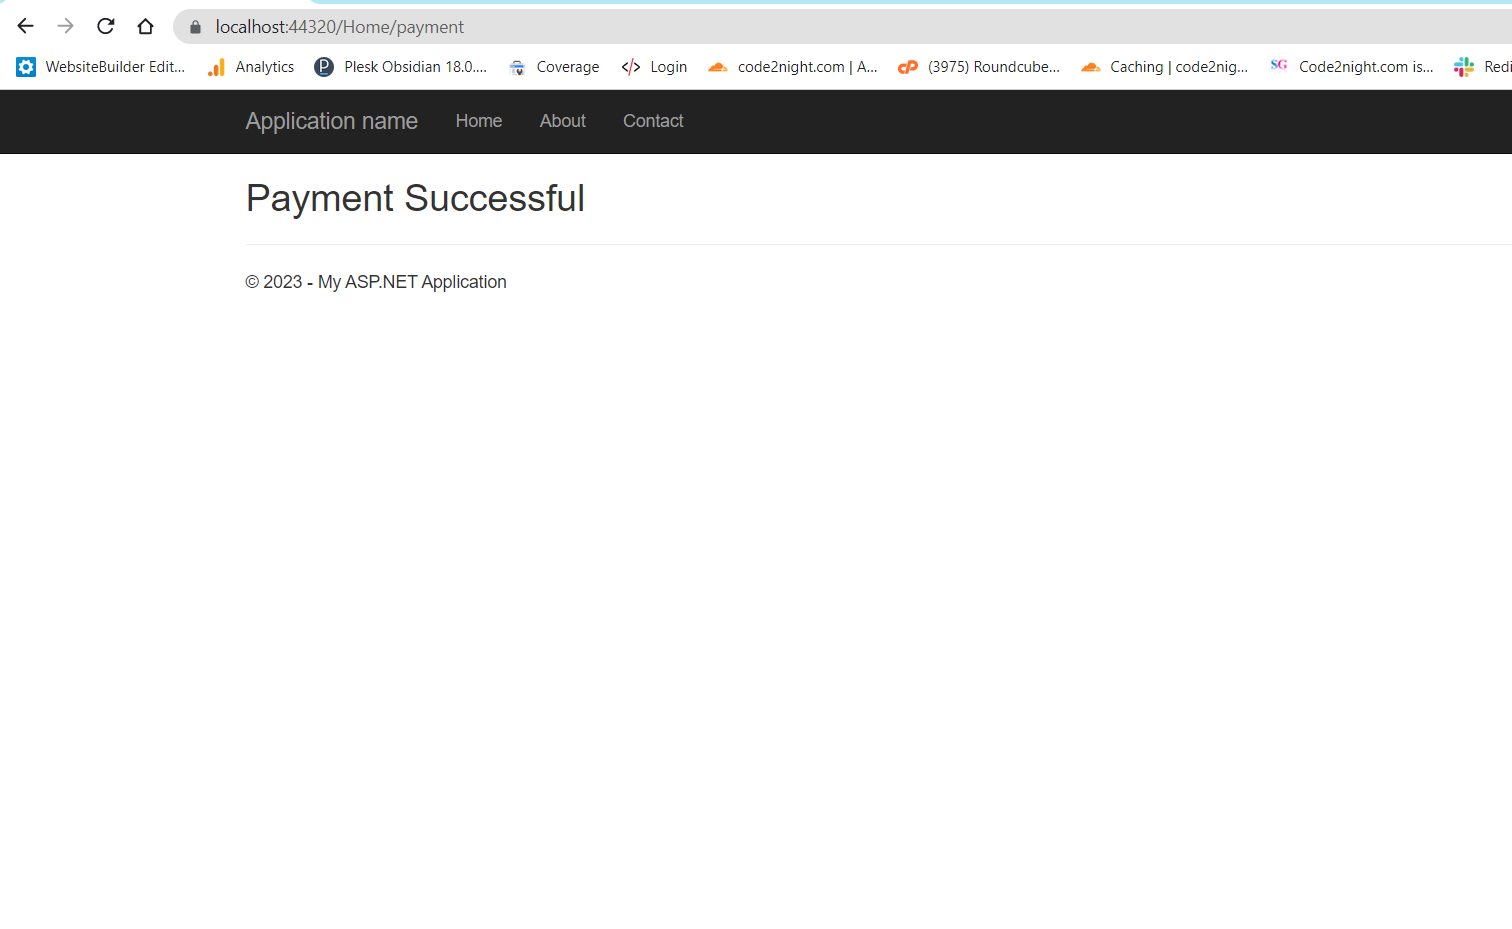
Now you will see the following page 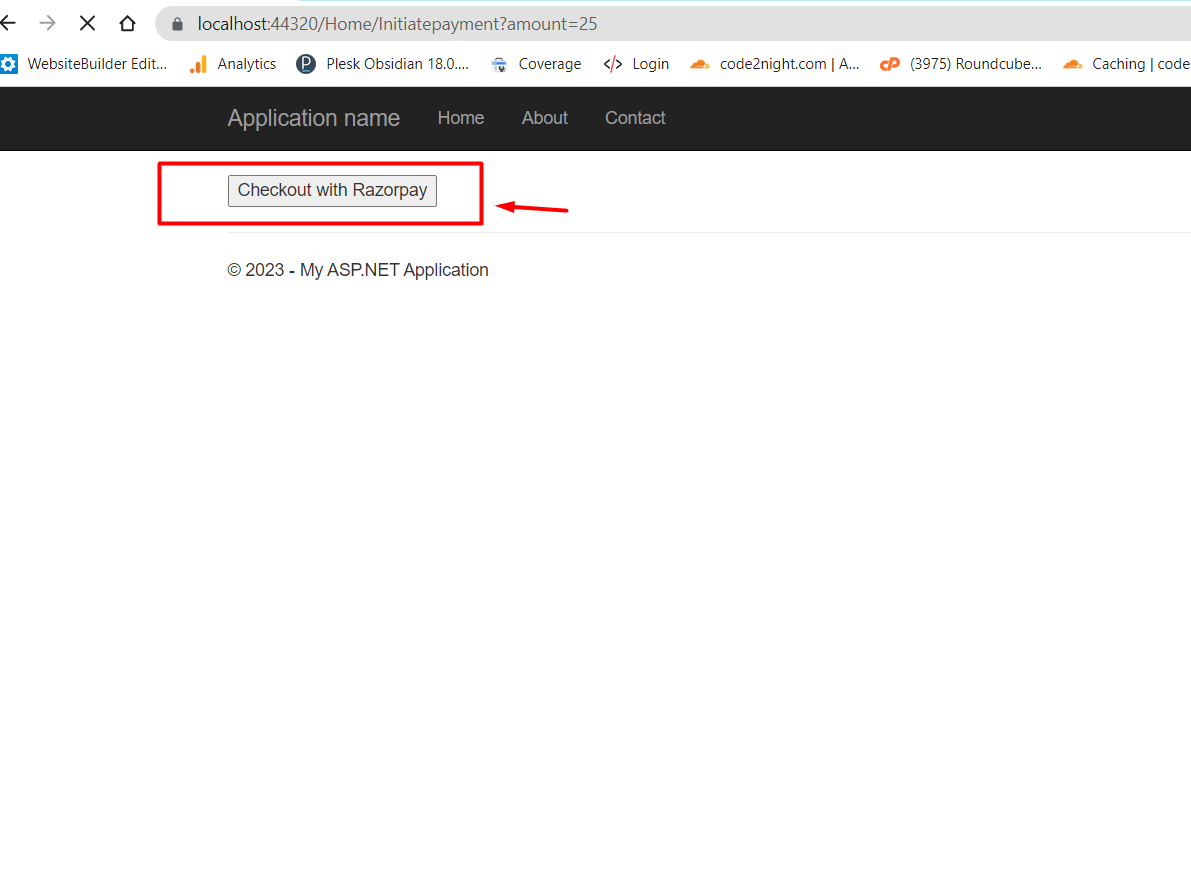
Here click on the button Checkout and following popup will open
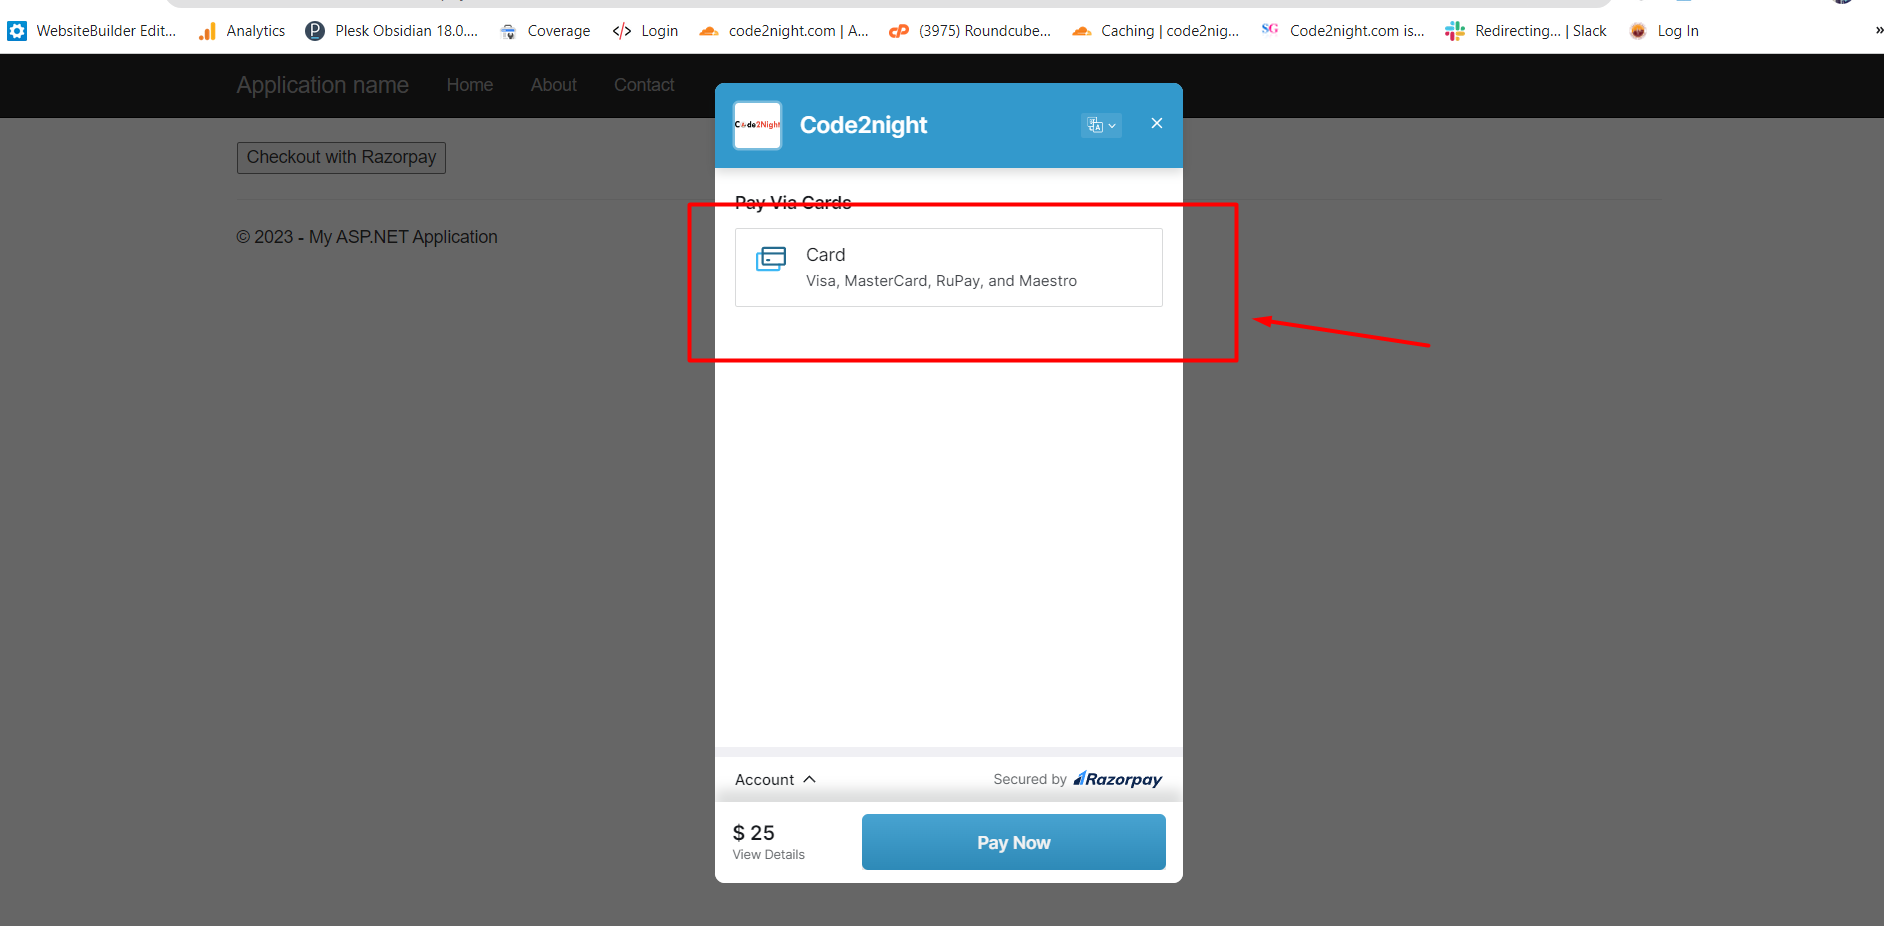
Click on card button in the popup and it will show following screen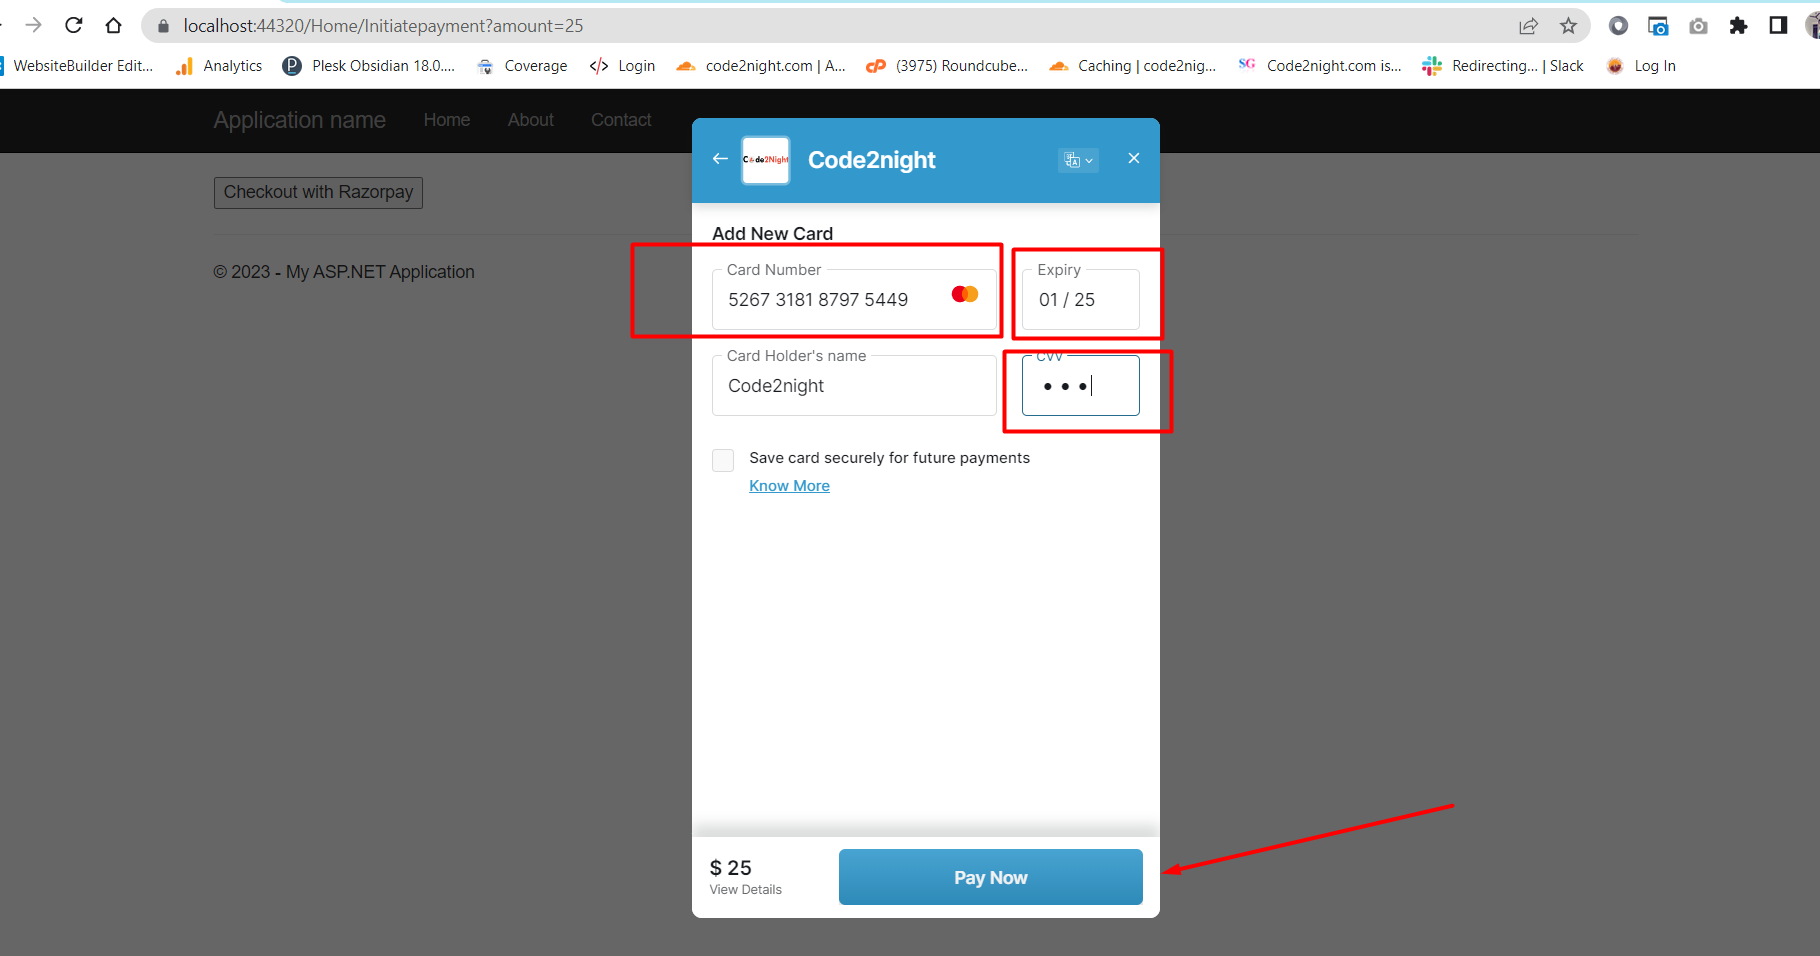
For test purposes, you can enter the following card details
Card Number- 5267 3181 8797 5449
Expiry-  01/25 (Any future date)
CVV - 567 (any random three digit)
After adding the following details, now click on Pay Now.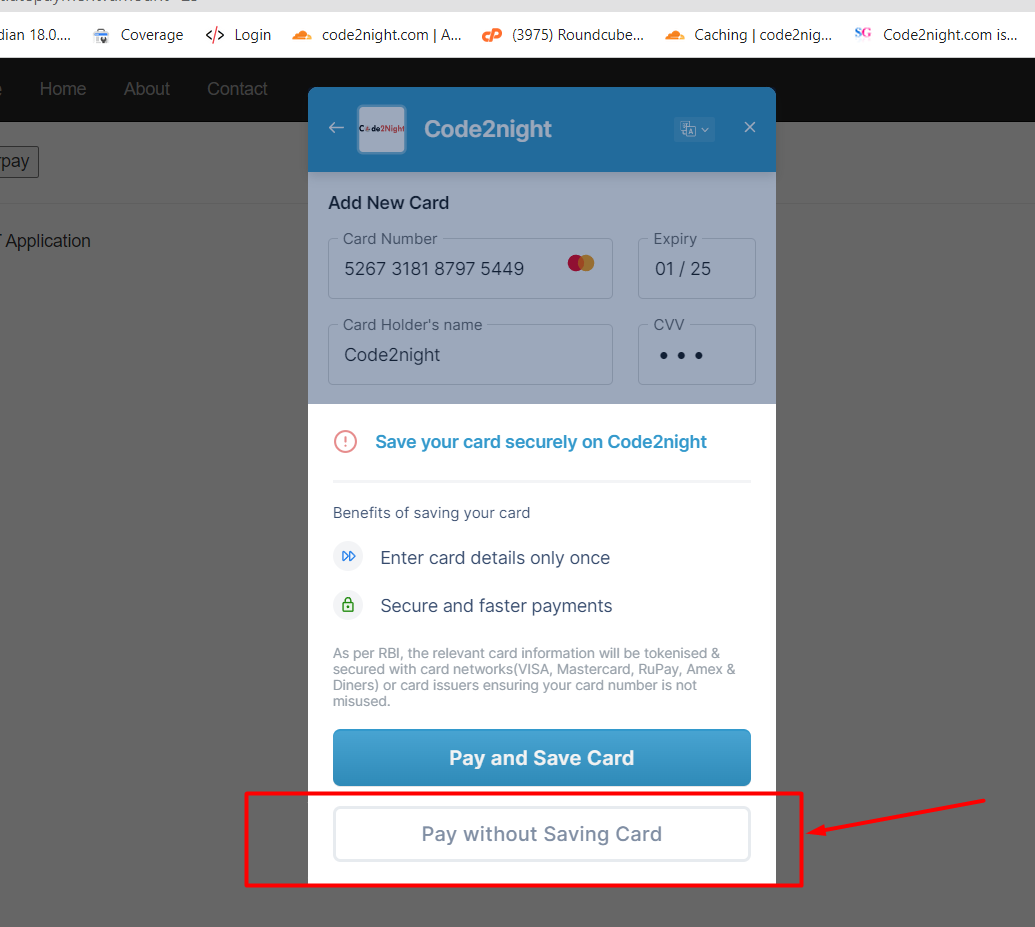
Since it is a sandbox test, you will see the following screen for the success or failure of the transaction. You can do success payment by clicking on the success button. Click on Success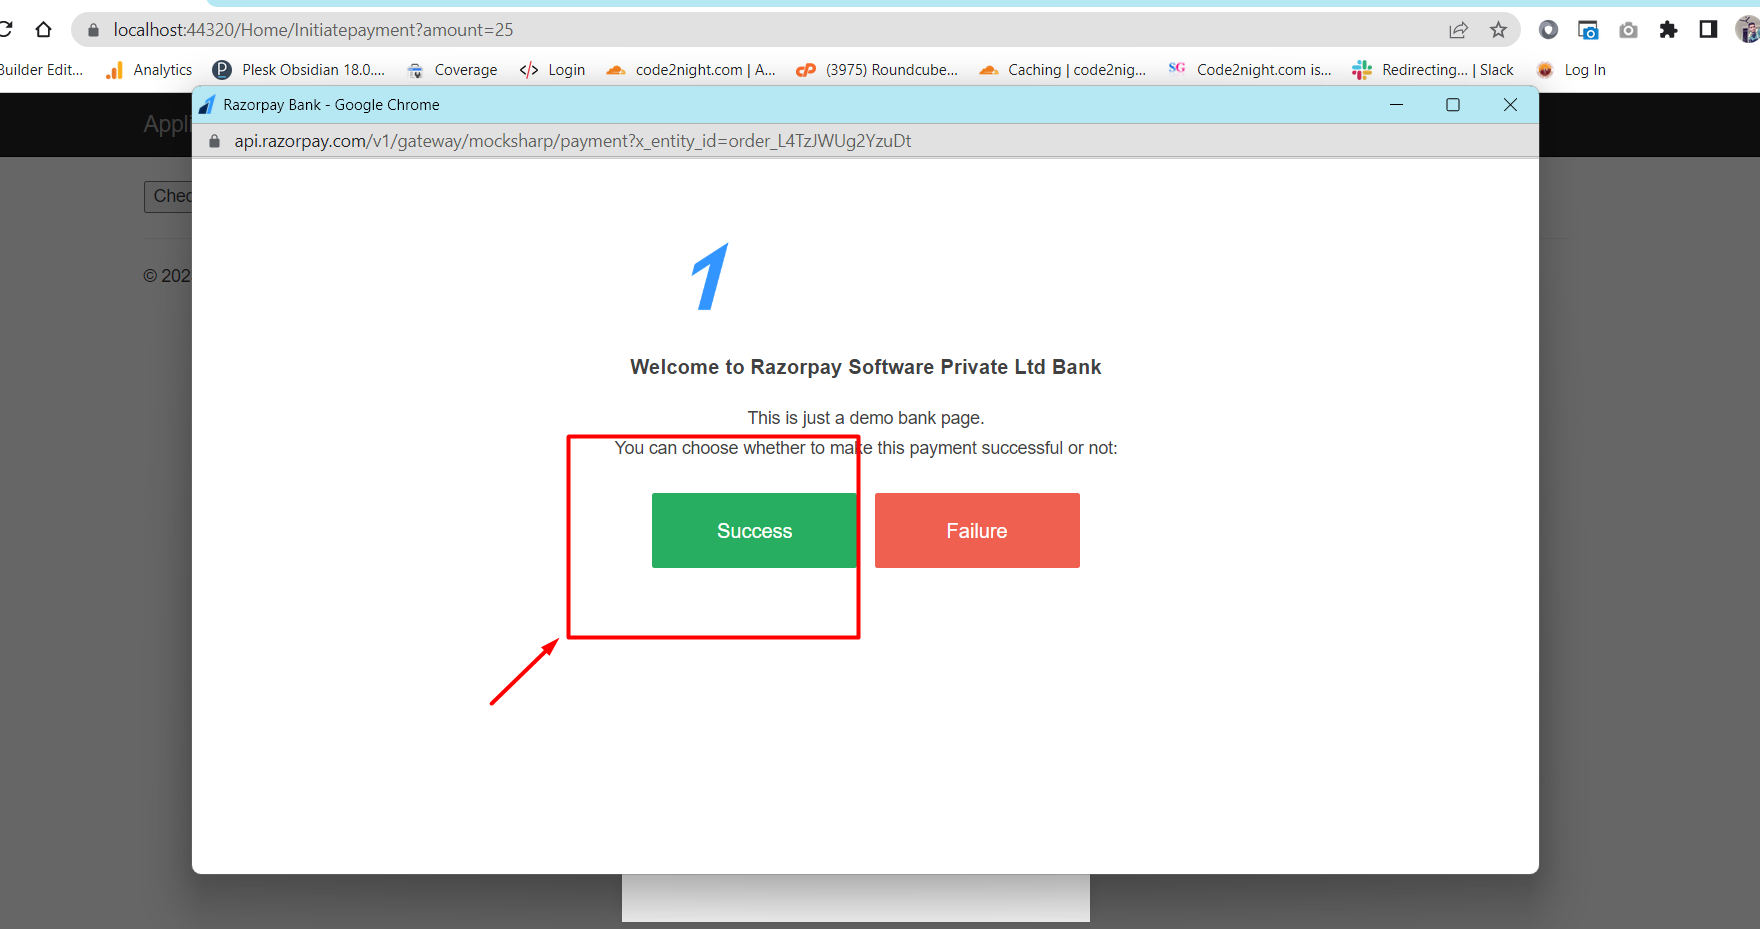
Now you can get the payment id and payment signature at
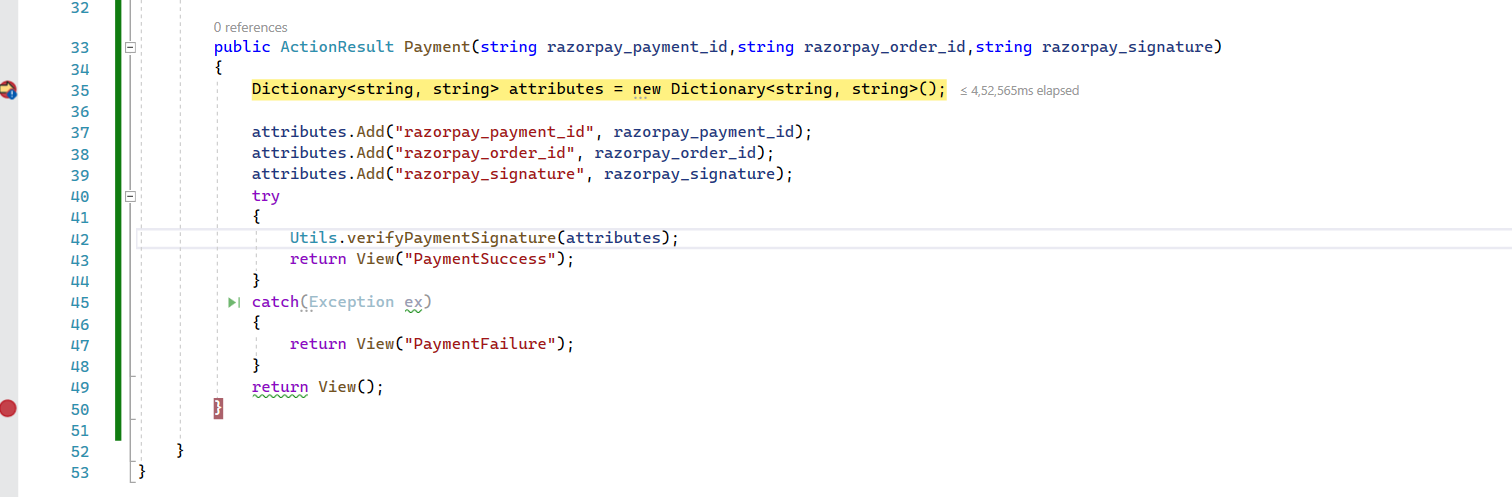
 Here you can save your payment details. Now you can check on your Razorpay dashboard for a new transaction. Click on the transactions tab and you will see all transactions here
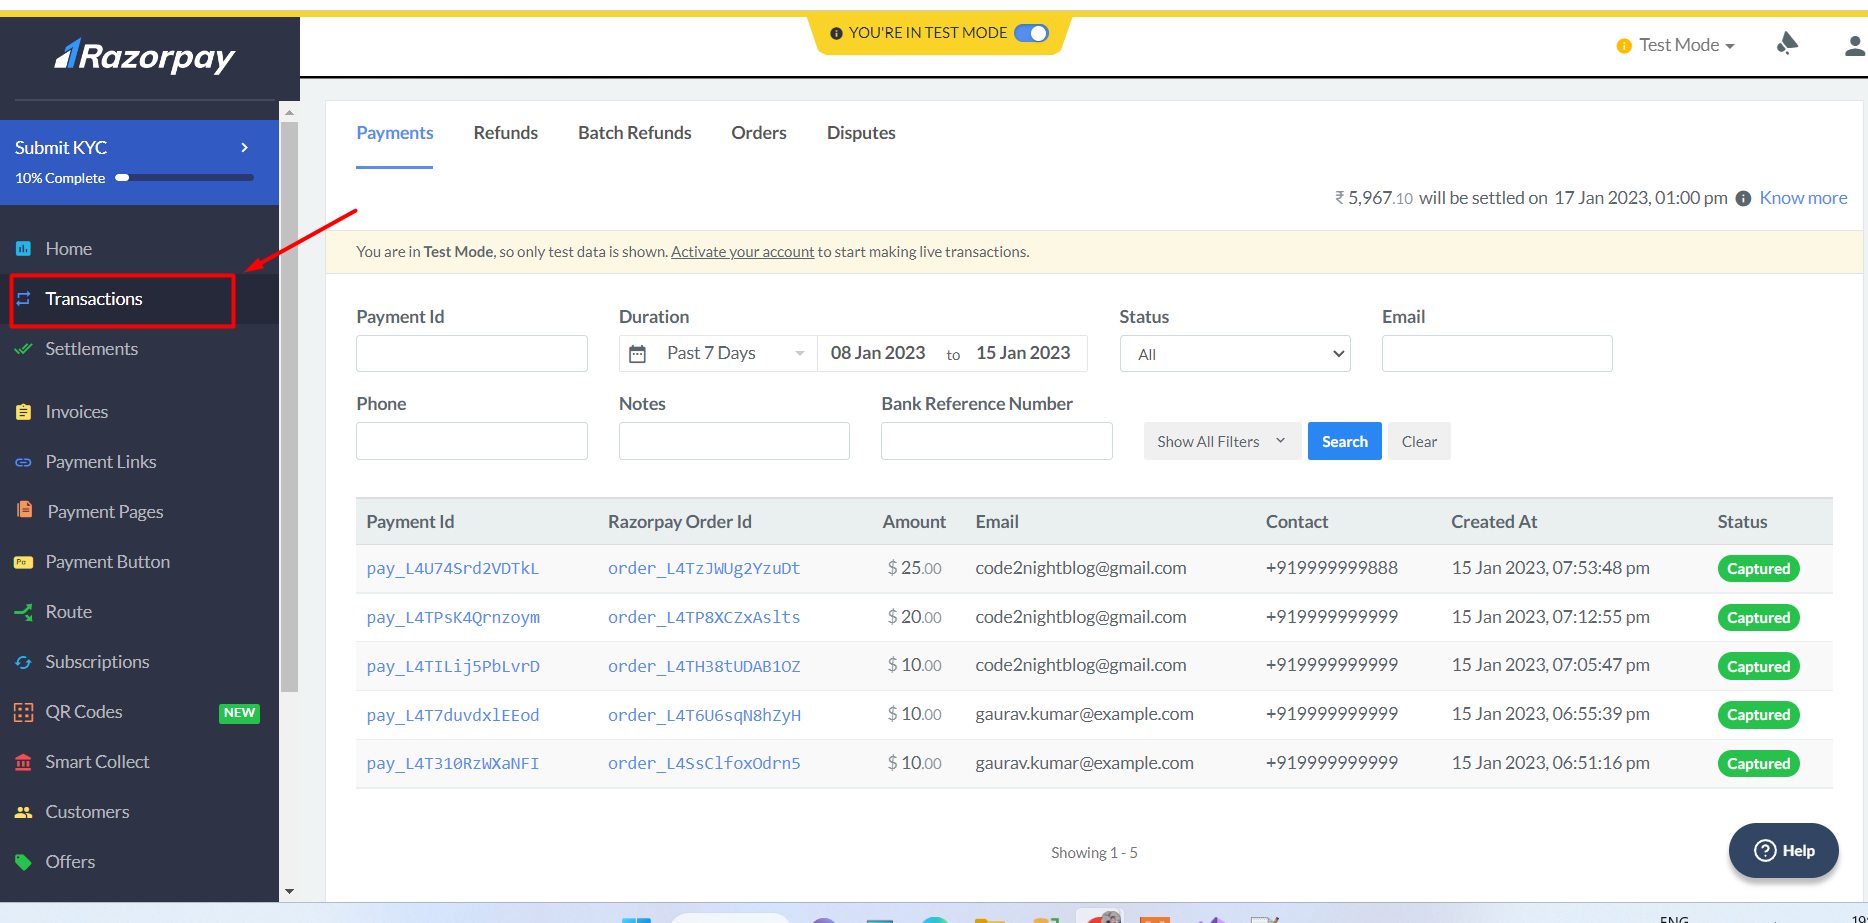
Here you can see the first transaction that we have just completed

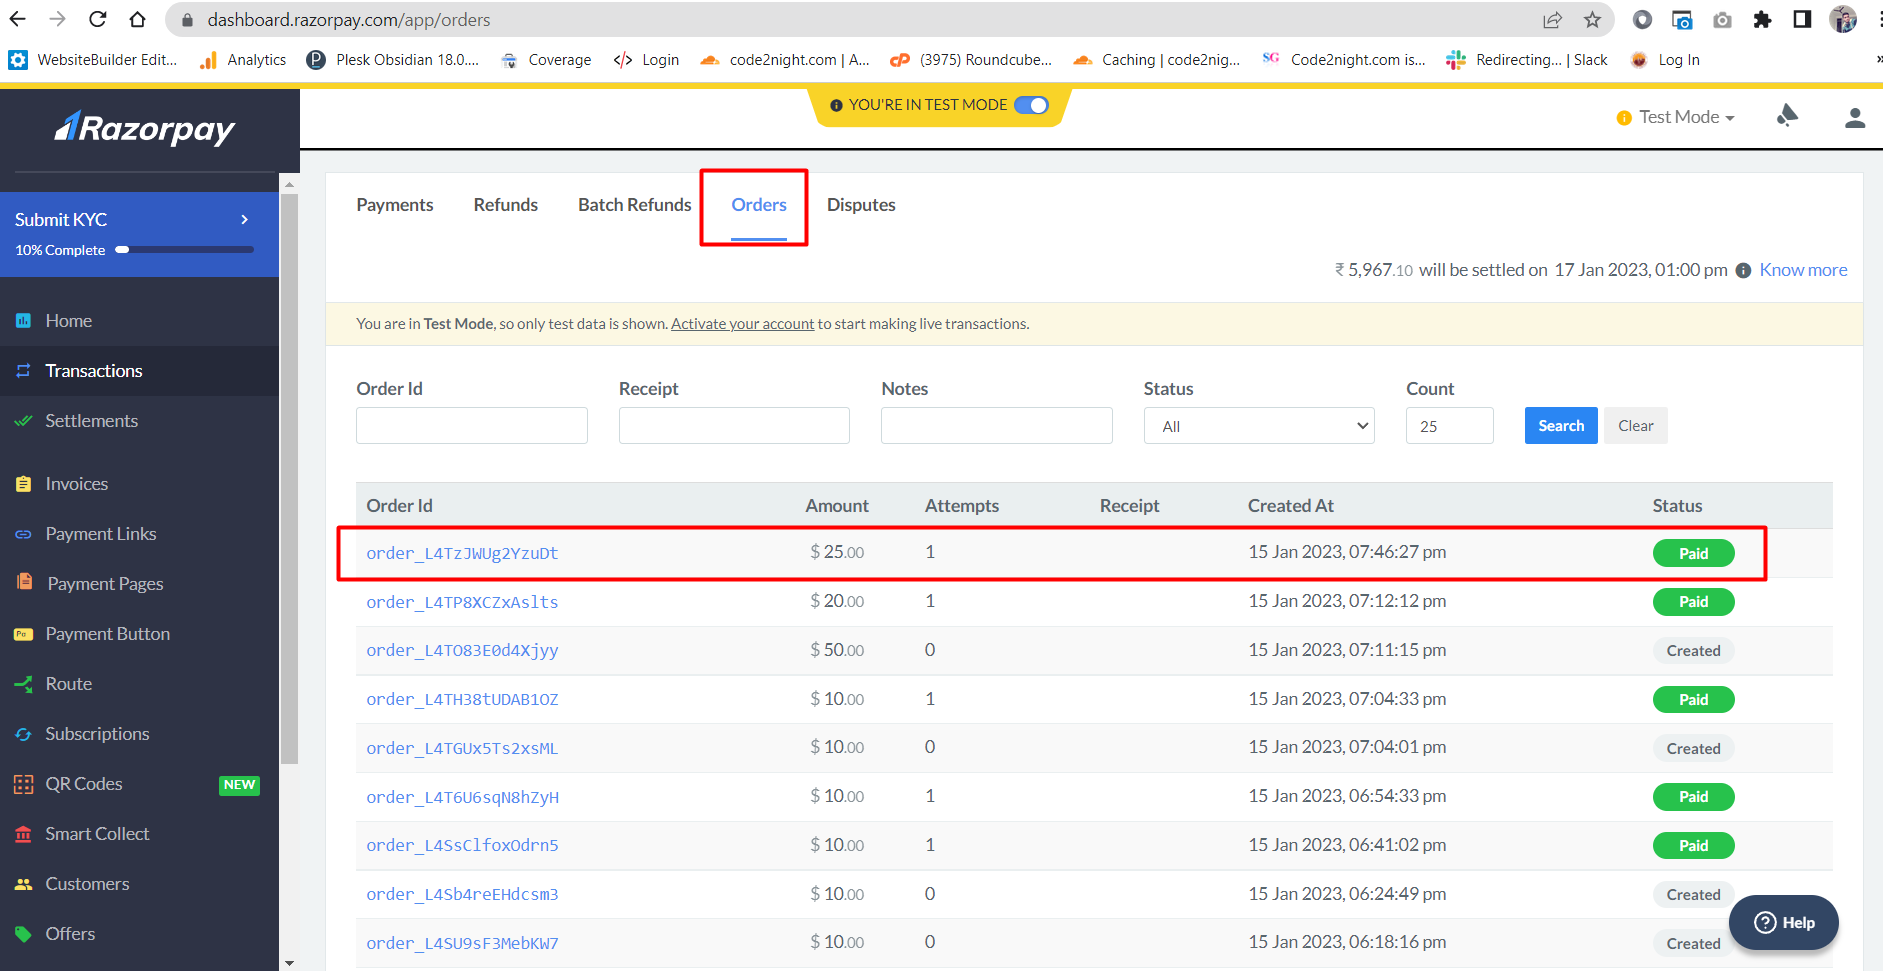
Now you can also click on the Orders tab to check the order status. Check out the first transaction here
So, this is how you can create and complete payment and this is how we can Implement RazorPay Payment Gateway in Asp.net MVC.
