How to Create XML Documents in ASP.NET
Creating XML Documents in ASP.NET
XML (Extensible Markup Language) is a widely used format for storing and transporting structured data. It provides a flexible way to create information formats and share both the format and the data on the World Wide Web, on intranets, and elsewhere. In ASP.NET, you can create, manipulate, and work with XML documents using the System.Xml namespace. This article will guide you through creating an XML document from scratch, adding nodes, child nodes, and attributes.
Prerequisites
Before diving into XML document creation in ASP.NET, ensure you have the following prerequisites:
- A basic understanding of C# and ASP.NET MVC framework.
- Visual Studio installed on your machine.
- Familiarity with XML structure and syntax.
Step 1: Import the System.Xml Namespace
Before you can work with XML in your ASP.NET application, you need to import the System.Xml namespace:
using System.Xml;Step 2: Create an XML Document
To create an XML document, you'll use the XmlDocument class. Here's how to create a basic XML document:
XmlDocument xmlDoc = new XmlDocument();Step 3: Create the Root Element
Every XML document must have a root element. You can create one using the CreateElement method:
XmlElement rootElement = xmlDoc.CreateElement("Root");
xmlDoc.AppendChild(rootElement);
Step 4: Add Child Elements
You can add child elements to the root element using the CreateElement method. This allows you to structure your XML document hierarchically:
XmlElement childElement1 = xmlDoc.CreateElement("Child1");
rootElement.AppendChild(childElement1);
XmlElement childElement2 = xmlDoc.CreateElement("Child2");
rootElement.AppendChild(childElement2);
Step 5: Add Text Content to Elements
You can set the text content of elements using the InnerText property. This is where you define the actual data that each element will hold:
childElement1.InnerText = "Hello, World!";
childElement2.InnerText = "ASP.NET XML Handling";
Step 6: Add Attributes
You can add attributes to elements using the CreateAttribute method. Attributes provide additional information about elements:
XmlAttribute attribute1 = xmlDoc.CreateAttribute("Attribute1");
attribute1.Value = "Value1";
childElement1.Attributes.Append(attribute1);
XmlAttribute attribute2 = xmlDoc.CreateAttribute("Attribute2");
attribute2.Value = "Value2";
childElement2.Attributes.Append(attribute2);
Step 7: Save the XML Document
To save the XML document to a file or a stream, you can use the Save method. This method allows you to define the location where the XML will be stored:
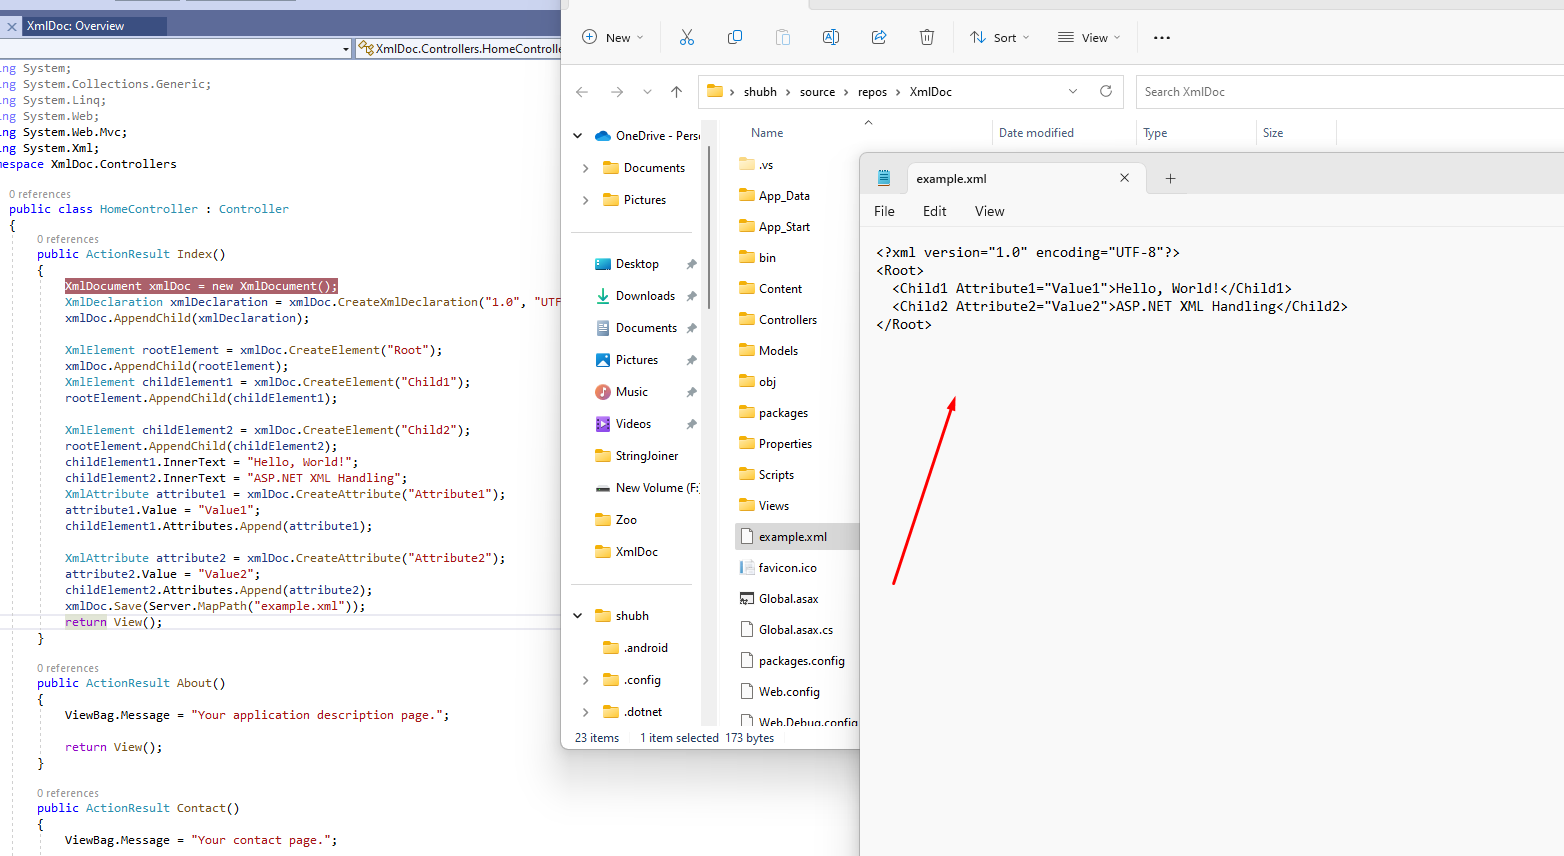
xmlDoc.Save(Server.MapPath("example.xml"));Step 8: Load and Parse XML (Optional)
If you have an existing XML document and want to parse it, you can use the XmlDocument.Load method. This is useful for reading and processing XML data:
XmlDocument loadedDoc = new XmlDocument();
loadedDoc.Load(Server.MapPath("example.xml"));
Step 9: Add Xml Declaration (Optional)
If you want to add an XML declaration, you can create one using the CreateXmlDeclaration method. This declaration specifies the XML version and encoding:
XmlDeclaration xmlDeclaration = xmlDoc.CreateXmlDeclaration("1.0", "UTF-8", null);
xmlDoc.InsertBefore(xmlDeclaration, xmlDoc.DocumentElement);
Complete Example
Here is the complete code for creating an XML document in an ASP.NET MVC action method:
public ActionResult Index() {
    XmlDocument xmlDoc = new XmlDocument();
    XmlDeclaration xmlDeclaration = xmlDoc.CreateXmlDeclaration("1.0", "UTF-8", null);
    xmlDoc.AppendChild(xmlDeclaration);
    XmlElement rootElement = xmlDoc.CreateElement("Root");
    xmlDoc.AppendChild(rootElement);
    XmlElement childElement1 = xmlDoc.CreateElement("Child1");
    rootElement.AppendChild(childElement1);
    XmlElement childElement2 = xmlDoc.CreateElement("Child2");
    rootElement.AppendChild(childElement2);
    childElement1.InnerText = "Hello, World!";
    childElement2.InnerText = "ASP.NET XML Handling";
    XmlAttribute attribute1 = xmlDoc.CreateAttribute("Attribute1");
    attribute1.Value = "Value1";
    childElement1.Attributes.Append(attribute1);
    XmlAttribute attribute2 = xmlDoc.CreateAttribute("Attribute2");
    attribute2.Value = "Value2";
    childElement2.Attributes.Append(attribute2);
    xmlDoc.Save(Server.MapPath("example.xml"));
    return View();
}
Edge Cases & Gotchas
When working with XML in ASP.NET, be aware of potential edge cases:
- Invalid XML Structure: Ensure that your XML is well-formed. An unclosed tag or incorrect nesting will lead to exceptions when loading or saving XML.
- Encoding Issues: Be mindful of the encoding specified in the XML declaration. Mismatched encoding can lead to data corruption.
- File Access Permissions: When saving XML files, ensure that your application has the necessary permissions to write to the specified directory.
Performance & Best Practices
To enhance performance and maintainability when working with XML in ASP.NET, consider the following best practices:
- Use XmlDocument Sparingly: For simple XML manipulations, consider using XDocument from LINQ to XML, which can be more efficient and easier to work with.
- Validation: Validate your XML against an XSD schema to ensure that the structure and data types are correct before processing.
- Use Asynchronous Operations: When loading or saving large XML files, consider using asynchronous methods to avoid blocking the main thread.
- Dispose Resources: Always dispose of any XML-related resources properly to prevent memory leaks.
Conclusion
In this article, we've explored how to create XML documents in ASP.NET, including creating elements, adding child elements, setting text content, and adding attributes. XML is a versatile format for representing structured data, and with the System.Xml namespace, you can easily create and manipulate XML documents in your ASP.NET applications.
- XML is a crucial data interchange format.
- ASP.NET provides robust tools for XML manipulation.
- Best practices enhance performance and maintainability.