Caching in ASP.NET Core using Redis Cache
Overview of Caching
Caching is a technique used to temporarily store data in a location that allows for faster access compared to fetching it from a primary data source, such as a database. In ASP.NET Core, caching can significantly improve the performance of your applications by reducing the time it takes to retrieve data, thus enhancing user experience. Redis, an open-source, in-memory data structure store, is one of the most popular caching solutions due to its speed and scalability.
Redis operates as a distributed cache, meaning that the cached data remains consistent across different server instances, making it particularly useful for cloud-based applications and microservices architectures. By caching data in Redis, you can reduce the load on your database and improve response times for users.
Prerequisites
Before diving into the implementation of Redis caching in your ASP.NET Core application, ensure that you have the following prerequisites:
- ASP.NET Core SDK: Make sure you have the latest version of the ASP.NET Core SDK installed on your machine.
- Redis Server: Install Redis on your local machine or have access to a Redis server. For local development, you can download Redis from the official website or use Docker.
- NuGet Package: Familiarity with managing NuGet packages in your ASP.NET Core project.
Distributed Caching
The IDistributedCache interface found in the Microsoft.Extensions.Caching.Distributed namespace is essential for working with distributed caches in ASP.NET Core. This interface provides a set of methods that allow you to manipulate data stored in the distributed cache:
- Get or GetAsync: Retrieve items from the cache using a specific key.
- Set or SetAsync: Store items in the cache, associating them with a specific key.
- Refresh or RefreshAsync: Update the expiration time of a cached item.
- Remove or RemoveAsync: Delete an item from the cache using its key.
Setting Up Redis Cache
To set up Redis Cache in your ASP.NET Core application, follow these steps:
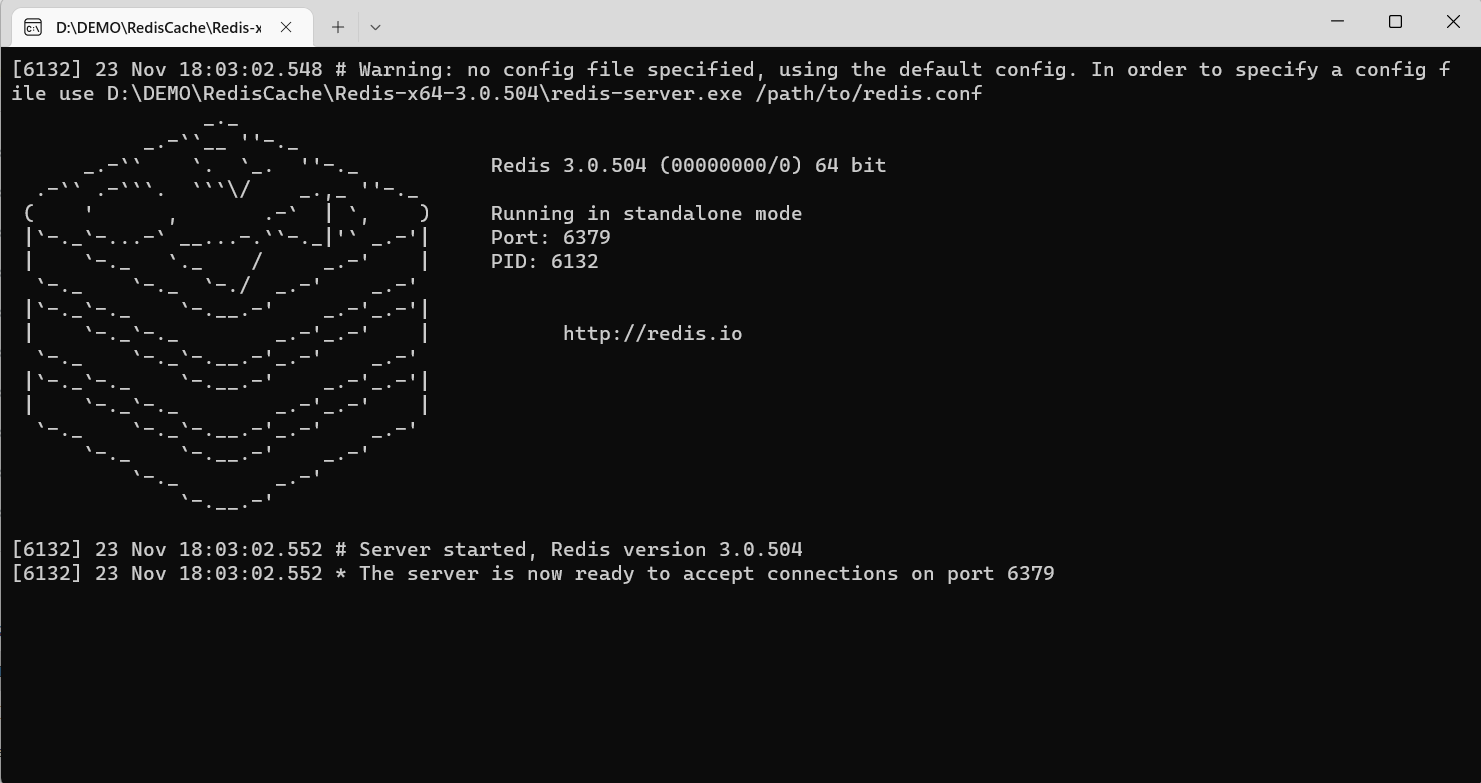
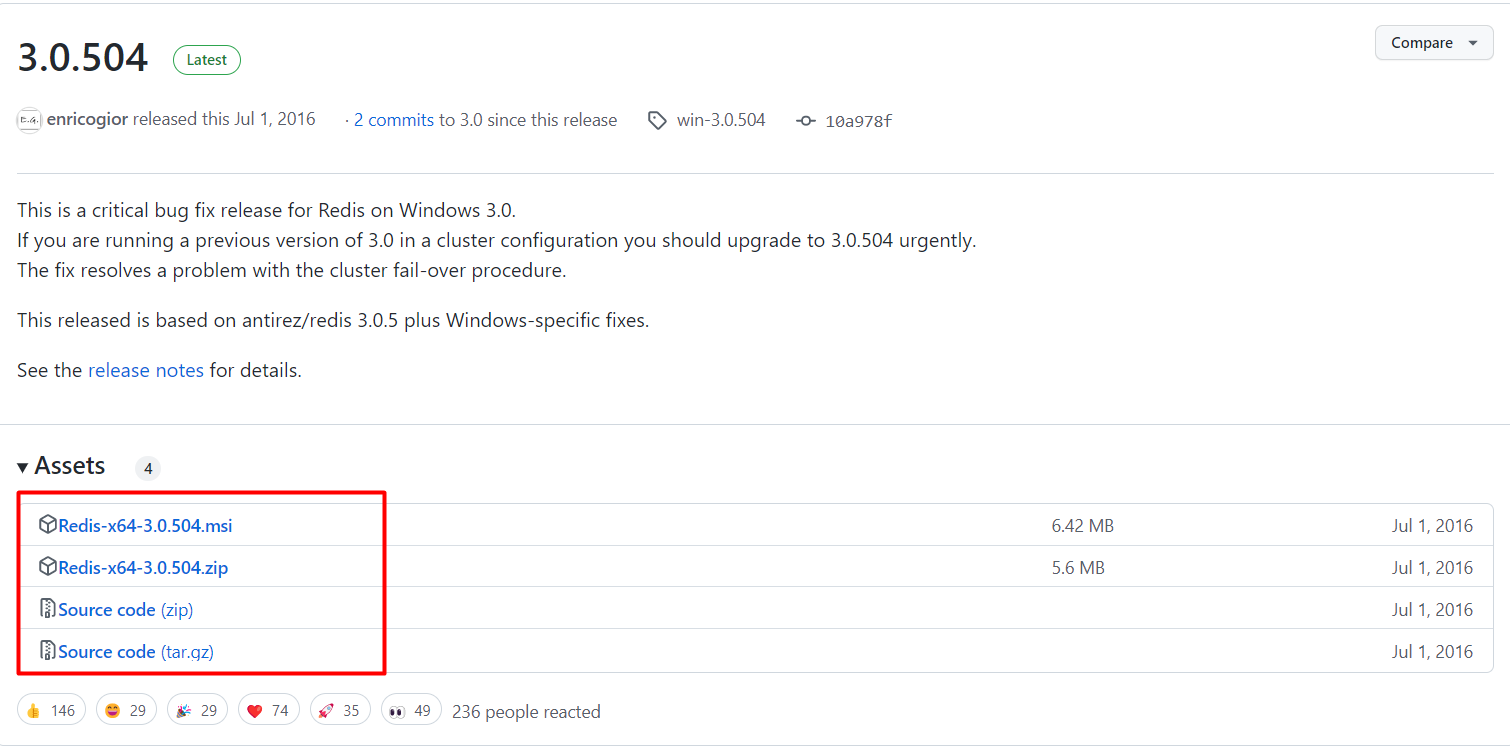
- Download the Redis server from the official repository or use the MSI installer.
- Extract the downloaded ZIP folder and run
redis-server.exe. Keep this window open as it runs the Redis server.
Next, you will need to install the necessary NuGet package to communicate with the Redis server. Use the following command in your Package Manager Console:
Install-Package Microsoft.Extensions.Caching.StackExchangeRedis -Version 7.0.0After installing the package, update your appsettings.json file to include the Redis connection string:
{ "ConnectionStrings": { "DefaultConnection": "Server=DESKTOP-K2Q2EAS; Database=DbEmployee; Trusted_Connection=True; MultipleActiveResultSets=true" }, "RedisCacheServerUrl": "127.0.0.1:6379", "Logging": { "LogLevel": { "Default": "Information", "Microsoft": "Warning", "Microsoft.Hosting.Lifetime": "Information" } }, "AllowedHosts": "*" }Creating the Data Model
To interact with your data, create a model class representing the data structure. For instance, let’s create a Product class:
namespace RedisCache.Models { public class Product { public int ProductID { get; set; } public string ProductCategory { get; set; } public string SubCategory { get; set; } public string ProductName { get; set; } public string ProductDescription { get; set; } public decimal ProductPrice { get; set; } public decimal ProductWeight { get; set; } public int Units { get; set; } public decimal Total { get; set; } } }Database Context Setup
Next, create the database context class that will allow Entity Framework Core to interact with your database:
using Microsoft.EntityFrameworkCore; namespace RedisCache.Models { public class DbEmployeeContext : DbContext { public DbEmployeeContext(DbContextOptions<DbEmployeeContext> options) : base(options) { } public DbSet<Product> Products { get; set; } } }Configuring Services in Startup
Now, you need to configure the services in your Startup.cs file. This includes setting up the database context and Redis cache:
public void ConfigureServices(IServiceCollection services) { services.AddControllers(); services.AddControllersWithViews(); services.AddDbContext<DbEmployeeContext>(options => options.UseSqlServer(Configuration.GetConnectionString("DefaultConnection"))); services.AddStackExchangeRedisCache(options => { options.Configuration = Configuration["RedisCacheServerUrl"]; }); }Implementing the Product Controller
Next, create a controller to manage your products. This controller will interact with both the database and the Redis cache:
using Microsoft.AspNetCore.Http; using Microsoft.AspNetCore.Mvc; using Microsoft.EntityFrameworkCore; using Microsoft.Extensions.Caching.Distributed; using Newtonsoft.Json; using RedisCache.Models; using System; using System.Collections.Generic; using System.Text; using System.Threading.Tasks; namespace RedisCache.Controllers { [Route("api/[controller]")] [ApiController] public class ProductController : ControllerBase { private readonly DbEmployeeContext _context; private readonly IDistributedCache _cache; public ProductController(DbEmployeeContext context, IDistributedCache cache) { _context = context; _cache = cache; } [HttpGet] public async Task<IActionResult> GetAll() { var products = await _context.Products.ToListAsync(); return Ok(products); } }Utilizing Redis Cache in Your Controller
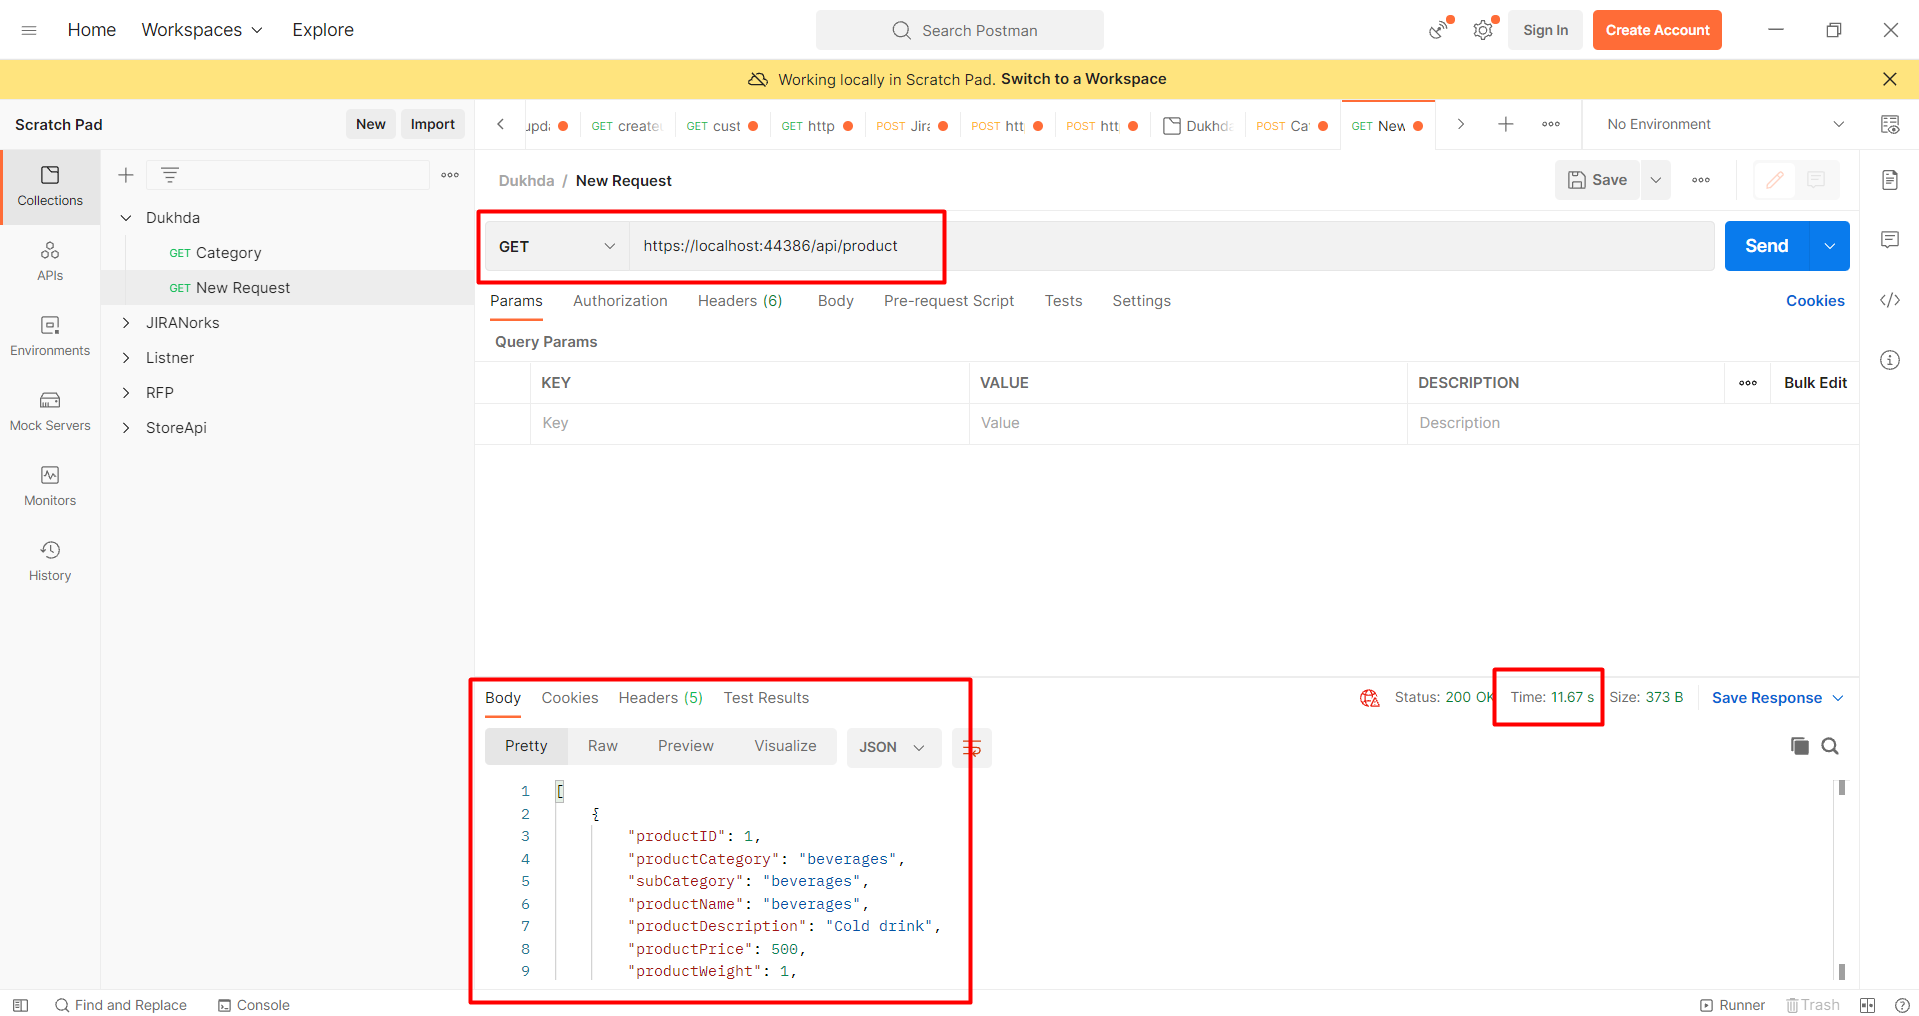
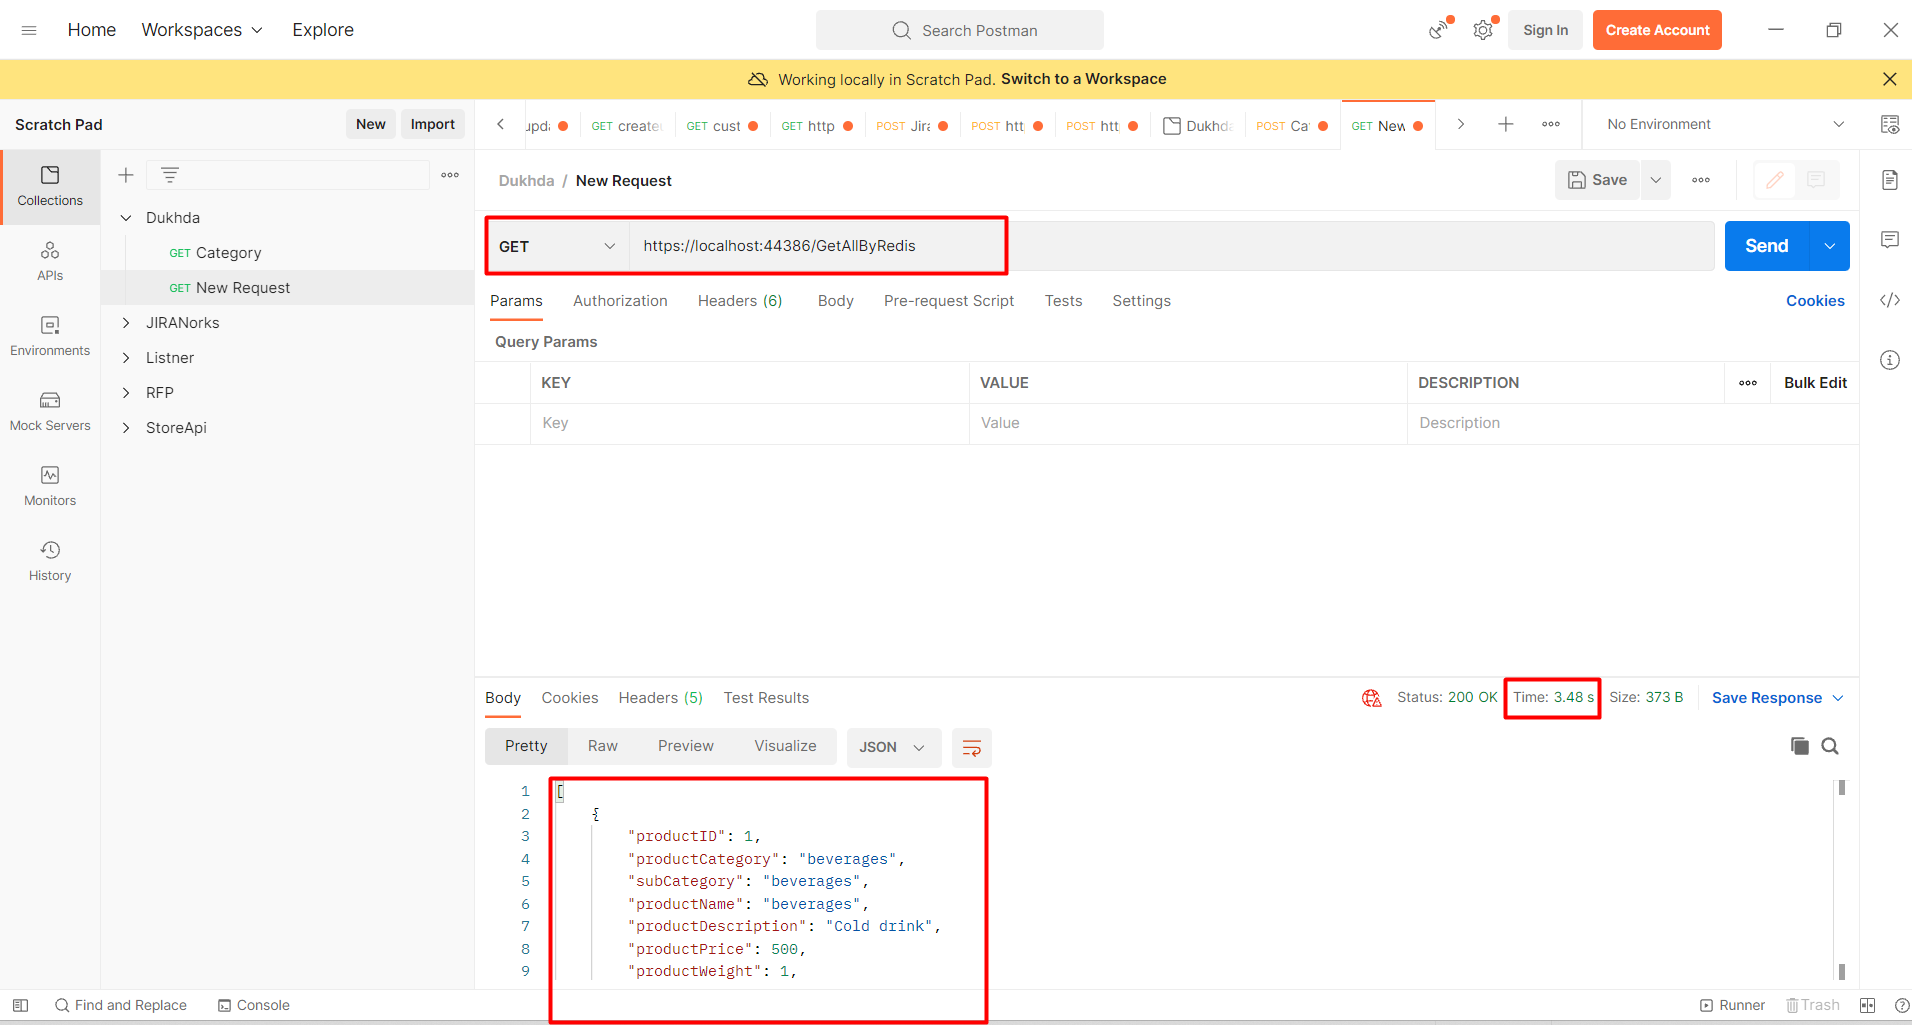
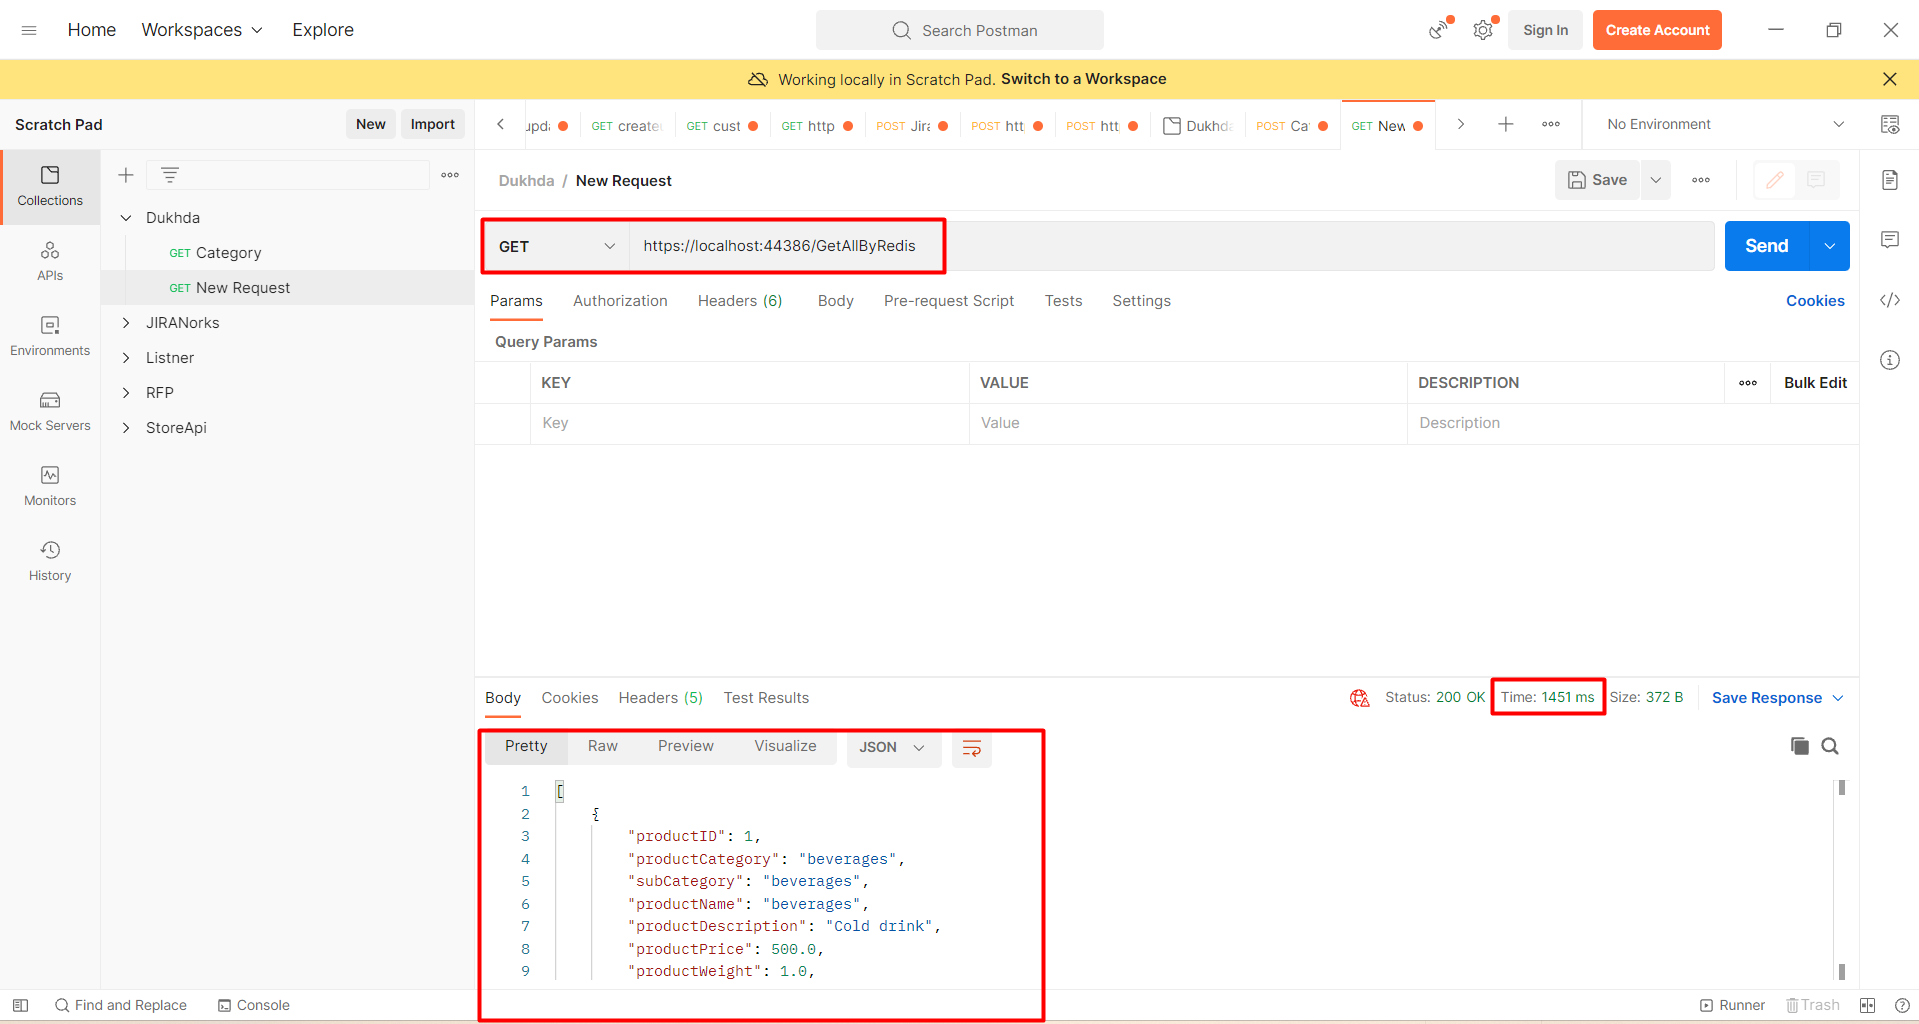
Within your controller, you can leverage Redis caching to store and retrieve product data. Here’s how you can enhance the GetAll method to utilize the cache:
[HttpGet] public async Task<IActionResult> GetAll() { string cacheKey = "productList"; string serializedProducts; var products = new List<Product>(); var redisProducts = await _cache.GetStringAsync(cacheKey); if (!string.IsNullOrEmpty(redisProducts)) { serializedProducts = redisProducts; products = JsonConvert.DeserializeObject<List<Product>>(serializedProducts); } else { products = await _context.Products.ToListAsync(); serializedProducts = JsonConvert.SerializeObject(products); await _cache.SetStringAsync(cacheKey, serializedProducts, new DistributedCacheEntryOptions { AbsoluteExpiration = DateTime.Now.AddMinutes(10) }); } return Ok(products); }Edge Cases & Gotchas
When implementing Redis caching, be aware of potential edge cases and gotchas:
- Cache Expiration: Ensure you set appropriate expiration times for cached items to avoid stale data. Consider using sliding expiration to refresh the cache based on recent access.
- Cache Invalidation: Implement strategies for cache invalidation when the underlying data changes. For example, after an update to the database, ensure you remove or refresh the corresponding cached data.
- Serialization Issues: Be cautious with serialization formats. Ensure that the data being cached is serializable and that you handle potential exceptions during serialization and deserialization.
Performance & Best Practices
To maximize the benefits of using Redis caching in your ASP.NET Core application, consider the following best practices:
- Use Appropriate Cache Keys: Design cache keys that are unique and descriptive to avoid collisions and make debugging easier.
- Monitor Cache Performance: Use Redis monitoring tools to analyze cache usage and performance metrics. This helps identify bottlenecks and optimize cache usage.
- Batch Data Retrieval: When possible, retrieve data in batches rather than making individual requests to reduce the number of cache lookups.
Conclusion
In this blog post, we explored how to implement caching in ASP.NET Core using Redis Cache. We covered the basics of distributed caching, setting up Redis, creating data models, and utilizing Redis in your controllers. By following best practices and being mindful of potential pitfalls, you can significantly enhance the performance of your applications.
Key Takeaways:
- Caching improves application performance by reducing database load.
- Redis is a powerful distributed caching solution that integrates seamlessly with ASP.NET Core.
- Proper cache management, including expiration and invalidation, is crucial for maintaining data consistency.
- Implementing best practices can optimize the performance of your caching strategy.