ASP.NET CORE CRUD Operations With Entity Framework Core In .NET CORE 8.0
1. Creating a new ASP.NET Core Web Application
2. Install EF Core in the Application
3. Adding Connection String to the Database
4. Adding Model class for Teacher
5. Adding EF Core DbContext File
6. Creating a Database using EF Core Migration
7. Adding Controller code
8. Adding Client-Side Validation feature
9. Performing the CREATE Teacher Functionality
10. Performing the READ Teacher Functionality
11. Performing the UPDATE Teacher Functionality
12. Performing the DELETE Teacher Functionality
Install EF Core DB Providers
Go to Tools > NuGet Package Manager > Manage NuGet Packages for Solution and search for Microsoft.EntityFrameworkCore.SqlServer. When it shows up, select it and install it to your app

Install EF Core Tools
Next, search for Microsoft.EntityFrameworkCore.Tools. Once you get the result, install it.
Adding Connection String to the Database
A Connection String stores the parameters to the database and is used to connect the application to it. These parameters are the name of the driver, Server name and Database name. It also contains security information such as user name and password needed for the database connection.
The connection string is stored inside the appsettings.json file which resides in the root of the application. So add the following Connection string to this file.
  "ConnectionStrings": {
    "DefaultConnection": "Server=.;Database=DbEmployee;Trusted_Connection=True;TrustServerCertificate=True;MultipleActiveResultSets=true"
  },
Adding Model class for Teacher
Right-click this ‘Models’ folder and select Add > New Item.
In the window that opens, select a new Class and name it Teacher. cs. Add the following properties to this class:
Teacher. cs
using System.ComponentModel.DataAnnotations;

namespace CrudOperation8.Models
{
    public class Teacher
    {
        [Required]
        public int Id { get; set; }

        [Required]
        public string Name { get; set; }

        [Required]
        public string Skills { get; set; }

        [Range(5, 50)]
        public int TotalStudents { get; set; }

        [Required]
        public decimal Salary { get; set; }

        [Required]
        public DateTime AddedOn { get; set; }
    }
}
Adding EF Core DbContext File
We now have to add Entity Framework Core Database Context file for defining your database and tables. So, create a new class called SchoolContext.cs (on the root of the app) and add the following code to it.
using CrudOperation8.Models;using Microsoft.EntityFrameworkCore;using System.Collections.Generic;using System.Reflection.Emit;namespace CrudOperation8.DBContext{public class SchoolContext : DbContext{public SchoolContext(DbContextOptions<SchoolContext> options) : base(options) { }public DbSet<Teacher> Teacher { get; set; }protected override void OnConfiguring(DbContextOptionsBuilder optionsBuilder){if (!optionsBuilder.IsConfigured){}}protected override void OnModelCreating(ModelBuilder modelBuilder){modelBuilder.Entity<Teacher>(entity =>{entity.Property(e => e.Name).IsRequired().HasMaxLength(50).IsUnicode(false);entity.Property(e => e.Skills).IsRequired().HasMaxLength(250).IsUnicode(false);entity.Property(e => e.Salary).IsRequired().HasColumnType("money");entity.Property(e => e.AddedOn).HasColumnType("date").HasDefaultValueSql("(getdate())");});}}}
Now, I have to add the SchoolContext class as a service and also specify how it will get the connection string which is stored in the ‘appsettings.json’ file. I do this inside the Program.cs class, so update its code to include the following code line after builder.Services.AddControllersWithViews()
.
using CrudOperation8.DBContext;using Microsoft.EntityFrameworkCore;var builder = WebApplication.CreateBuilder(args);// Add services to the container.builder.Services.AddControllersWithViews();builder.Services.AddDbContext<SchoolContext>(options =>options.UseSqlServer(builder.Configuration.GetConnectionString("DefaultConnection")));var app = builder.Build();// Configure the HTTP request pipeline.if (!app.Environment.IsDevelopment()){app.UseExceptionHandler("/Home/Error");// The default HSTS value is 30 days. You may want to change this for production scenarios, see https://aka.ms/aspnetcore-hsts.app.UseHsts();}app.UseHttpsRedirection();app.UseStaticFiles();app.UseRouting();app.UseAuthorization();app.MapControllerRoute(name: "default",pattern: "{controller=Home}/{action=Index}/{id?}");app.Run();
Creating a Database using EF Core Migration
Now run the Migrations in Entity Framework Core so that the ‘School’ database and ‘Teacher’ table are created. So open the Package Manager Console window in Visual Studio then run this below command,
PM> add-migration Migration1
PM> Update-Database
Adding Controller code
To the HomeController.cs file we will write the the Entity Framework Core code to perform CRUD operations for the teachers. We will need the ‘StudentContext’ service injected to it using the Dependency Injection feature. So update this controller as shown below:
HomeController.cs
public class HomeController : Controller
	{
		private SchoolContext schoolContext;
		public HomeController(SchoolContext sc)
		{
			schoolContext = sc;
		}

		public IActionResult Index()
		{
			return View();
		}
	}
Adding Client Side Validation feature
The Client Side validation feature is performed by ‘jQuery’ and 2 validation plugins,
- jQuery Validation
- jQuery Validation Unobtrusive
All these come pre-installed in the app. It is still good to know their installation commands which are given below.
PM> Install-Package jQuery

PM> Install-Package jQuery.Validation

PM> Install-Package jQuery.Validation.Unobtrusive
Performing the CREATE Teacher Functionality
The CREATE Teacher Functionality is done through a new Action method called ‘CREATE’. Add this action method to the ‘Home Controller’. It is shown in the below code,
public IActionResult Create()
{
	return View();
}

[HttpPost]
public IActionResult Create(Teacher teacher)
{
	if (ModelState.IsValid)
	{
		schoolContext.Teacher.Add(teacher);
		schoolContext.SaveChanges();
		return RedirectToAction("Index");
	}
	else
		return View();
}
@model Teacher@{Layout = "_Layout";var title = "CREATE Teacher";ViewData["Title"] = title;}<style>.input-validation-error {border-color: red;}</style><h2>@title</h2><div asp-validation-summary="ModelOnly" class="text-danger"></div><form class="m-1 p-1" method="post"><div class="form-group"><label asp-for="Name"></label><input asp-for="Name" class="form-control" /><span asp-validation-for="Name" class="text-danger"></span></div><div class="form-group"><label asp-for="Skills"></label><input asp-for="Skills" type="text" class="form-control" /><span asp-validation-for="Skills" class="text-danger"></span></div><div class="form-group"><label asp-for="TotalStudents"></label><input asp-for="TotalStudents" type="text" class="form-control" /><span asp-validation-for="TotalStudents" class="text-danger"></span></div><div class="form-group"><label asp-for="Salary"></label><input asp-for="Salary" type="text" class="form-control" /><span asp-validation-for="Salary" class="text-danger"></span></div><button type="submit" class="btn btn-primary">Submit</button></form>@section scripts {<script src="~/lib/jquery/dist/jquery.min.js"></script><script src="~/lib/jquery-validation/dist/jquery.validate.min.js"></script><script src="~/lib/jquery-validation-unobtrusive/jquery.validate.unobtrusive.min.js"></script>}
The View has a Model of type ‘Teacher’ and it creates Input fields for ‘Name, Skills, TotalStudents and Salary’, so that user can fill and submit it.
When the Submit button is clicked then the Create Action of type HttpPost, is called and the new teacher records is created.
Notice the 3 script files which do the Client Side Validation of the input fields in the View, We need to add them to the scripts section given on the _Layout.cshtml page. That is why we have used @section scripts {} and then added the 3 scripts to them.
	<script src="~/lib/jquery-validation/dist/jquery.validate.min.js"></script>
	<script src="~/lib/jquery-validation-unobtrusive/jquery.validate.unobtrusive.min.js"></script>
The code – schoolContext.Teacher will get all the teachers entity from Entity Framework Core.
Next, to the Index.cshtml view given inside the ‘Views/Home/’ folder, add the following code,
 @model IEnumerable<Teacher>

@{
    Layout = "_Layout";
    var title = "READ Teacher";
    ViewData["Title"] = title;
}

<h2>@title</h2>

<h3><a asp-action="Create" class="btn btn-sm btn-secondary">Create</a></h3>
<table class="table table-bordered table-sm table-striped">
    <thead>
        <tr><th>Id</th><th>Name</th><th>Skills</th><th>Total Students</th><th>Salary</th><th>Added On</th><th>Update</th><th>Delete</th></tr>
    </thead>
    <tbody>
        @if (Model == null)
        {
            <tr><td colspan="7" class="text-center">No Model Data</td></tr>
        }
        else
        {
            @foreach (var p in Model)
            {
                <tr>
                    <td>@p.Id</td>
                    <td>@p.Name</td>
                    <td>@p.Skills</td>
                    <td>@p.TotalStudents</td>
                    <td>@string.Format(new System.Globalization.CultureInfo("en-US"), "{0:C2}", p.Salary)</td>
                    <td>@string.Format("{0:dddd, dd MMMM yyyy}", p.AddedOn)</td>
                    <td><a asp-action="Update" asp-route-id="@p.Id">Update</a></td>
                    <td>
                        <form asp-action="Delete" method="post" asp-route-id="@p.Id">
                            <button>Delete</button>
                        </form>
                    </td>
                </tr>
            }
        }
    </tbody>
</table>
Performing the UPDATE Teacher functionality
Add the 2 Update Actions to the Home Controller as shown below:
 public IActionResult Update(int id)
{
    return View(schoolContext.Teacher.Where(a => a.Id == id).FirstOrDefault());
}

[HttpPost]
[ActionName("Update")]
public IActionResult Update_Post(Teacher teacher)
{
    schoolContext.Teacher.Update(teacher);
    schoolContext.SaveChanges();
    return RedirectToAction("Index");
}
Next, create the Update View inside the Views/Home/ folder with the following code,
 @model Teacher

@{
	Layout = "_Layout";
	var title = "UPDATE Teacher";
	ViewData["Title"] = title;
}

<style>
	.input-validation-error {
		border-color: red;
	}
</style>

<h2>@title</h2>

<div asp-validation-summary="ModelOnly" class="text-danger"></div>
<form class="m-1 p-1" method="post">
	<div class="form-group">
		<label asp-for="Id"></label>
		<input asp-for="Id" type="text" readonly class="form-control" />
	</div>
	<div class="form-group">
		<label asp-for="Name"></label>
		<input asp-for="Name" type="text" class="form-control" />
		<span asp-validation-for="Name" class="text-danger"></span>
	</div>
	<div class="form-group">
		<label asp-for="Skills"></label>
		<input asp-for="Skills" type="text" class="form-control" />
		<span asp-validation-for="Skills" class="text-danger"></span>
	</div>
	<div class="form-group">
		<label asp-for="TotalStudents"></label>
		<input asp-for="TotalStudents" type="text" class="form-control" />
		<span asp-validation-for="TotalStudents" class="text-danger"></span>
	</div>
	<div class="form-group">
		<label asp-for="Salary"></label>
		<input asp-for="Salary" type="text" class="form-control" />
		<span asp-validation-for="Salary" class="text-danger"></span>
	</div>
	<div class="form-group">
		<label asp-for="AddedOn"></label>
		<input asp-for="AddedOn" type="text" class="form-control" asp-format="{0:d}" />
	</div>
	<button type="submit" class="btn btn-primary">Submit</button>
</form>

@section scripts {
	<script src="~/lib/jquery/dist/jquery.min.js"></script>
	<script src="~/lib/jquery-validation/dist/jquery.validate.min.js"></script>
	<script src="~/lib/jquery-validation-unobtrusive/jquery.validate.unobtrusive.min.js"></script>
}
Performing the DELETE Teacher Functionality
Create Delete Action method in the Home Controller whose code is given below:
 [HttpPost]
public IActionResult Delete(int id)
{
	var teacher = schoolContext.Teacher.Where(a => a.Id == id).FirstOrDefault();
	schoolContext.Teacher.Remove(teacher);
	schoolContext.SaveChanges();
	return RedirectToAction("Index");
}
Complete code of home controller.
using CrudOperation8.DBContext;
using CrudOperation8.Models;
using Microsoft.AspNetCore.Mvc;
using System.Diagnostics;

namespace CrudOperation8.Controllers
{

    public class HomeController : Controller
    {
        private SchoolContext schoolContext;
        public HomeController(SchoolContext sc)
        {
            schoolContext = sc;
        }

        public IActionResult Index()
        {
            return View(schoolContext.Teacher);
        }

        public IActionResult Create()
        {
            return View();
        }

        [HttpPost]
        public IActionResult Create(Teacher teacher)
        {
            if (ModelState.IsValid)
            {
                schoolContext.Teacher.Add(teacher);
                schoolContext.SaveChanges();
                return RedirectToAction("Index");
            }
            else
                return View();
        }

        public IActionResult Update(int id)
        {
            return View(schoolContext.Teacher.Where(a => a.Id == id).FirstOrDefault());
        }

        [HttpPost]
        [ActionName("Update")]
        public IActionResult Update_Post(Teacher teacher)
        {
            schoolContext.Teacher.Update(teacher);
            schoolContext.SaveChanges();
            return RedirectToAction("Index");
        }

        [HttpPost]
        public IActionResult Delete(int id)
        {
            var teacher = schoolContext.Teacher.Where(a => a.Id == id).FirstOrDefault();
            schoolContext.Teacher.Remove(teacher);
            schoolContext.SaveChanges();
            return RedirectToAction("Index");
        }
    }
}
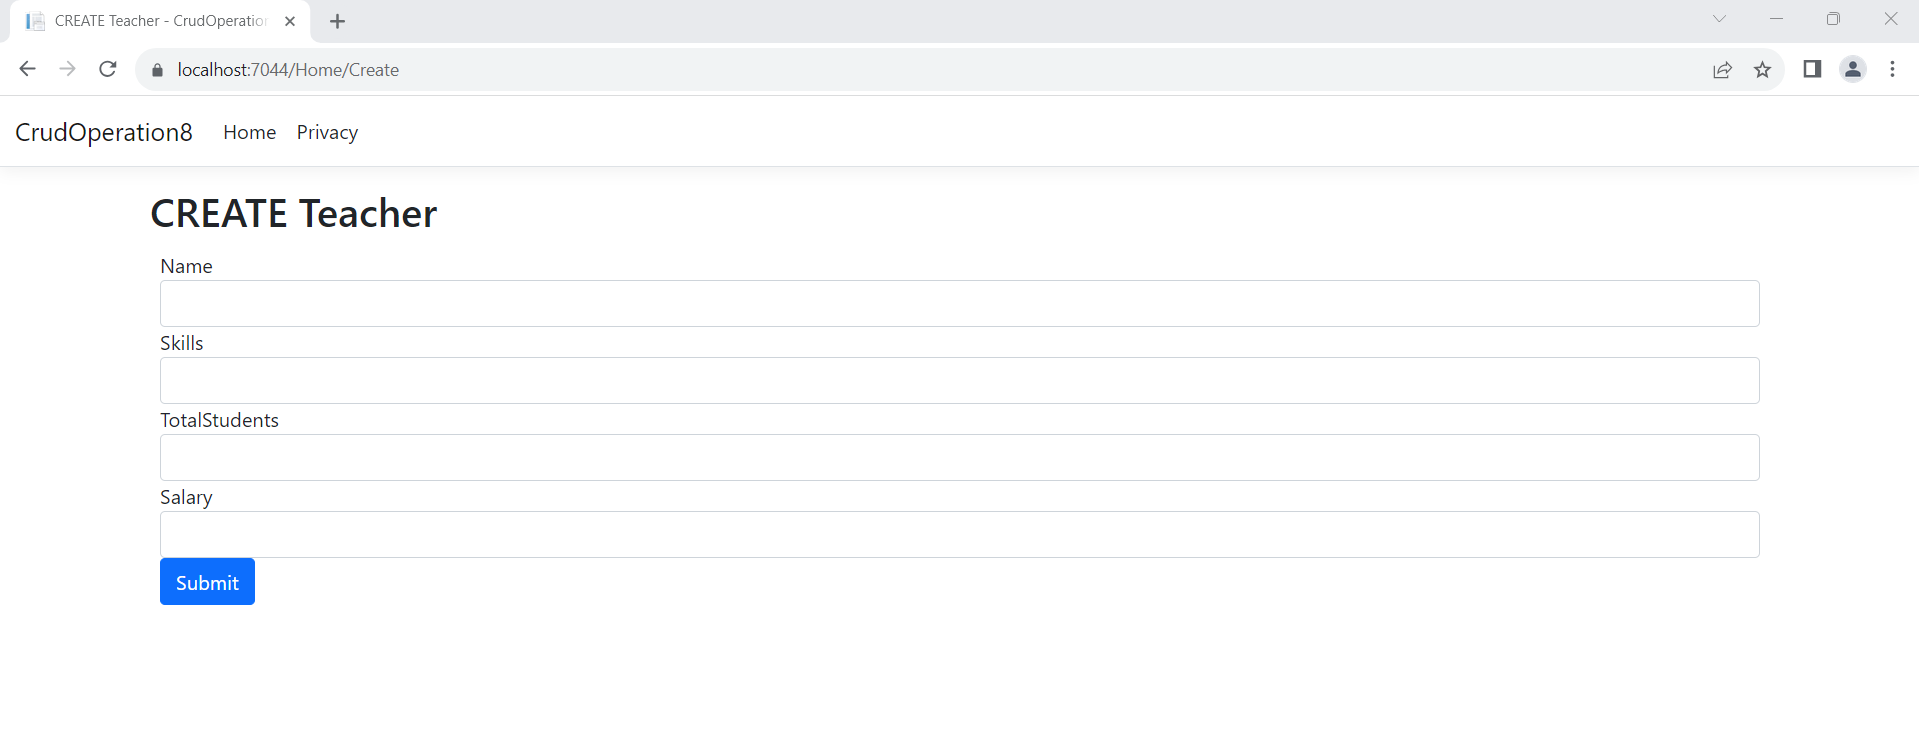
Testing the Create Teacher functionality
Run the application and in the browser go to the URL of ‘Create’ View, which is – http://localhost:52730/Home/Create. You will see the Create Teacher form in the browser.
Now fill all the fields (as shown by the below image) and click the submit button.
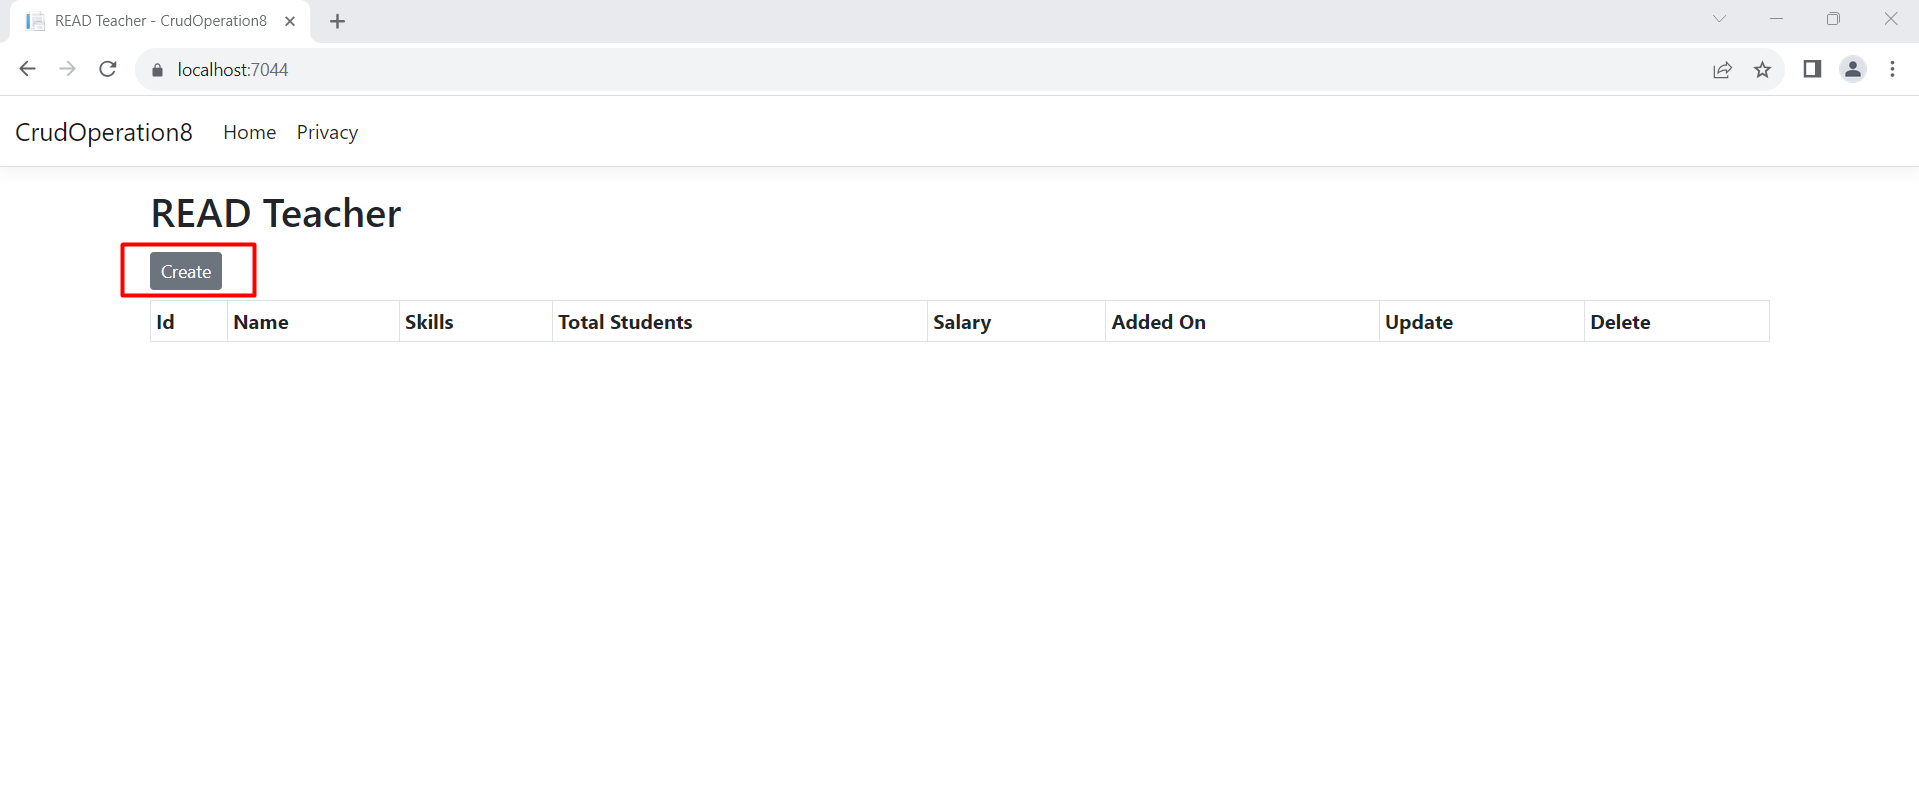
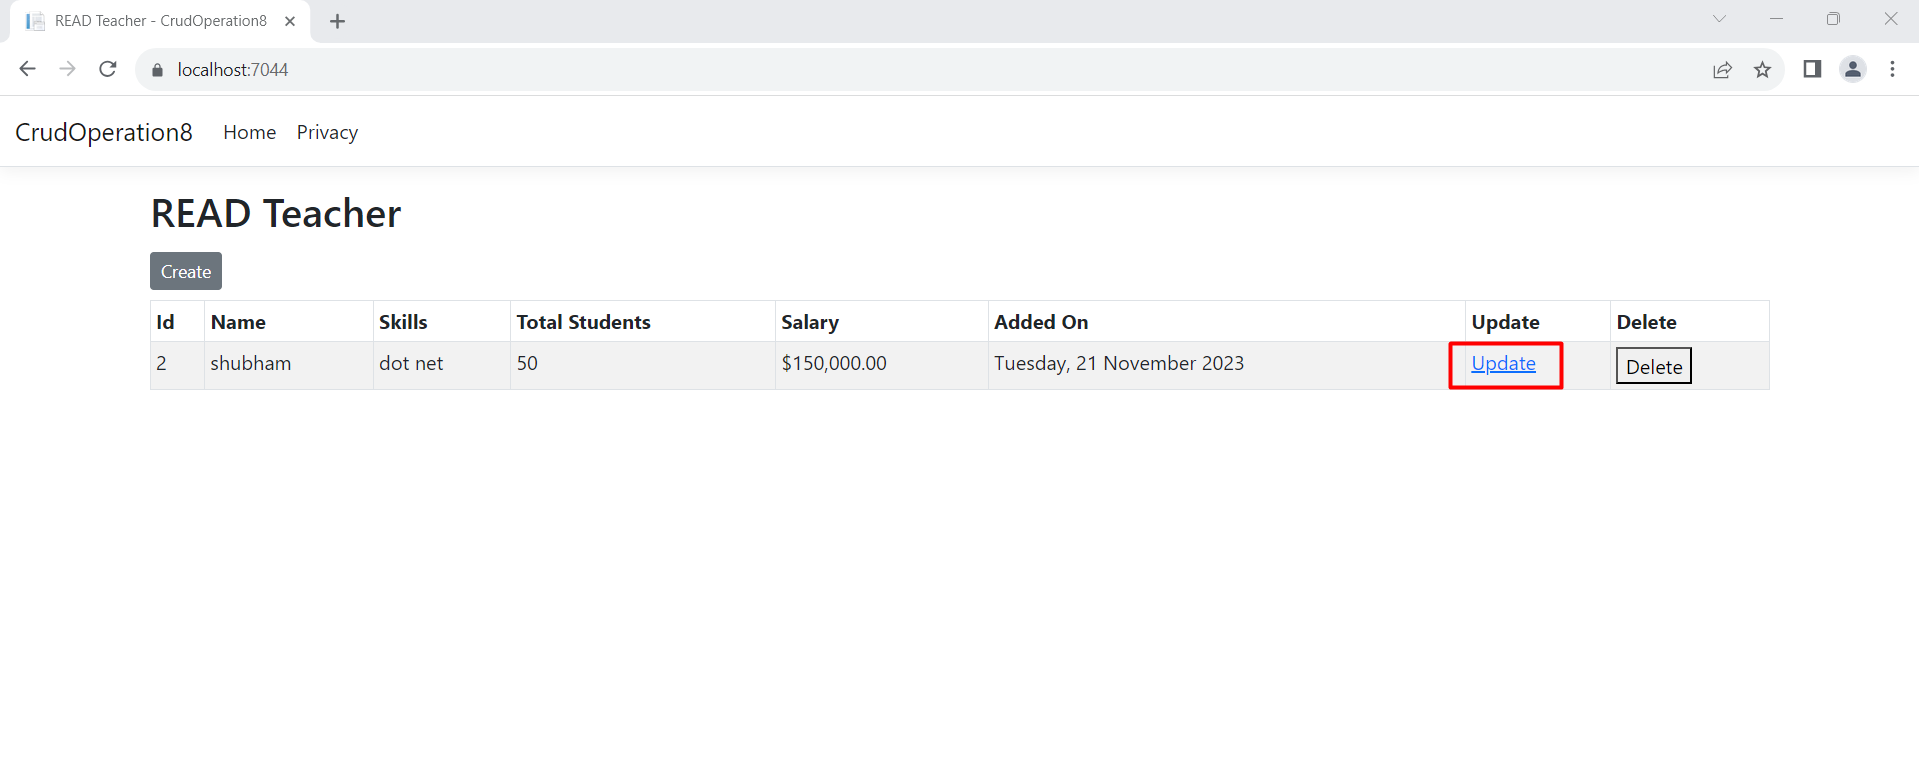
Testing the Read Teacher functionality
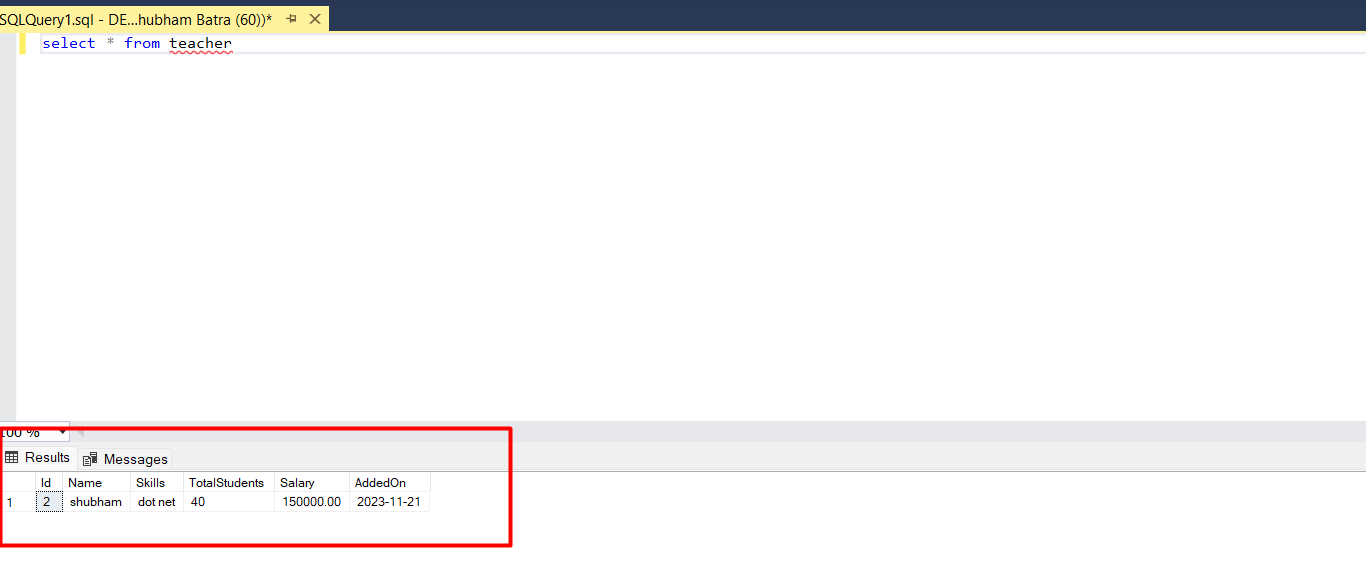
Run your application and you will see the Teacher’s table records get displayed in the Index View. This is shown by the below image,
Performing the UPDATE Teacher functionality
The record will be updated and you will be redirected to the Index View where you can see the updated record fields as shown by the below image,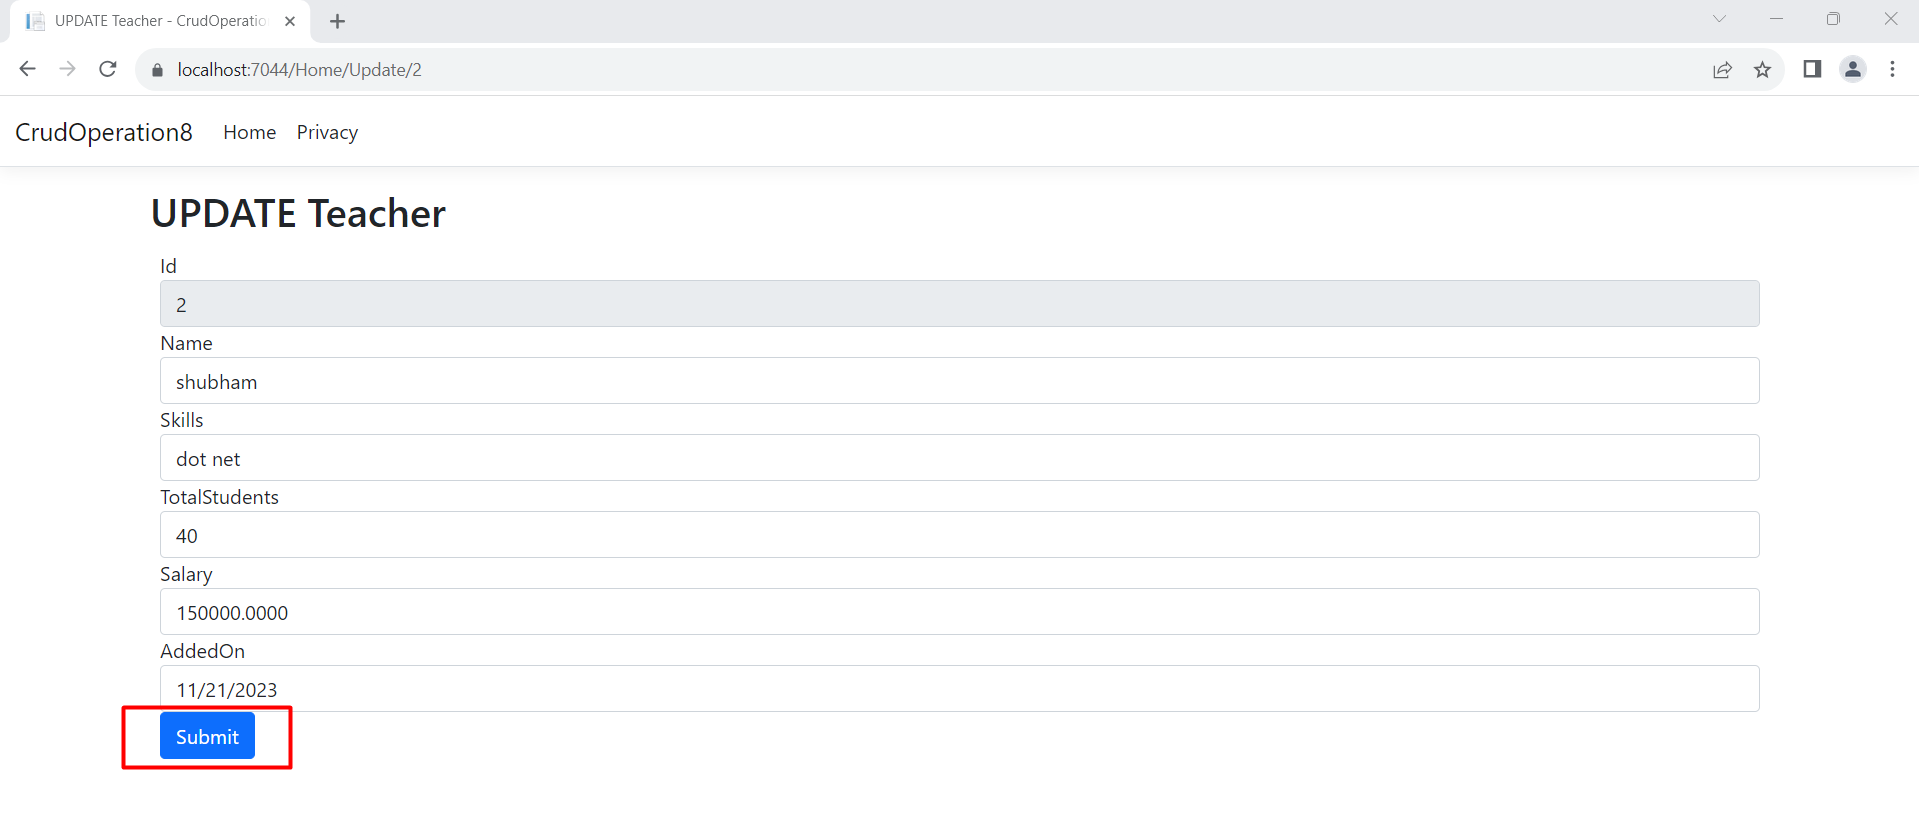
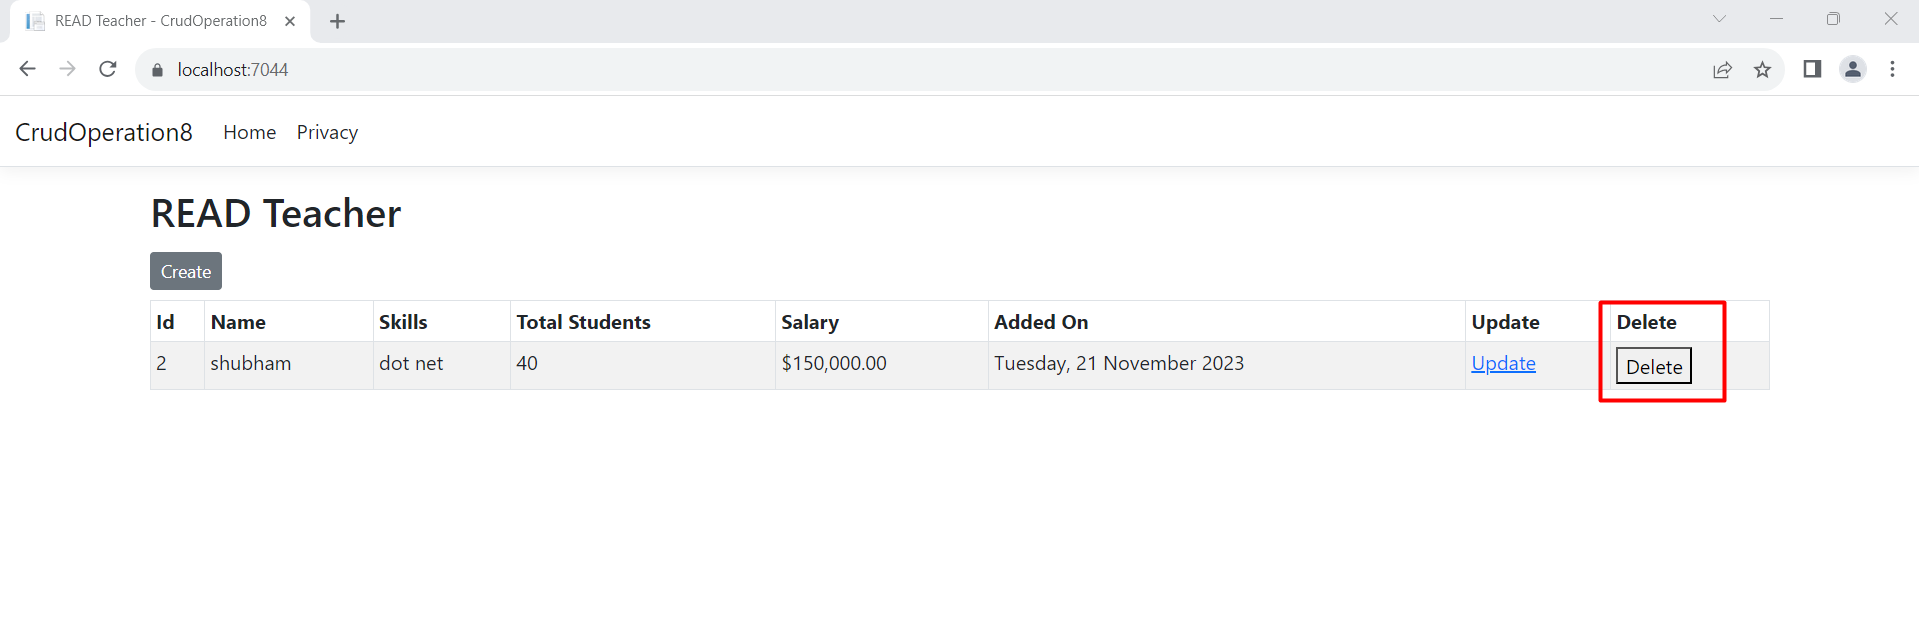
Testing the Delete Teacher functionality
Run your application and click the Delete button given against each record. Check the below images which shows the record deletion process,